In the world of distributed data storage on NAS devices such as Synology, QNAP, ASUSTOR, Western Digital, Thecus, TerraMaster, Buffalo and others, information recovery has become an integral part of security. This article brings together methods for recovering data from RAID NAS devices, including drive failure scenarios and simple file recovery without removing drives.
Contents
- What is a NAS device?
- Data recovery from RAID-based NAS
- How to recover data from a NAS device
- How to recover deleted files from NAS devices without disconnecting the drives
- When to use the services of a data recovery service
- Tips for preventing data loss from NAS
- Comparison table of programs for data recovery from RAID NAS
What is a NAS device?
Network Attached Storage (NAS) is a data storage device with one, but more often with several disks, connected to the network and providing shared access to files for various devices using network data exchange protocols (NFS, SMB, AFP and others). Unlike servers, NAS devices allow users to easily share data, create backups and even provide remote access to files. Popular NAS vendors include Synology, QNAP, ASUSTOR, Western Digital, and others.
Using RAID technologies provides an additional level of security and resiliency, making NAS a more reliable solution for storing and managing data in home and corporate networks.
NAS devices use RAIDs of various types, with the most popular configurations being RAID 0, RAID 1 and RAID 5. For the commercial segment, NAS manufacturers can offer the use of RAID 6 and RAID 10. At the same time, some manufacturers also offer their own RAID management system designs, such as Drobo BeyondRAID, Synology Hybrid RAID (SHR), ReadyNAS X-RAID.
Building your own NAS storage is quite possible right at home.
When a NAS device fails due to hardware issues, power surges, or software problems, recovering data becomes a major concern. The integrity of the RAID array could be compromised, necessitating a sequence of recovery actions that typically begin with an assessment of the physical and logical state of the disks.
What’s the real deal with NAS?
In fact, NAS is not just a simple data storage with several hard drives (or SSD or NVMe), but a primitive computer with a modified Linux operating system. It is connected to the router using an Ethernet cable or Wi-Fi. Most systems for managing RAID arrays in NAS devices are based on the use of two technologies for creating RAID arrays in Linux: mdadm and LVM2.
You can find out more about the difference between mdadm and LVM in the article: “Comparison of RAID lvm and mdadm”
Due to the lack of low-level access to physical disks, data recovery from the NAS requires removing its disks and connecting them to a computer.
What can damage a NAS device’s RAID array?
As you know, NAS devices have good fault tolerance and they very rarely fail. However, there are several factors that can lead to damage to the RAID array in a NAS device, resulting in data loss:
- One of the most common scenarios is the failure of one or more drives in a RAID array. This may be caused by physical damage, disk wear, malfunctions, or other hardware problems.
- Power surges, current surges, or other power problems can damage the drives and electronics of the NAS device, which in turn can damage the RAID array.
- Problems with device software or bugs during the update process can cause RAID malfunctions, resulting in data loss or damage to the array.
- Failure of the RAID controller may result in the inability to correctly manage and maintain the RAID array, which can ultimately lead to data loss.
- Logical errors in file system design: Incorrect file system operations, formatting errors, or other logical errors can affect the integrity of the data in the RAID array.
All the reasons mentioned above do not allow you to recover data from the RAID array of the NAS device using conventional or built-in methods. Thus, there is only one option left: connect the NAS device drives to the computer and use a specialized program for data recovery from RAID arrays, such as RS RAID Retrieve
The program RS RAID Retrieve supports standard configurations of RAID NAS devices (RAID 0, RAID 1, RAID 5), combined arrays (RAID 10, RAID 50, RAID 60, etc.), as well as modified configurations such as RAIDZ, Drobo BeyondRAID, Synology Hybrid RAID (SHR), Synology RAID F1, ReadyNAS X-RAID and others. It works with all file systems – NTFS, ReFS, FAT, exFAT, APFS, HFS+, Ext 2/3/4, Btrfs, XFS, ReiserFS, UFS 1/2, ZFS.
What happens when a NAS drive fails?
It all depends on how the NAS is configured. If the NAS is configured in RAID mode with redundancy, then the failure of one drive will not lead to data loss. This is because RAID uses parity, which allows data to be calculated and reconstructed from the remaining drives.
The RAID controller or processor will use the data from the remaining drives to calculate parity and then use that parity to recover the data.
However, the array will operate in Degraded mode, which means its performance will be reduced. This is because the RAID controller or processor will need to perform additional calculations to recover the data remaining on the failed disk.
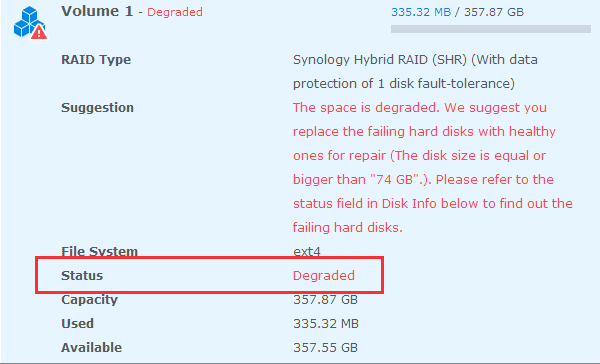
To restore the array to its original state, it is enough to replace the failed disk with a new one. After replacing the drive, the RAID controller or processor will recalculate parity and write the recovered data to the new drive. After recalculation, the performance of the NAS device will be restored.
If, before replacing the failed disk, another disk fails or the JBOD or RAID 0 fails, then the array will completely fail. This is because the failed drives will not have enough information to recover the data, although not all data will be lost.
Data recovery from RAID-based NAS
Although network-attached storage (NAS) is considered a very reliable storage solution, the hard disk drives (SSD) used in NAS are also prone to failure. In such situations, the NAS device will not always be able to provide access to the storage. In order to recover data from NAS, you need to remove the disks from the device and connect them to the PC to recover NAS data.
Preparing for recovery
To recover data from a NAS RAID array, you need to connect its hard drives to a PC running a desktop operating system.
Remove all hard drives from the NAS device.
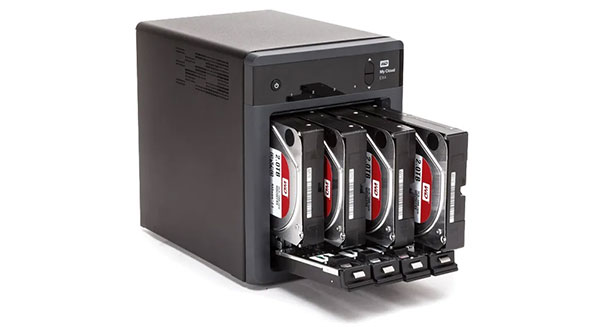
Pay attention to the sequence in which they are installed, so as not to confuse them in the future. It is recommended to number them.
Connect all the drives removed from the NAS to the computer – it is best to use the SATA ports located on the motherboard.
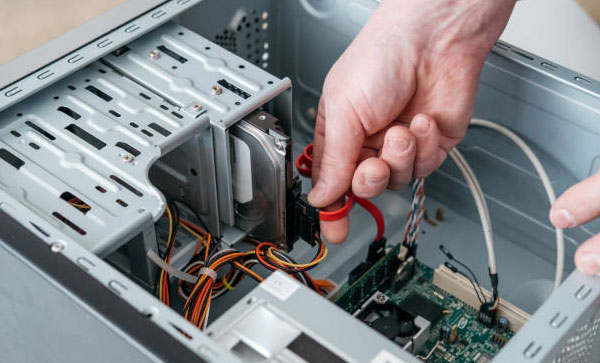
If one of the disks fails, then such a disk does not need to be connected, provided that the NAS device used RAID with redundancy, which can work if one or more disks are excluded.
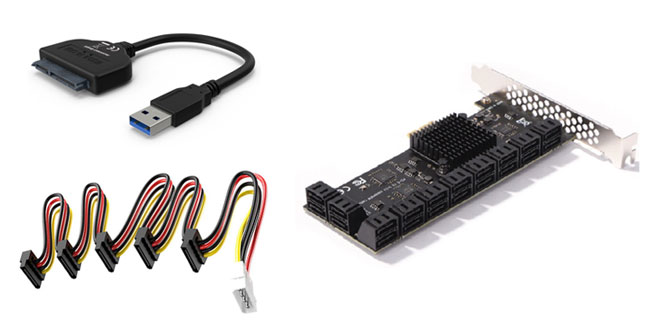
If your system does not have enough free SATA connectors, you can use USB-to-SATA adapters or SATA extenders, although this approach will significantly affect the speed of the data recovery process.
Important! If, when connecting drives, you are prompted to initialize the drives or format them, do not agree, as this will erase the data from the drives.
- Prepare disk space to save the recovered data from the NAS. This could be an external/internal hard drive or other network storage.
- Download NAS data recovery software: RS RAID Retrieve.

Data recovery from damaged RAID arrays
How to recover data from a NAS device
Step 1. When you open RS RAID Retrieve, the program will scan the disks and assemble them into the RAID array that was on the disks. Information about RAID is displayed at the bottom of the screen, where you can check whether the program has correctly identified your array.
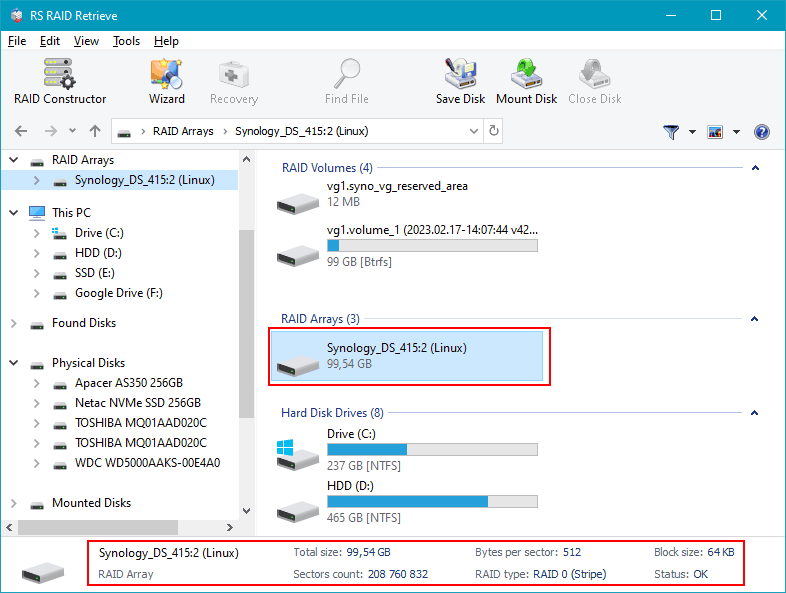
If you created disk images to use them instead of physical devices, open all image files using “Mount Disk” in the “Tools” menu or click the “Mount disk” button.
Step 2. To find data on the RAID array, double-click on the array or right-click on the array and select “Open”.
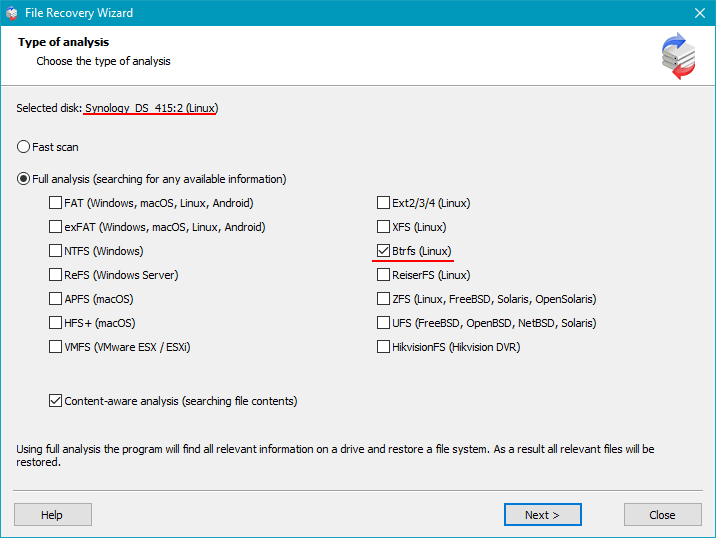
For analysis, you need to specify the search type of data. You can leave the default type – quick scan. It is designed to retrieve existing data and recover recently deleted data. But in any case, you can use it to get started.
If the quick scan does not offer the necessary data for recovery, then you need to re-run the data search and select a more efficient search type – full analysis. To do this, return to the main menu, right-click on the array and select “Analyze again” –> “Full analysis”, specify the file system type and you can uncheck the search by signatures checkbox to speed up the search process.
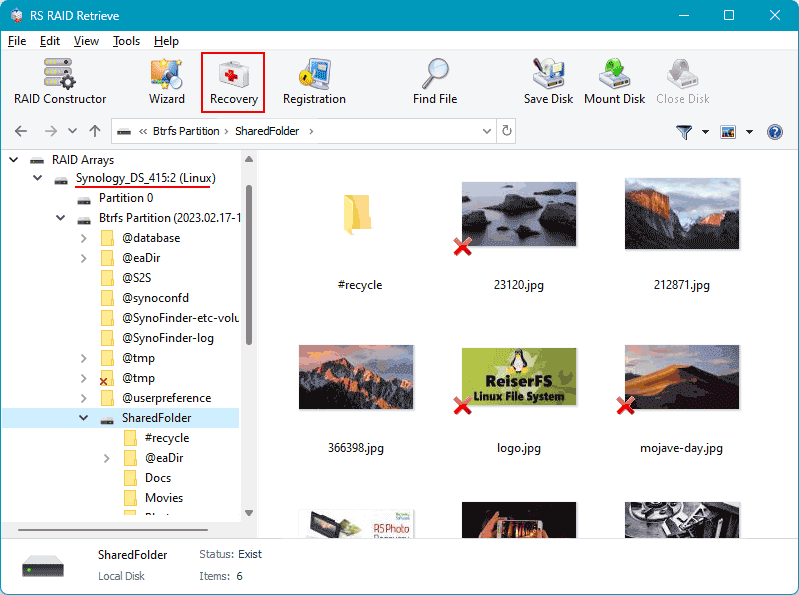
- Step 3: When the scan is completed, the data that can be recovered will be displayed. Select the required files and click the “Recover” button.
- Step 4: Specify the path to save the data. The recovered data from the NAS device will be located along this path.
How to recover deleted files from NAS devices without disconnecting the drives
Because the NAS uses unique software, it is not possible to install data recovery software directly onto it. Additionally, the data recovery software you use must support NAS devices.
Next, we will introduce you to methods for recovering deleted files from NAS. These methods are only suitable if the NAS device is operational and the RAID array has not collapsed.
-
Step 1: Download and install one of the following programs on your computer: EaseUS Data Recovery Wizard or Wondershare Recoverit.

Step 2: Enable SSH service on the NAS device.
-
Step 3: Connect to the NAS server.
Select the desired NAS from the list of your storage devices in the NAS servers section. Enter the NAS device IP address and port (usually 22), administrator name and password.

-
Step 4: After successfully connecting to your NAS, the device will begin scanning for data. After scanning, deleted, lost, or existing files on your NAS server will be displayed.

Step 5: Select the files you want to recover and save them.
As you can see, the recovery process is not very different from recovering data from a hard drive.
When to use the services of a data recovery service
If you are not confident in your abilities and have little experience, you can contact a data recovery service for assistance. However, this also has its drawbacks.
Among the main disadvantages of using a service, compared to using software yourself, are the following:
- A much higher price;
- Low guaranteed confidentiality of personal or corporate data;
- Longer wait times for receiving recovered information;
- Most data recovery companies already use the same software.
However, recovering data yourself also has its disadvantages:
- Working with hardware internals (hard drives, adapters, connectors, etc.) requires at least basic technical skills;
- Lack of experience can lead to fatal mistakes;
- Incorrect assessment of the hardware condition can worsen the situation (for example, additional damage to the surface of a faulty disk);
- It is not recommended to independently recover data from failed disks (with bad blocks or other hardware problems).
Tips for preventing data loss from NAS
To prevent RAID damage and ensure the safety and availability of your valuable NAS files, we recommend that you regularly back up your data, monitor drive health, update software and follow device maintenance procedures.
Regular backups:
Back up your NAS data regularly. Use the NAS’s built-in backup tools or software to automate this process. Keep your backups in a secure location, preferably off the NAS, to protect yourself from data loss if your device fails.
Using RAID with fault tolerance:
Configure your NAS using fault-tolerant RAID arrays (e.g., RAID 1, RAID 5, RAID 6). This will ensure the safety of data in the event of failure of one or more disks.
Disk health monitoring:
Regularly check the status of the disks in the system. Many NAS systems provide monitoring tools that allow you to monitor the health of your drives and receive warnings about potential failures.
Software update:
Keep your NAS software updated regularly, including the operating system and applications. This will help fix known vulnerabilities and improve overall system security.
Use of strong passwords and multi-factor authentication:
Secure access to your NAS with strong passwords. If possible, enable multi-factor authentication for an additional layer of security.
Access restrictions:
Configure access restrictions to the NAS, allowing access only to authorized users and devices. This will help prevent unauthorized access and exposure to malicious software.
Protection from physical damage:
Place your NAS in a safe location, protected from physical hazards such as fire, flooding, or shock. This may also include the use of reliable power supplies and cooling systems.
Comparison table of programs for data recovery from RAID NAS
| RS RAID Retrieve | Zero Assumption Recovery | R-Studio Data Recovery | GetDataBack Data Recovery | UFS Explorer RAID Recovery | DiskInternals RAID Recovery | ReclaiMe Free RAID Recovery | |
|---|---|---|---|---|---|---|---|
| Automatic RAID detection | + | – | + | – | + | + | – |
| RAID 0, 1, 5, 10, 01 | + | + | + | + | + | + | + |
| RAID 1E, 5E, 5EE | + | – | + | – | + | + | – |
| RAID 50, 60 | + | – | + | – | + | + | – |
| RAID Z, RAID Z2, RAID Z3 | + | – | – | – | + | – | – |
| File systems NTFS, FAT, Ext | + | + | + | + | + | + | + |
| File systems APFS, HFS, HFS+ | + | – | + | + | + | + | – |
| File systems XFS, ReiserFS | + | + | + | – | + | + | – |
| File systems Btrfs, ZFS | + | – | – | – | + | – | – |
| Bootable Media Recovery | – | – | – | + | – | – | – |
| Supported OS | Windows | Windows | Windows, Linux, Mac | Windows | Windows, Linux, Mac | Windows | Windows |
| Russian localization | + | – | – | – | + | – | – |
| License type | Paid | Paid | Paid | Paid | Paid | Paid | Free |

