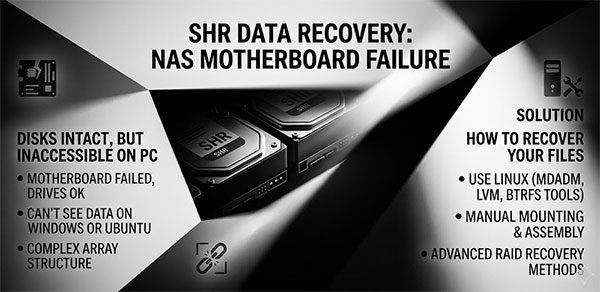
The NAS is dead. The drives are intact. You connect them to a Windows or Linux machine and either see a “You need to format this disk” prompt, or the drives are not visible at all. This is not data loss — it is an access problem. Unlike scenarios where the drives themselves fail, a dead Synology motherboard leaves the SHR volume data physically untouched. What you need to recover is not the data itself, but access to the multi-layered structure Synology uses to store it.
Contents
- Why Neither Windows, macOS, nor Bare Linux Can Read the Drives
- Path 1: Manual Assembly via Linux Terminal
- Path 2: RS RAID Retrieve
- When Neither Path Works
Before doing anything else: note the slot order of the drives in the NAS chassis. Synology labels each bay — photograph it or write it down before pulling the drives. Changing the connection order on the recovery machine complicates array reconstruction and can cause the wrong parity mapping to be applied.
Why Neither Windows, macOS, nor Bare Linux Can Read the Drives
Synology Hybrid RAID does not store data as a single filesystem on a raw partition. When DSM creates a storage pool and volume, it builds three distinct layers on top of the physical disks:
mdadm software RAID — each drive is partitioned, and the data partition is tagged type 0xFD (Linux RAID autodetect). The mdadm superblock on each partition contains the array UUID, member role, and event count. This is what SHR actually is at the block level — a standard Linux md array, assembled and managed by mdadm.
LVM volume group — the assembled md device is registered as an LVM Physical Volume (PV). DSM creates a Volume Group (VG), typically named vg1 or vg1000, and one or more Logical Volumes (LVs) inside it: volume_1, volume_2, and so on. LVM metadata sits in the PV header and describes the VG layout.
Filesystem — each Logical Volume is formatted as Btrfs or ext4, depending on the DSM version and the filesystem selected at volume creation. DSM 5 and earlier used ext4 by default; DSM 6 and later default to Btrfs.
Windows has no native support for any of these layers: not for Linux RAID partitions, not for LVM, and not for Btrfs or ext4. macOS is in the same position. A stock Ubuntu installation without additional packages will detect the 0xFD partitions but will not assemble the md array or activate the LVM volume group automatically. This is why Synology SHR drives appear as RAW, unformatted, or simply invisible regardless of which OS you connect them to.
To understand the mdadm assembly process and LVM structure in more depth, see our articles on LVM and recovering mdadm RAID arrays.
Two configurations where the steps below may not fully apply: volumes with a read-write SSD cache configured in DSM, and encrypted volumes or shared folders. SSD write-back cache creates an additional device layer that complicates manual assembly. Encrypted volumes require the recovery key and cryptsetup. If either applies to your setup, the RS RAID Retrieve section below handles both cases.
Path 1: Manual Assembly via Linux Terminal
This procedure applies to DSM 6.2 and above, for volumes using Btrfs or ext4. You need a PC with enough SATA ports to connect all SHR drives simultaneously — hot spares excluded — a bootable Ubuntu 22.04 Live USB, and a separate destination drive with sufficient free space.
sudo -i
apt-get update && apt-get install -y mdadm lvm2
Both packages are required. Without lvm2, the vgchange command will not be available and the Logical Volumes will not activate.
mdadm -AsfR && vgchange -ay
mdadm -AsfR scans all block devices for mdadm superblocks and assembles any arrays it finds. vgchange -ay activates all LVM Volume Groups found on the resulting md devices, making the Logical Volumes accessible as block devices.
cat /proc/mdstat lvs
The lvs output determines the correct mount path:
- SHR single volume, no LVM output:
/dev/md<N> - SHR single volume with LVM:
/dev/vg1000/lv - SHR multiple volumes:
/dev/vg1/volume_1,/dev/vg1/volume_2, etc.
The entry syno_vg_reserved_area in lvs output is a DSM system reservation — ignore it.
mount /dev/vg1/volume_1 /mnt/data -o ro
Always mount with -o ro (read-only). This prevents any writes to the Synology drives during the recovery process. Once mounted, verify the directory structure is intact, then copy files to the destination drive. Do not move — keep the originals on the source drives until the copy is verified complete.
If automatic assembly fails: mdadm -AsfR relies on valid superblocks on all member drives. If it does not produce output in /proc/mdstat, the array can be assembled manually by specifying each device explicitly with mdadm --assemble /dev/md0 /dev/sdb3 /dev/sdc3 /dev/sdd3 --run.
Use mdadm --examine /dev/sdX on each drive first to confirm the array UUID matches across all members. The --force flag is a last resort for inconsistent superblock states — use it only after all drives are confirmed present.
Path 2: RS RAID Retrieve
RS RAID Retrieve performs the same mdadm superblock detection, LVM metadata parsing, and volume mounting — but through a graphical interface, without requiring a live Linux environment. It runs on Windows, Linux, and macOS, so you can use whatever system is available.

Data recovery from damaged RAID arrays
Connect all SHR drives to the recovery machine. Launch RS RAID Retrieve and open the built-in S.M.A.R.T. monitor before doing anything else. Review the health status of each drive — pay attention to Reallocated Sector Count, Pending Sectors, and Uncorrectable Errors. If any drive shows elevated values on these attributes, do not scan it directly.
If S.M.A.R.T. shows a degraded drive, use RS RAID Retrieve’s built-in imaging function to create a sector-level image of that drive first. All subsequent recovery work is then performed on the image rather than the original. This protects the source drive from additional reads during the scan and prevents further degradation.
RS RAID Retrieve reads the mdadm superblocks on each connected drive (or image), identifies the array configuration — RAID level, member roles, stripe block size, drive order — and reconstructs the SHR volume structure. For a standard SHR or SHR-2 setup with intact drives, this happens without any manual input. The program displays the detected Volume Group, Logical Volumes, and filesystem type.
Once the volume is mounted, RS RAID Retrieve presents a file browser showing the directory tree of the Btrfs or ext4 filesystem. Select the files and folders to recover, specify the destination path, and start the copy. The source drives are accessed read-only throughout this process.
SSH option: If the NAS still powers on but DSM is inaccessible — for example, only the motherboard’s peripheral components failed while the SATA controller is functional — RS RAID Retrieve can connect to the NAS directly via SSH. In this case the drives do not need to be physically removed from the chassis.
When Neither Path Works
Both methods above assume the drives are mechanically functional and electrically detectable. If any drive fails to appear in the OS, produces audible clicking or grinding, or shows critical S.M.A.R.T. values, the problem is no longer in the software layer. Recovering data from a mechanically failed drive requires physical intervention — head stack replacement, platter transfer — and must be done in a controlled environment.
Stop and power down if you observe any of the following
- Drive is not listed in BIOS/UEFI or in
lsblkoutput - Audible clicking, grinding, or repeated failed spin-up attempts
- S.M.A.R.T. Reallocated Sector Count (ID 05) or Uncorrectable Sector Count (ID C6) are non-zero and increasing
- Drive temperature rises to abnormal levels within minutes of connection
Each additional power cycle on a failing drive reduces the probability of a successful recovery. If physical damage is suspected, contact a professional data recovery lab before attempting further access.
A failed Synology motherboard with intact drives is among the more straightforward NAS recovery scenarios — the SHR volume data is present and consistent, and time is not an active factor. The drives will not degrade on their own while sitting disconnected. The risk comes from action, not inaction: connecting to software that writes partition metadata, running --force assembly without understanding the superblock state, or continuing to power a drive that was already showing errors before the board died.