Today in our data recovery blog we’ll talk about something completely different. Let’s talk about how to irreversibly destroy information such that no one would be able to recover it later on no matter what tools they use.

Contents
- Why Destroy Information?
- Securely Erasing Data Is Device Dependent
- Hard Drives Secure Data Erase
- Formatting the Disk
- Using Secure Erase
- Securely Erasing Individual Files and Folders
- Destroying Information from SSD Drives
- Wiping eMMC Media in Windows Tablets
- Wiping SD Cards
- Wiping BlackBerry Smartphones
- Wiping Apple iPhones and iPads
- Wiping Android Smartphones and Tablets
- Conclusion
Why Destroy Information?
Why would anyone want to destroy data? Aside from the military, government agencies and corporations getting rid of antiquated hardware, there are plenty of reasons for anyone to want to erase information securely. Whether you are about to sell a laptop with a built-in SSD, a tablet or smartphone with an eMMC storage device, or just want to replace your old and aged hard drive, you’ll probably want to make sure that whoever ends up owning your old hardware doesn’t have access to your files and personal information.
Securely Erasing Data Is Device Dependent
The exact method of wiping the storage clean differs between devices and types of storage. In this article, we’ll talk about securely wiping hard drives, SSD drives, eMMC storage found in Windows and Android tablets, as well as cleaning up Apple and Android-based smartphones.
Hard Drives Secure Data Erase
A lot has been written already about securely erasing hard drives, so we won’t go into much technical detail here. Instead, we’ll look at some myths and misconceptions about the steps you need to do to erase a hard drive.
Formatting the Disk
First and foremost, simply repartitioning and/or formatting your hard drive may not enough. Plenty of data recovery tools exist that can pick up deleted partitions and restore information from formatted hard drives including our own RS Partition Recovery (yes, we’re not making this up; formatting your hard drive is really not as secure a way to delete information as one might think). But is this always the case? Let’s look at how Windows formats hard drives a little bit closer.
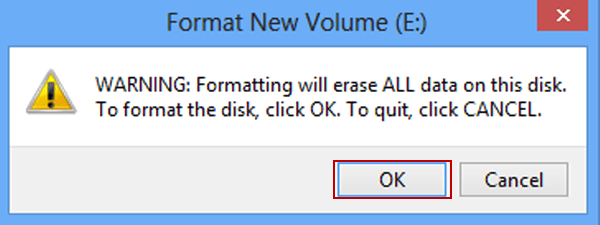
First and foremost, let’s dismiss repartitioning. Erasing a partition and creating a new one has nothing to do by itself with the actual data stored on your hard drive. If you are using repartitioning as a method of securely erasing your hard drive, please reconsider.
Moving on to formatting, Windows has two methods of formatting the hard drive: Quick and Full format. Quick-formatting the disk simply creates a fresh, empty copy of the file system. It does NOT delete your files and folders, and may even leave residual traces of the old file system. In other words, quick format is not something you can use to securely delete data.
What about the full format? By the sound of it, full-formatting the disk should actually delete data, shouldn’t it? The answer is, it depends on the version of Windows you’re using.
In Windows XP and earlier (including Windows 95, 98, 98 SE, all versions of Windows NT, Windows 2000 and Windows XP), the format command does not physically overwrite information on the disk when a full format is performed. Instead, those versions of Windows would simply read the disk surface to ensure that there are no bad sectors around. If any particular sector could not be read, Windows would mark that sector as ‘bad’ and move on to the next one.
This behavior has changed with the release of Windows Vista. In Windows Vista, Windows 7, 8, 8.1, Windows 10 and their corresponding Server versions, Microsoft made the full format operation to actually overwrite the entire content of the partition with zeroes (https://support.microsoft.com/en-us/kb/941961/). As a result, using full format is a working and viable method of wiping non-sensitive information from a hard disk. Any information that used to be on the disk will become effectively unrecoverable and inaccessible to any software tools.
Theoretically, information overwritten with zeroes could be partially recovered in a lab by removing disk platters and using special hardware to read residual magnetic fields that could still be left on the disk. This even used to work in practice some twenty years ago or so when the largest size of the disk was about 80 to 160 MB (that’s megabytes, not gigabytes!) With today’s high-density hard drives using all kinds of tricks to fit more information onto the same-size platters, the standard forensic recovery procedure fails to yield any meaningful result in practice. However, if you are really paranoid and want to ensure that your data is completely and absolutely gone (even if just for the peace of mind), you may want to use one of the available secure erase tools.
Using Secure Erase
The point of using secure erase tools is to make sure that no remnant data can be recovered from the device being wiped. There are plenty of secure data erase tools on the market including a bunch of free ones, most of which declare compliance with one or more military-grade standards (http://en.wikipedia.org/wiki/Data_erasure#Standards) and performing one or more cycles of completely overwriting your information with random data. This, in theory, makes it impossible for anyone to recover remnant data by reading any kind of residual magnetic fields from the hard drive.
However, most of those military-grade standards are hopelessly obsolete. Let’s look, for example, at Bruce Schneier’s Algorithm published in 1996 that required as many as 7 rounds of overwrites including all zeroes, all ones (one round each) and five rounds of random data. Back in 1996, we had hard drives that were the same physical size as today. However, their storage capacity was 10,000 times smaller than what we enjoy today. This in turn means that, back then, each data bit was recorded on the area of the disk platter that was about 10,000 larger than what we have today; and that, in turn, means that our chances of actually retrieving that data after just one round of filling it up with zeroes were significantly greater than what we have today.
A far more recent Australian Government ICT Security Manual published in 2014 specifies just one round of overwriting information with random data. However, the Australian standard only specifies that for hard drives sized 15 GB and larger (have you ever seen a 15 GB hard drive sold in the last 10 years?); smaller devices must be degaussed and physically destroyed.
So what’s the conclusion? For all intents and purposes up to and including Confidential and Top Secret grades, a single round of overwriting the disk with random data is plenty sufficient.
Securely Erasing Individual Files and Folders
If you just want to get rid of a certain file or folder, you can simply use one of the available secure erase utilities to wipe its content. The tool will first open the file, then fill it with random data (effectively overwriting its content), then rename the file (to remove all references to the file name and type) and clear its attributes, and then delete it from the file system.
If you are using a low-level secure erase tool, it may go as far as clearing the file system record referring to the file being deleted. This is a dangerous technique, and it’s not recommended at all as it can easily damage the file system. Steps listed above are more than sufficient to ensure that the file is gone completely along with its content, and that no one will be able to recover it even if they carve the disk with File Recovery or similar.
Destroying Information from SSD Drives
Everything we wrote above about repartitioning, formatting and overwriting data was only applicable to traditional mechanical hard drives with rotating magnetic platters. The new generation of storage devices uses NAND flash cells to record information. Instead of the moving magnetic platters with many precise mechanical parts, solid-state media uses chips of flash media to keep information. As a result, the approach to clearing the content of solid-state media is completely different.
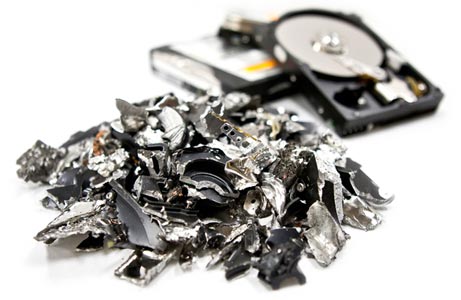
First and foremost, many SSD drives support features such as TRIM and background garbage collection. Due to these features, the SSD drive will automatically erase the content of a file being deleted, wipe removed partitions and clear formatted volumes – even if you use the quick format option. Once the data is cleared, the content of a cell that used to contain it is physically erased in order to prepare the cell to accept new data.
That functionality alone is not a guarantee of secure data erase. Mechanisms such as overprovisioning and instant remapping of physical and logical addresses allow for some residual remnant data to remain on the disk for an indefinite period of time. As a result, simply formatting the disk may not guarantee a 100% wipe.
In addition, TRIM may not be available (or it can be inactive) in certain circumstances. More information on the topic is available in our previous article “How SSD Drives Permanently Erase Deleted Data”. Here we’ll just mention that TRIM is only available since Windows 7 and newer, and is only activated on SSD drives formatted with NTFS. TRIM is not available on USB-connected SSD drives as well as SSD drives used in most NAS models (with few exceptions such as certain Synology models running latest versions of the Synology OS). All in all, we don’t recommend relying upon SSD drives’ background garbage collection mechanisms for the purpose of secure data erase.
For pretty much the same reasons, no secure data wipe tool designed with magnetic hard drives in mind will work with an SSD drive. If you overwrite the entire content of the device, some data blocks may (and will) remain in the so-called overprovisioning area, leaving traces of remnant data available to a data recovery specialists.
The only way to securely erase wipe an SSD drive is using the manufacturer’s secure erase tool. There’s no manufacturer-specific magic in secure erase. Most SSD drives support a standard “secure erase” instruction from the SATA command set. Simply passing this command to the SSD drive will make its controller wipe the entire content of the device internally, including all data blocks stored in the overprovisioning area. (On a side note, some SSD manufacturers are known to mess up with this command, leaving overprovisioned data blocks unaffected and potentially exposing remnant data even after running the secure erase command).
So which secure data erase tool should you use? You can use Intel SSD Toolbox, OCZ SSD ToolBox, Samsung Magician, or Seagate SeaTools if you’re using an SSD drive made by one of these manufacturers. There are also plenty of third-party tools such as Acronis True Image or Parted Magic that implement SSD Secure Wipe as part of their functionality.
Wiping eMMC Media in Windows Tablets
eMMC media is similar to SSD drives in that it uses NAND flash cells to store information. eMMC media supports TRIM and background garbage collection, which makes the same wiping techniques applicable to eMMC media found in Windows tablets.
However, there is a much easier way to securely erase the content of your Windows tablet. If your tablet has a built-in TPM security module and BitLocker encryption was activated (BitLocker full-disk encryption is activated automatically if your Windows 8/8.1 administrative account is a Microsoft Account as opposed to a local account), simply resetting your tablet to factory settings via the Windows Reset and Repair menu will destroy BitLocker keys and securely wipe the content of its eMMC storage (the recovery partition will of course remain on the disk, but that doesn’t contain any personal information).
If your Windows tablet does not contain a TPM module, then using a secure erase tool on the user partition and then resetting your tablet to factory settings will be the most secure way of wiping the data. However, if you’re not that paranoid, a simple factory reset should take care of your personal information, and TRIM will take care of the rest.
Wiping SD Cards
SD cards are much easier to wipe compared to eMMC storage. While they do have an internal controller featuring data block remapping to a certain extent, they don’t have much of the overprovisioning area. SD cards don’t have TRIM. As a result, simply formatting an SD card with quick format will not erase information, while using the full format in Windows Vista, Windows 7, 8, 8.1 and newer will effectively overwrite its content with zeroes. Alternatively, you may use any secure data erase tool designed for magnetic hard drives (a single round of zeroes, ones or random data is plenty sufficient for securely destroying information from an SD card).

Wiping BlackBerry Smartphones
This is going to be the shortest chapter. BlackBerry OS is all about security. Simply performing a factory reset initiates a full secure data wipe of the entire storage. End of story.
Wiping Apple iPhones and iPads
Another very short chapter. Apple has implemented a wonderfully concise, simple and completely secure of deleting personal information when you’re about to sell your device. Simply go to your phone’s settings, deactivate iCloud lock (otherwise the new owner won’t be able to use the device), and perform factory reset. As the entire device is encrypted using whole-disk encryption, and your personal information is additionally encrypted in the keychain, simply deleting the encryption key renders existing data effectively inaccessible. The factory reset procedure does that, and erases the content of the storage media. No single case of a data leak after full factory reset is known with Apple devices.
Wiping Android Smartphones and Tablets
We hoped to make this a small chapter similar to Apple. Alas, Android is not (yet) quite as secure as Apple iOS. There are reports mentioning remnant data availability even after factory-resetting Android smartphones. Security researchers were able to access authentication tokens stored by Google apps and remaining on certain smartphones after a factory reset, and use those tokens to log in to the user’s Google account and download all the personal information stored there (and that’s even a lot more sensitive data than the phone itself ever contained). While this was only achievable in lab conditions (the procedure is not even available to general law enforcement as of yet), there is no definite answer to this issue especially if your Android device uses an older version of Android (2.3 Gingerbread through 4.3 Jelly Bean).
Newer versions of Android (4.4. Kit Kat) are reportedly better in this respect, while Android 5 Lollipop has finally caught up in this respect, enabling mandatory full-disk encryption on newer devices. However, if the device you’re about to sell is old and running an outdated version of Android… seller beware!
Conclusion
In this publication, we reviewed common approaches and methods of securely wiping information from a variety of devices and storage media using different principles of recording information. Unlike many existing publications based on obsolete security standards or writing about techniques only applicable to magnetic hard drives, we covered the complete range of devices ranging from hard drives to NAND-based media. We also looked at the different operating systems (Windows, Android, iOS and BlackBerry) and different form factors (Windows PCs and tablets). If you read this publication, you should be now well equipped to securely erase your storage media.
Frequently Asked Questions
Yes, it is possible to recover deleted files if they have not been overwritten by new data.
Stop using the disk (create an image) as soon as the files have been deleted and use the professional data recovery software RS File Recovery to recover the deleted files.
This greatly depends on the capacity of your hard drive and your computer's performance. Basically, most of hard disk recovery operations can be performed in about 3-12 hours HDD 1TB in normal conditions.
If the file does not open, it means that the file was damaged or corrupted before recovery.
Use "Preview" to evaluate the quality of the recovered file.
When you try to access the drive, you get the message "Drive is not accessible" or "You need to format the partition drive"
Your disk structure is corrupted.
In most cases, the data may still remain available. Just run the data recovery software and scan the desired partition to get it back.
Please use free versions of programs with which you can analyze the storage and view the files available for recovery.
You can save them after purchasing the program - you won't need to scan it again.





My goal is to ‘wipe” the Android O.S. on my phone.(Galaxy SM-A205U/Android 10) Problem; bootloader is locked. Is there software that would wipe the partition the B/ler is on, then allow me to wipe/erase the Andriod O.S. and install another O.S. of my choice? I’m sure this can be done on a HDD but I’m not sure about a phones “storage” which is/may be a SSD?
Thanks;
Rick