To Make Your Own LiveCD, you should get a stand-alone software environment image and write it to a USB flash drive, or to another removable media like an external hard drive, or an optical disk if your computer has a DVD drive. If you need a ready-made solution, the image can be downloaded from the Internet. Alternatively, you can create a LiveCD of your own that suits your particular needs. Let’s explore all options in detail.

Contents
- What is a LiveCD?
- Linux-based LiveCD
- WinPE-based LiveCD
- How to create WinPE with AOMEI PE Builder
- How to create WinPE with Win10XPE
What is a LiveCD?
LiveCD, also known as LiveDisk or LiveUSB is an external bootable drive containing a stand-alone software environment and utilities. Such environment is a restricted version of the operating system that only has basic functionality. There are LiveCDs based on Linux, and there are versions based on Windows.
A LiveCD should be used when the computer’s operating system can’t work:
- To restore the operating system (when the bootloader or system files are damaged, when there are driver issues, or when restoring the system from backup);
- To partition a hard disk;
- To remove viruses;
- To retrieve data in emergency situations;
- To perform any other operations which are impossible when the operating system is running;
- To be able to use a password-protected computer, or a computer without a hard disk.
LiveCDs can be of various purpose. Some are narrowly specialized and contain main native functions of the operating system along with tools for specific purposes. For example, these may include LiveCD antivirus, disk management and backup apps. Such LiveCDs are usually created by their own utilities, or their images can be downloaded from their developer websites.
Other LiveCDs are versatile and contain all sorts of software, along with extended functionality of the operating system. Versatile LiveCDs are more preferable as they have a wide range of solutions for all kinds of unexpected situations and emergencies, and this is the kind of LiveCD we are going to discuss.
Linux-based LiveCD
A Linux-based LiveCD is easy to obtain since they are provided as your operating system is being installed. You can try one before actually installing Linux,
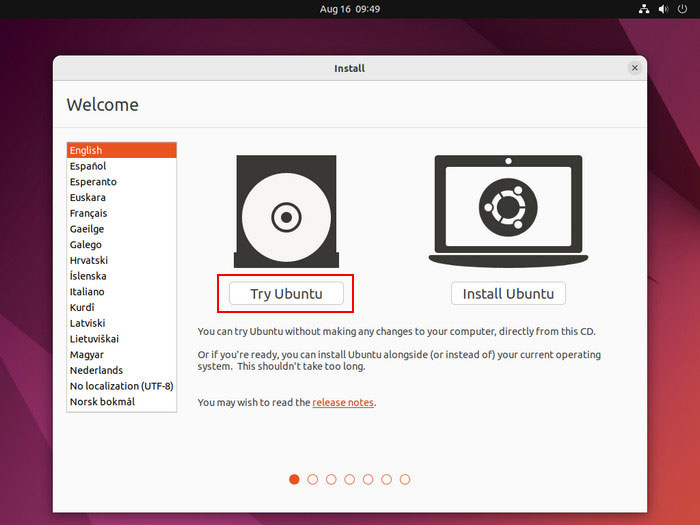
and use some of its functions without installing, but from the installation media itself. Meanwhile, you will be able to use the tools inside the Linux distribution as well as install some from the software center.
There are also Linux-based LiveCDs provided separately from the main distribution. The most well-known are Knoppix and Kali Linux. These are properly supported projects, and you can visit their websites to download their LiveCDs, i.e., to download their ISO images and then write them to removable media.
WinPE-based LiveCD
A lightweight version of Windows used as a basis for LiveCDs is known as Windows PE, aka WinPE. There are many WinPE versions which are essentially limited version of a certain Windows OS — 7, 8.1, 10, 11.
It is quite difficult to get WinPE officially. The tools that Microsoft provides to create a WinPE image are made for software developers, and a ready-made WinPE by Microsoft, MSDaRT, contains a very short list of tools. What is more, it is legally available only to corporate users, on a subscription basis.
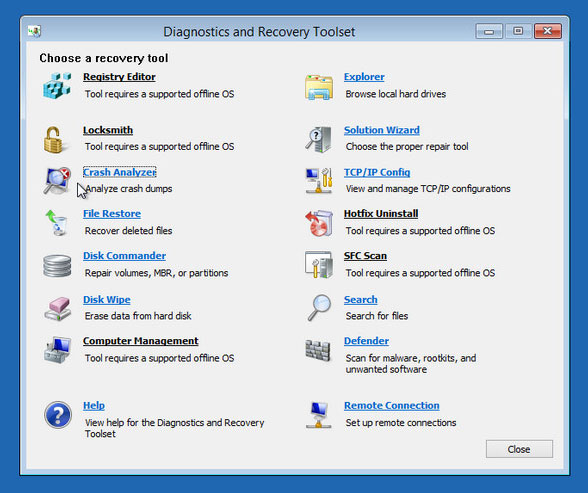
An optimal variant would be to get such LiveCDs unofficially. You can download Windows PE from the multitude of ready-made versatile builds as an ISO image which can be written to removable media. Third-party WinPE builds are sometimes provided within project development campaigns, with website addresses where users can download such images.
A few exclusions are Hiren’s BootCD PE and Gandalf’s Windows 10PE. These are powerful builds including a wide range of apps for every possible occasion, with all kinds of drivers that enable users to run WinPE on any computer.
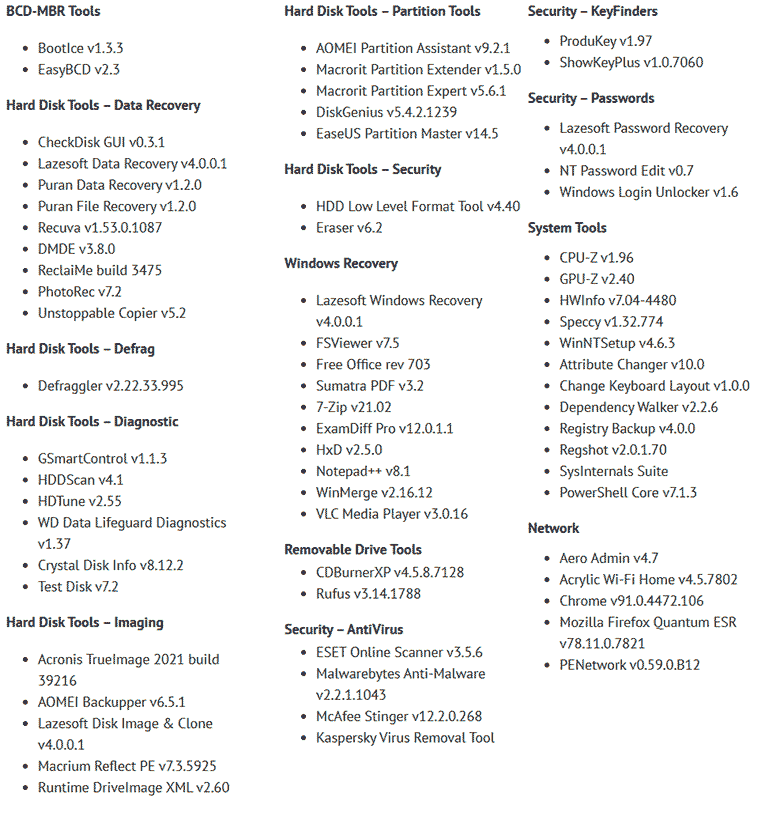
Most often, WinPE builds are sporadic distributions offered on torrent trackers. This is actually where you can download such WinPE images.
WinPE is not licensed like Windows, but third-party builds often include pirated software. This means you are running a risk of legal responsibility for breach of license rules, at least when such LiveCDs are used professionally.
Meanwhile, Linux-based LiveCDs tend to include freeware and this entails no risks for users. However, WinPE is what you need to restore Windows and many other software products.
To get a WinPE-based LiveCD without pirated software, you can create one of your own. That is, you create your own WinPE build, stuffed with the necessary software, either free or legally licensed.
How can we create a WinPE for all our needs? There are special tools for that purpose called WinPE builders. Unlike official Microsoft tools, they are designed for ordinary users. Let’s explore how to create WinPE with two apps of this kind.
How to create WinPE with AOMEI PE Builder
The easiest tool for the job is AOMEI PE Builder. By default, such WinPE build includes a disk manager and a backup tool by AOMEI.
If you wish, such build may also include other freeware, and you can add your own portable utilities.
AOMEI PE Builder creates a very limited version of WinPE. In this environment, it is impossible to install any programs, and some portable software may not work. Certain products might lack system files to start.
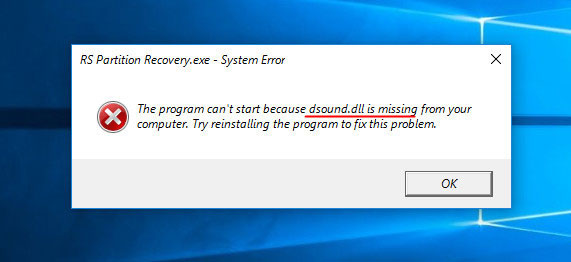
Which means that after creating a LiveCD based on such WinPE build you should test it to see if all software works properly.
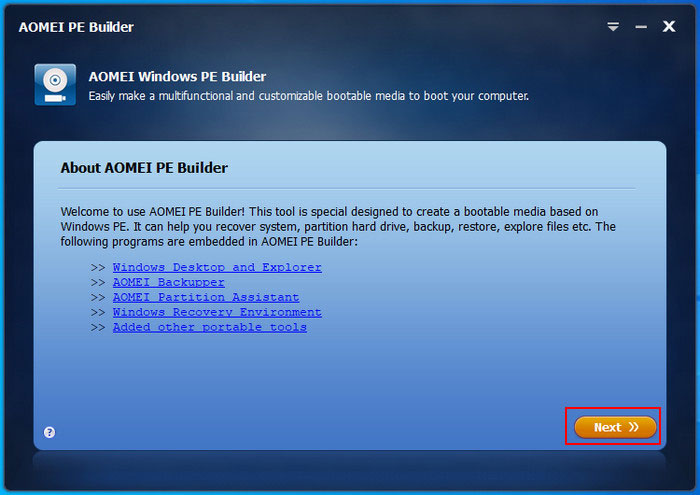
How to create WinPE with AOMEI PE Builder? Start the program and click Next.
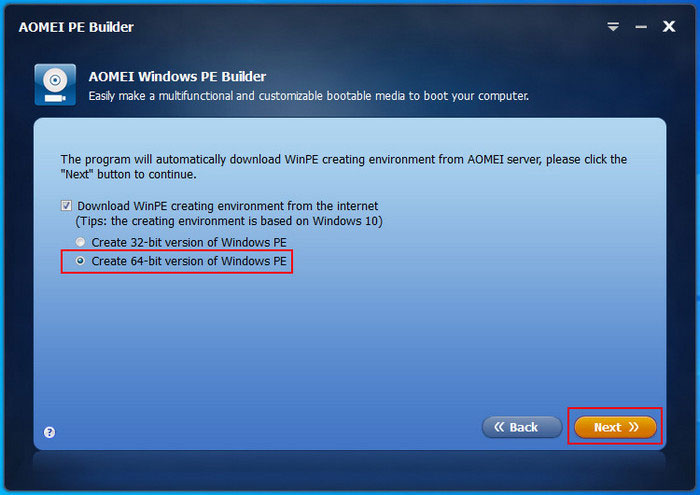
In most cases, choose “Create 64-bit version of Windows PE.”
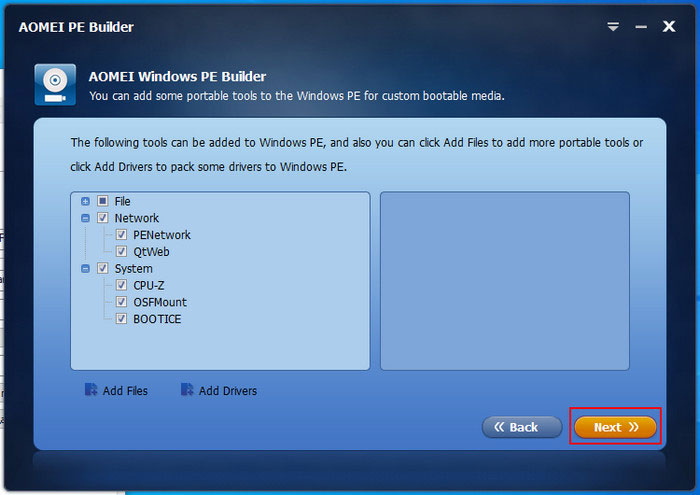
Check what programs can be included into this build, and select the ones you need. If you want to add some special drivers, do it by clicking on the Add Drivers button. To add your own software, click Add Files.
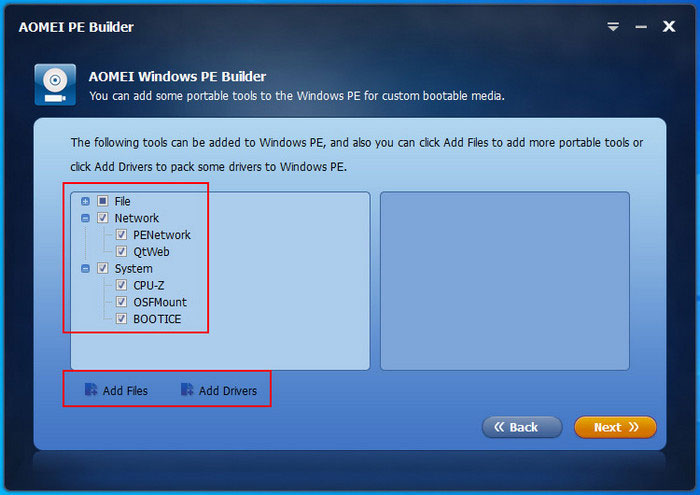
Click Add Folder,
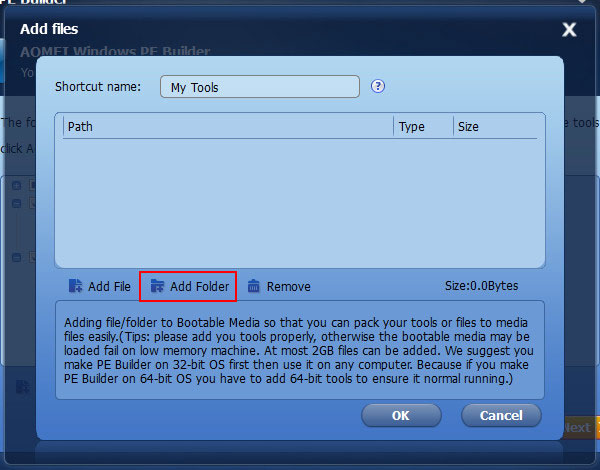
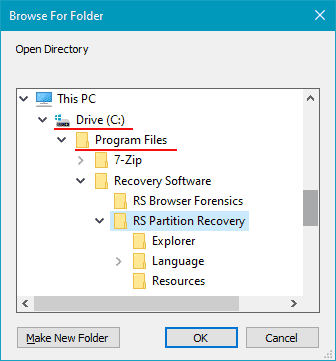
And give the path to the directory containing a portable version of an application. In our example, it is a data recovery tool RS Partition Recovery. To get its portable version, you can copy the folder with the installed program on drive C by this path:
C:\Program Files\Recovery Software
Use a similar sequence of steps to add other programs. Click OK.
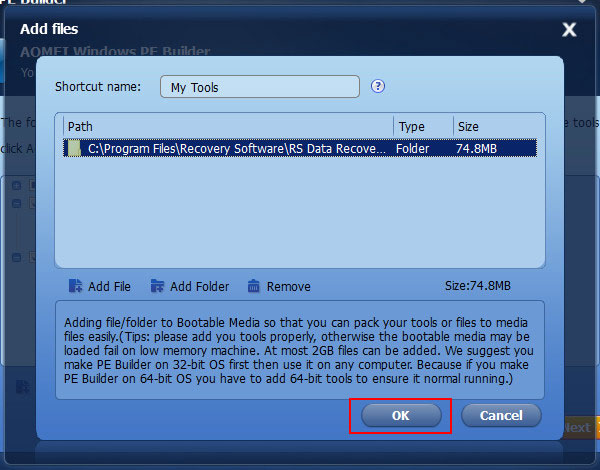
Click Next.
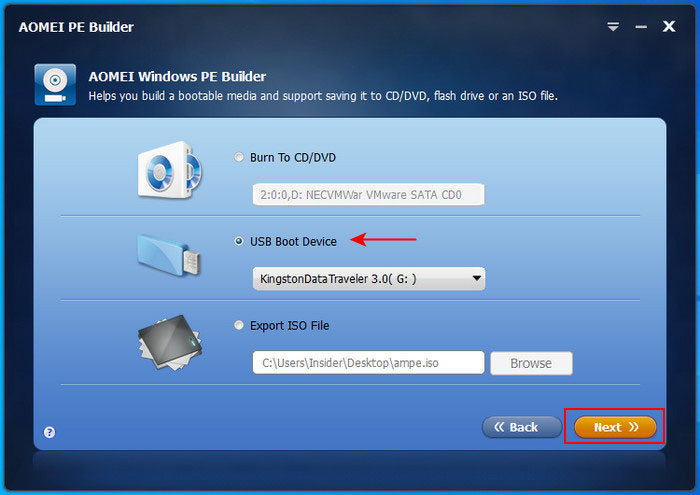
Now you can either write the build to a flash drive / optical disk, or create its ISO image.
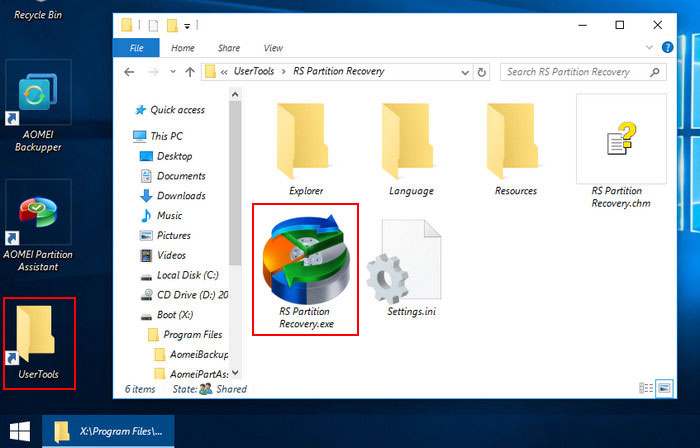
In WinPE, al added programs will be placed into the desktop folder named UserTools. It is from this folder that you can run the programs you need.
If WinPE is written to a flash drive or an external hard drive, you can add your portable software in one more way (not only when you create your WinPE). In the root directory of the flash drive / external hard drive, create a folder and put your portable software there, as if it were an ordinary external storage device. After that, you’ll be able to run those programs from the root folder.
Unfortunately, RS Partition Recovery failed to run from WinPE created with AOMEI PE Builder, so we had to look for a more efficient solution.
How to create WinPE with Win10XPE
This solution turns out to be Win10XPE builder. This is a free tool developed as a part of the project by a group of enthusiasts, and it has quite a lot of things to offer. It implements a more functional WinPE environment, and adds some interesting features.
You can integrate your own portable software into a WinPE build created with Win10XPE. Curiously enough, this build can also provide a chance to install Windows-compatible software, if necessary. It’s a good solution for cases when certain programs have no portable versions.
Also, such build can contain a Windows installation process. If you fail to bring your Windows back to life with WinPE tools, you can choose to reinstall the operating system immediately, by downloading its ISO image from the Internet.
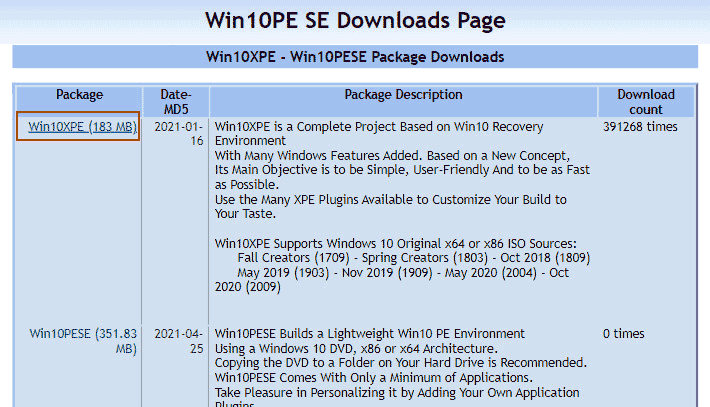
How to create WinPE with Win10XPE Builder? For starters, download Win10XPE builder.
After that, download a Windows 10 ISO image. This should be a Windows 10 image specifically – just any Windows OS won’t do. Secondly, it should be a clean image by Microsoft, and not a custom build which has been tampered with. You can download the latest clean ISO installation image for Windows 10 from the official Microsoft website.
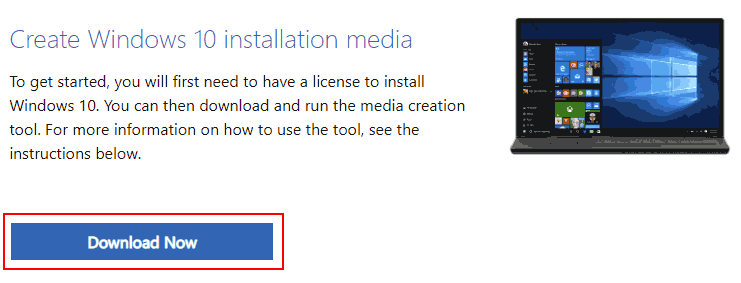
Lifehack. To download a Windows ISO image from the Microsoft website, you need to get a utility called Media Creation Tool first. This utility actually creates the ISO image on your side. However, you can take an easier way and download the ISO image faster directly from the Microsoft website.
To do it, press F12 on the Windows 10 download page to enter the developer mode in your browser. Choose an Apple tablet for emulation. Press F5 to refresh the page and download the Windows ISO image.
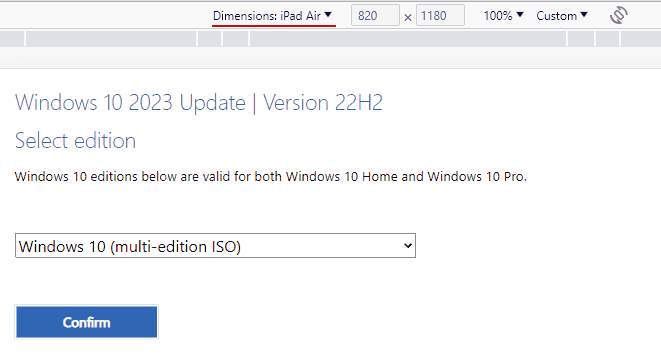
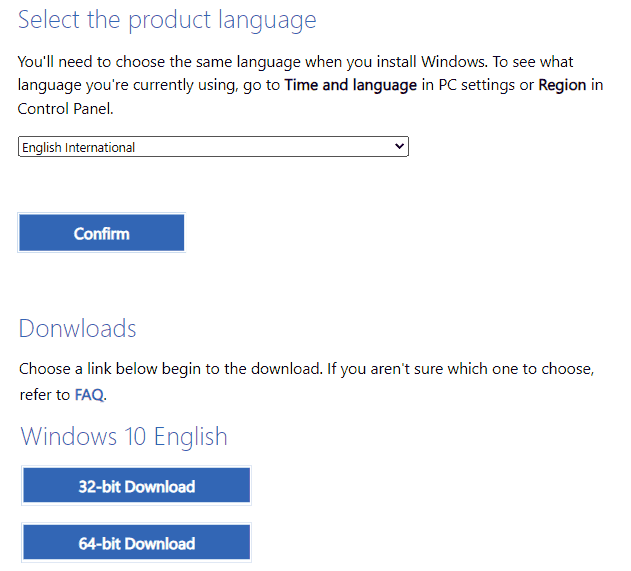
Remember to choose the proper language and bitness.
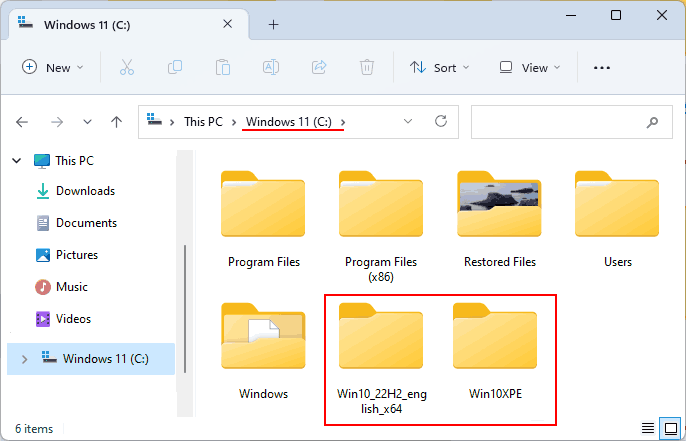
Double-click on the downloaded image to connect it so that it is displayed in the File Explorer. Copy all of its contents into a folder you have already created in the root directory of your drive C. Extract the archive containing Win10XPE to the same directory. In the end, you’ll get two folders in the root directory of drive C which are required to create WinPE – one with a Windows 10 distribution, and the other with Win10XPE.
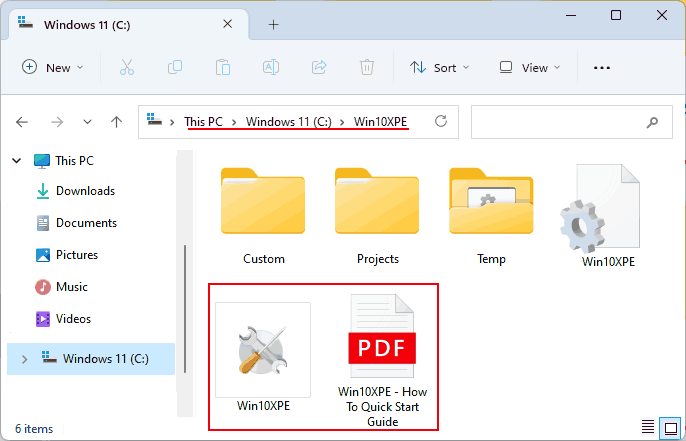
Go to the Win10XPE folder. Before that, have a look into the Win10XPE manual. It contains a detailed description of all its features. This document is a must-read if you want to use Win10XPE at an advanced level. However, we will only explore the main steps required to create WinPE with Win10XPE. Start the program.
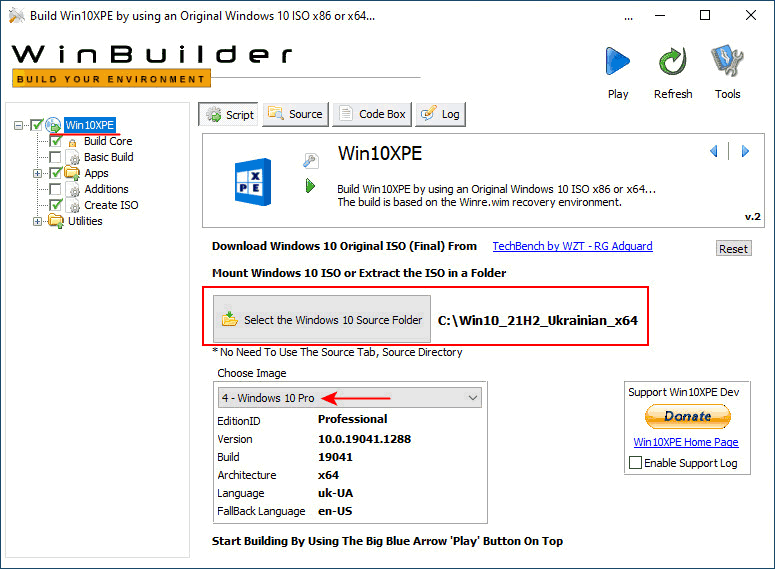
In the Win10XPE section click “Select the Windows 10 Source Folder” and give the path to the folder containing the extracted distribution of Windows 10, in the root directory of drive C. You can also choose the Windows edition from which WinPE will be created, but the default choice is its optimal edition, Windows 10 Pro.
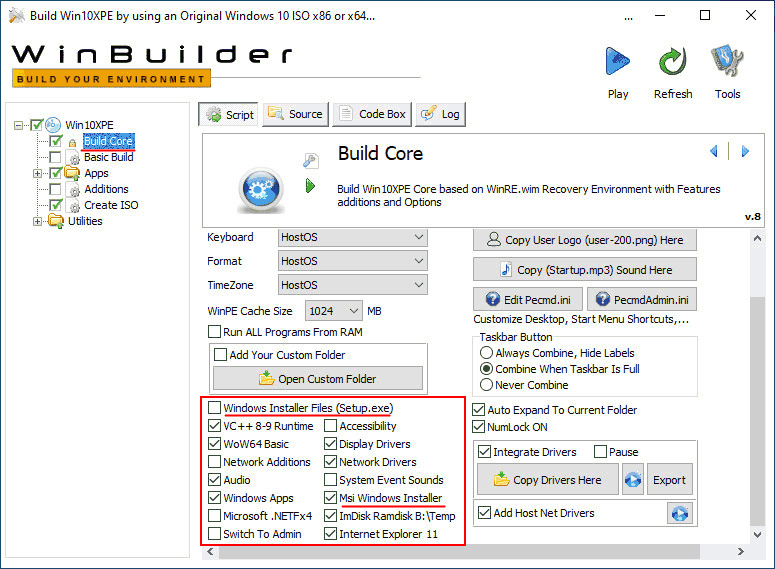
The Build Core section is the most important. This is where WinPE core is configured – all system components and drivers to be included into the build. The core configuration will determine performance of your WinPE build.
At the bottom of the left column, check the boxes for system components to include. There are software platforms that might be very necessary for operation of certain Windows tools. Enable these components by checking the corresponding box.
If the elements listed here are of no special value for the operation of your software, you may leave everything at default settings. Pay attention to Msi Windows Installer – the component determining ability of programs to be installed in the WinPE environment, and to Windows Installer Files (Setup.exe) – it determines integration of Windows installation process into WinPE.
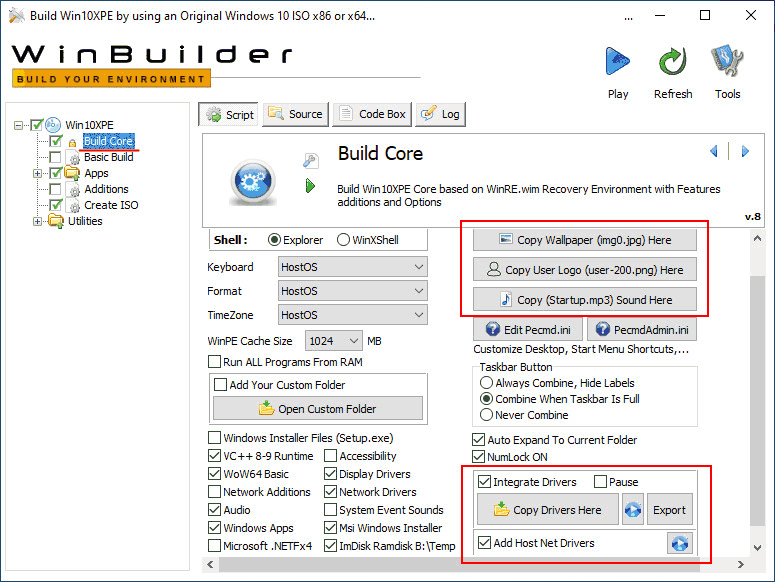
In the right column, you can customize your WinPE build and add your desktop background, startup sound and user logo. When you click on these options, a folder containing corresponding files will open. You have to replace the original files with your own alternatives, but with the same name.
A more important aspect is integration of drivers into WinPE. If the computer where this build will run needs drivers for particular devices, check the box for the option Integrate Drivers, and add these drivers to the folder which opens when you click on Copy Drivers Here.
If necessary, drivers can be extracted from the current copy of Windows by clicking on the Export button.
In the Apps section you’ll be offered some programs that can be included into this WinPE build. All of them are freeware. Check the boxes for the tools you need. The tools can be configured – language, functions, WinPE desktop shortcuts etc.
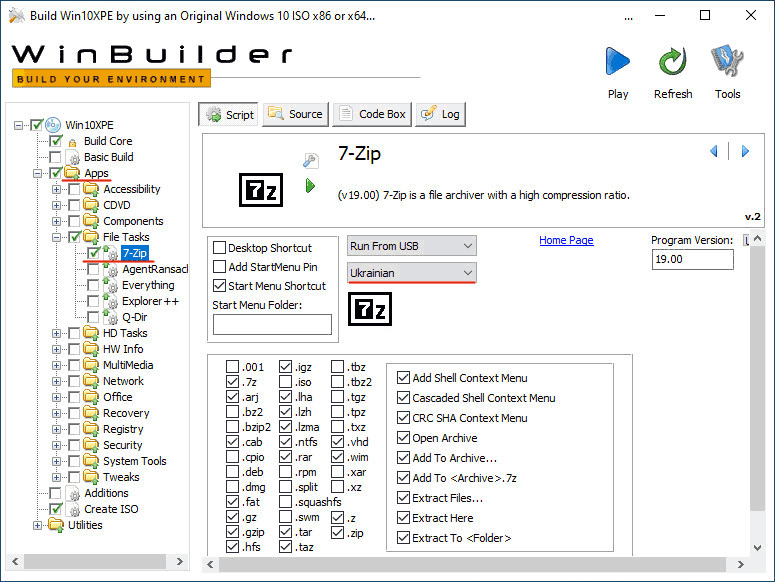
One of the most important aspects is how to include your own portable apps into the WinPE build? They can be added later to your flash drive or external drive.
Alternatively, you can include them into the ISO image from the start and put folders of such programs into the root directory of the image. Then you’ll be able to run them in WinPE from the root folder of any bootable media.
Do the same to installers of the software for which you don’t have portable versions. Collect all installers into a folder and add it to the root directory of the image.
To do it, find the section Create ISO and check the box for the option Include Files In ISO Root. Click Open ISO Root Folders.
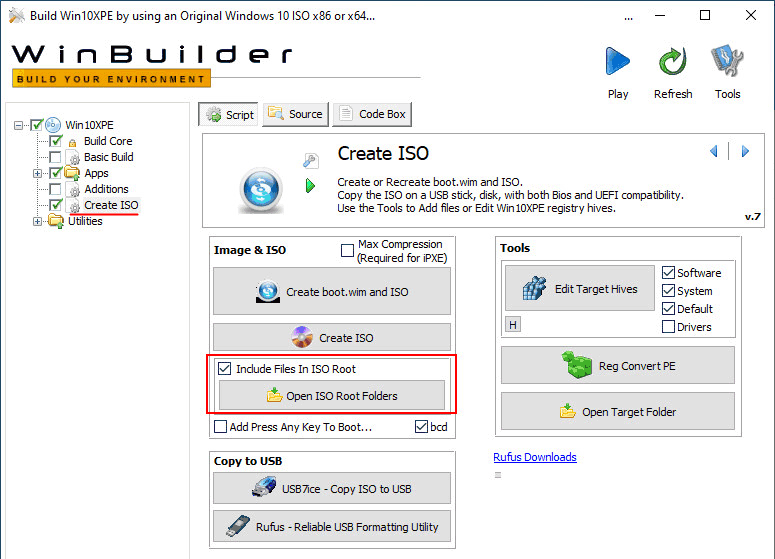
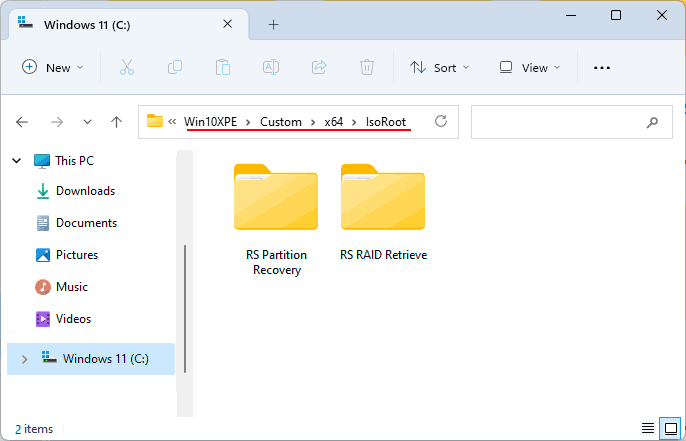
Copy the folders of portable software and installer folders to the directory that opens. In our case, this is a data recovery tool, RS Partition Recovery, and its counterpart supporting RAID systems — RS RAID Retrieve. You can get their portable versions by copying the folders with installed programs from drive C, by this path:
C:\Program Files\Recovery Software
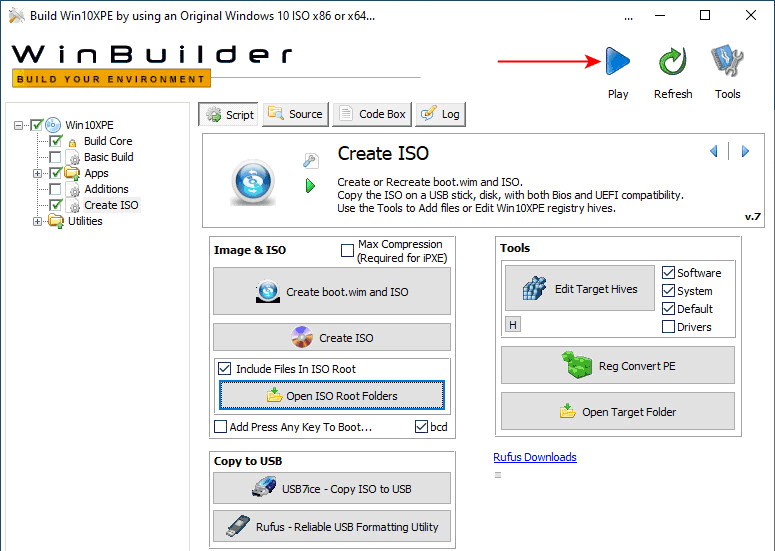
Now that you have finished configuring this WinPE build, create its ISO image. Click on the Play button.
If you encounter this error – “Some required programs are missing in the Tools Folder” – in the process of creating the image, make sure that the file GWT.exe exists in the folder \Win10XPE\Projects\Tools\. Usually, it gets blocked by antivirus software like Windows Defender.
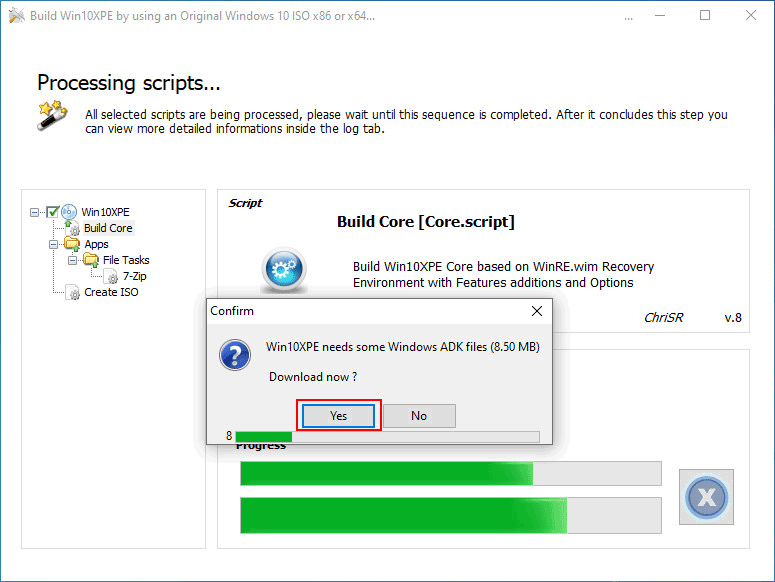
In the course of creating the image, Win10XPE will ask you to add Windows ADK files – it’s a Microsoft tool used to create WinPE. Click Yes.
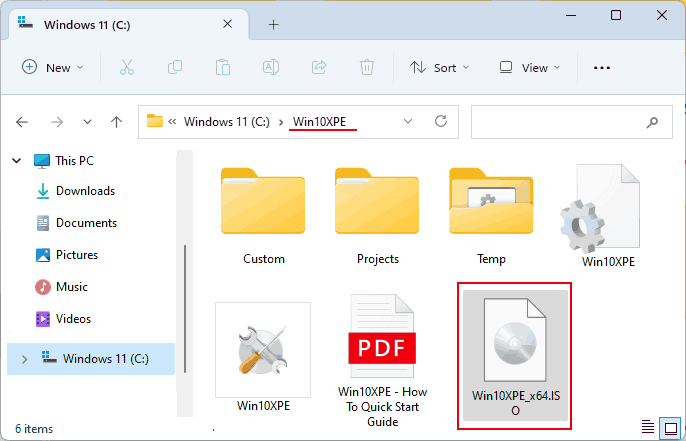
In the end, you will find the ISO image in the folder Win10XPE, in the root directory of drive С.
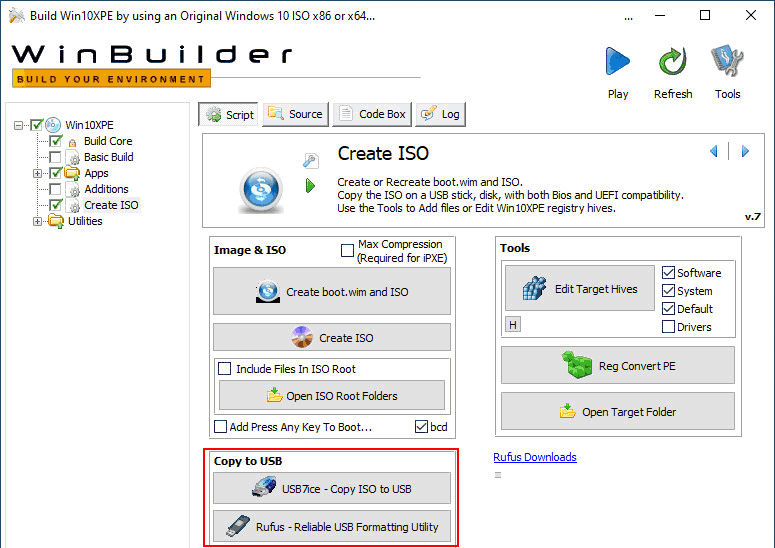
Finally, let’s have a look at some other opportunities provided by Win10XPE. The builder includes portable utilities for creating a bootable flash drive. In the Create ISO section, you can run either USB7ice or Rufus, and use them to write the WinPE ISO image to a flash drive.
As a result, you’ll get a WinPE environment with Windows 10 functionality suited to various tasks, and including the software tools you need.
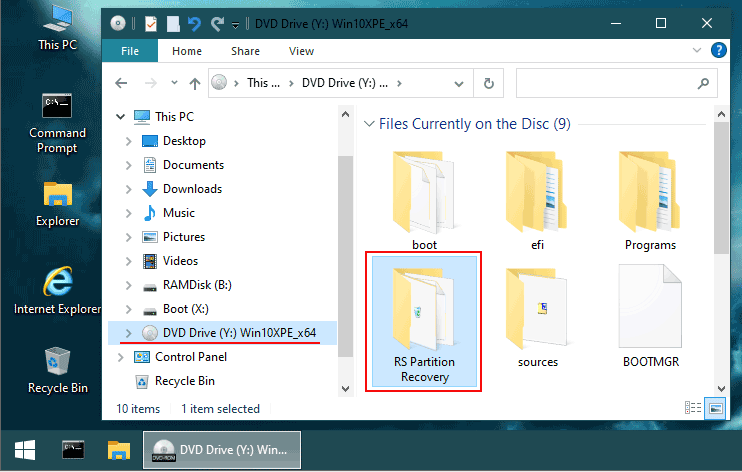
Within the WinPE environment, programs are installed in the same way as in Windows – run the installer and follow the wizard directions.


