RAID Controller Failure – this issue can have serious consequences. You may lose a significant amount of data stored in RAID array-based storage systems. What should you do in such a case? How can you avoid data loss? How can you recover data from RAID array?
Contents
RAID Array Failure
When encountering problems with a RAID array, the first step is to ensure that the RAID controller is indeed the component that has failed. A hardware RAID can fail due to a controller malfunction or complete failure, as well as issues with the hard drives.
If the response time from a hard drive exceeds the expected duration, the RAID controller marks the drive as faulty and excludes it from the array. A fault-tolerant RAID becomes degraded, while a non-fault-tolerant RAID becomes non-operational or failed.
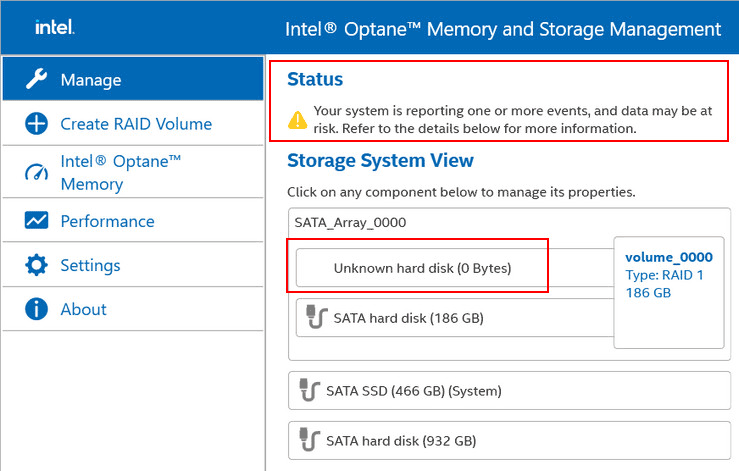
In such cases, it is necessary to identify which drive caused the issue. To do this, check the array status in its management software:
- in the computer’s BIOS,
- in specialized programs from motherboard chipset manufacturers like Intel Optane Memory and Storage Management and AMD RAIDXpert2;
- in specialized programs from RAID controller manufacturers.
Next, check the drive connections. Diagnose the problematic drive using software like Victoria HDD/SSD or Hard Disk Sentinel. You may also need to perform a surface test on the drive. If the drive is faulty, it needs to be replaced.
Non-fault-tolerant arrays (RAID 0) are recreated upon drive replacement, resulting in data loss. Fault-tolerant arrays need to be rebuilt after replacing a drive, if this does not happen automatically. However, before performing this operation, ensure data safety in case the degraded RAID recovery fails.
Important: If the recovery fails, the degraded RAID will become failed, leading to total data loss. The RAID will then need to be recreated.
If data copying is not possible, use data recovery software that supports non-operational RAID arrays.
Note: If the RAID array was used for the operating system and it fails to boot due to RAID issues, use an emergency LiveDisk (LiveCD) on a bootable media.
RAID recovery is performed using the RAID’s management software. An example of such recovery is discussed in the article “How to Create RAID in BIOS of an Asus Motherboard on Intel Platform”.
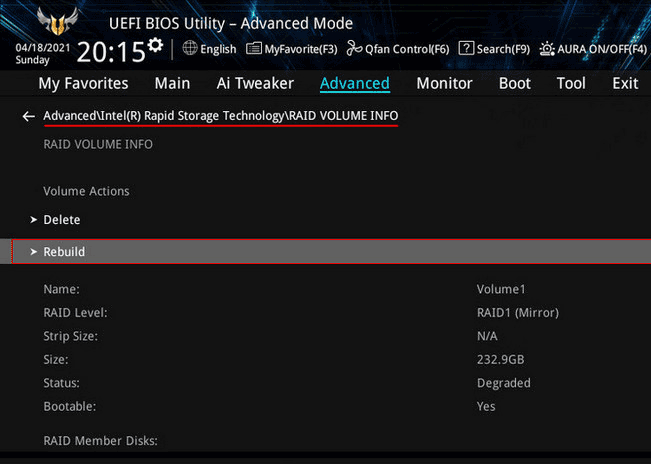
If it is not possible to recover a fault-tolerant hardware RAID, it will need to be recreated, resulting in data loss.
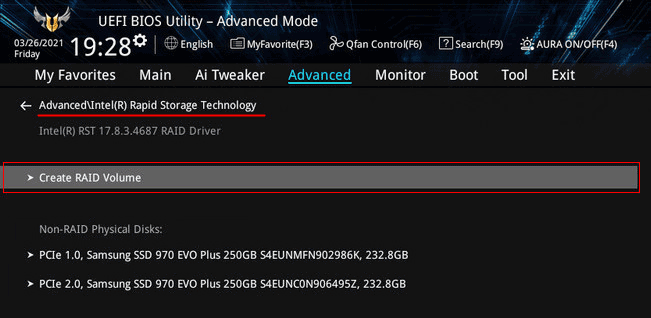
For more details on RAID array failures, refer to the article “Causes of RAID Array Failures”.
RAID Controller Malfunction
If the RAID array’s drives are fine, the cause of the failure might be a RAID controller malfunction. In this case, the first step is to recover the array’s data using data recovery software that supports non-operational RAID arrays.
Then, attempt to recover the RAID using its management software. If recovery is not possible, the array needs to be recreated.
In some cases, resolving a RAID controller malfunction may require updating the BIOS firmware of the motherboard or the firmware of the external RAID controller.
RAID Controller Failure
If the RAID controller has completely failed, it needs to be replaced. Preferably with the same model or at least from the same manufacturer. If the integrated RAID controller on the motherboard fails, consider purchasing an external RAID controller.
An alternative to hardware RAID is software RAID. This can be created in Windows using the Storage Spaces feature or in Linux using the mdadm utility.
If the RAID controller fails, the first priority is to ensure data recovery. Start by using data recovery software that supports non-operational RAID arrays.
Next, replace the RAID controller. Connect the hard drives to the new external controller in the same order as they were previously connected.
Note: Avoid initializing the RAID. If necessary, use only Quick Init.
If the RAID does not resume operation automatically, attempt to recover it using the array’s management software. As a last resort, recreate the array.
RAID Array Data Recovery
Copying data or recovering it if copying is not possible is the first step in addressing any RAID issues. As mentioned, recovering a RAID may result in data loss. Recreating a RAID guarantees data loss.
You may not encounter these operations when replacing a RAID controller. However, it is crucial to prevent data loss. Array metadata may be tied to a specific RAID controller, and a new controller may not work with the old array. Recovery or recreation will be necessary.
If copying data from the damaged RAID array is possible, perform the copying. For Windows, use backup tools, third-party programs like AOMEI Backupper, or the built-in system archiving feature.
If copying is not possible, use specialized data recovery software. Such software should support RAID arrays, including non-operational ones. One such program is RS RAID Retrieve:
- Specializes in data recovery from RAID arrays;
- Supports multiple file systems;
- Includes a feature to create device images for data recovery, including deleted data.
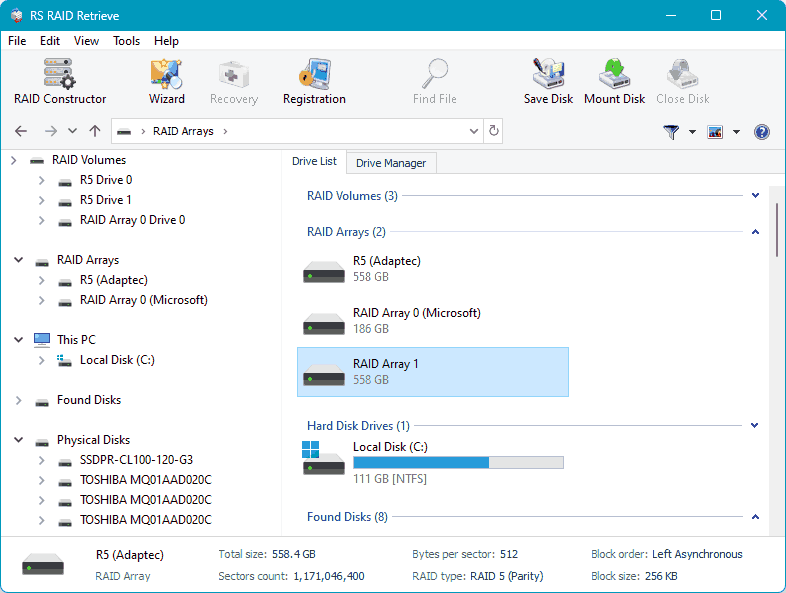
Most importantly, RS RAID Retrieve recovers data from non-operational RAID arrays, even if the RAID controllers are unavailable. The program reconstructs the array instead of the controller. The array’s integrity is not mandatory; some drives may be missing.
RS RAID Retrieve recovers RAID arrays automatically by reading array information from its drives. If necessary, the array can be reconstructed manually by specifying the RAID configuration, number of drives, their order, etc.
How to recover data using this program? Disconnect the drives from the RAID controller (if external) and connect them directly to the computer’s motherboard.
Download and install the program.

Data recovery from damaged RAID arrays
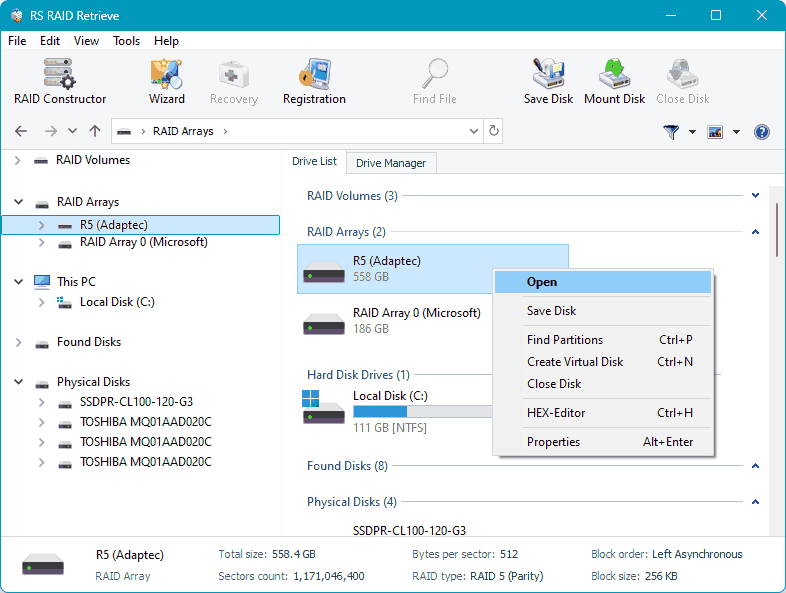
Upon starting the program, check the “RAID Arrays” section, where your RAID should be automatically detected. Click on it.
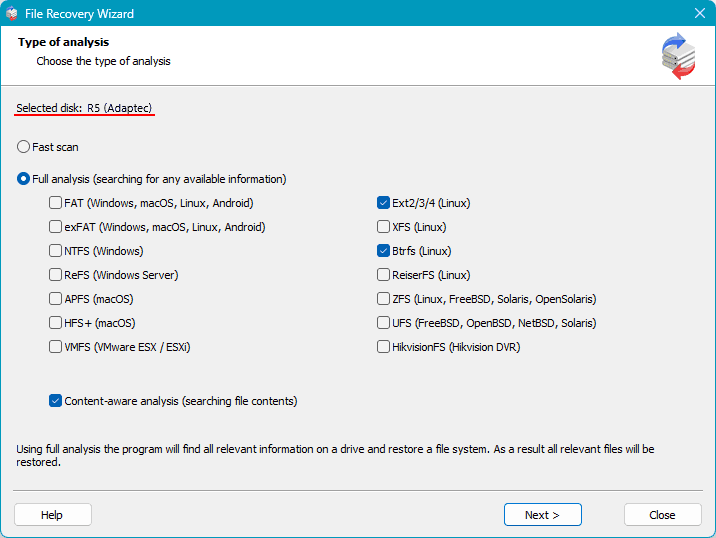
The program offers two types of data recovery scans. A quick scan for recently deleted data and existing data extraction, which is our case.
The other type is a full analysis, which is longer and more effective. It is used in more complex data deletion cases. Use it if the quick scan does not help.
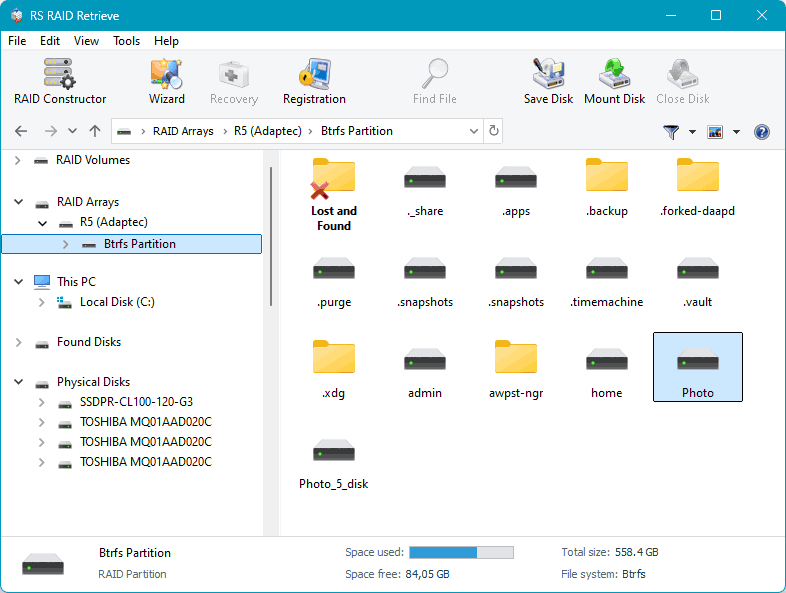
After the scan, you will see your data. Deleted data is marked with a cross. Select the data you want to recover and click the “Recover” button.
Next, choose the method for saving the recovered data and specify the path for saving the data.
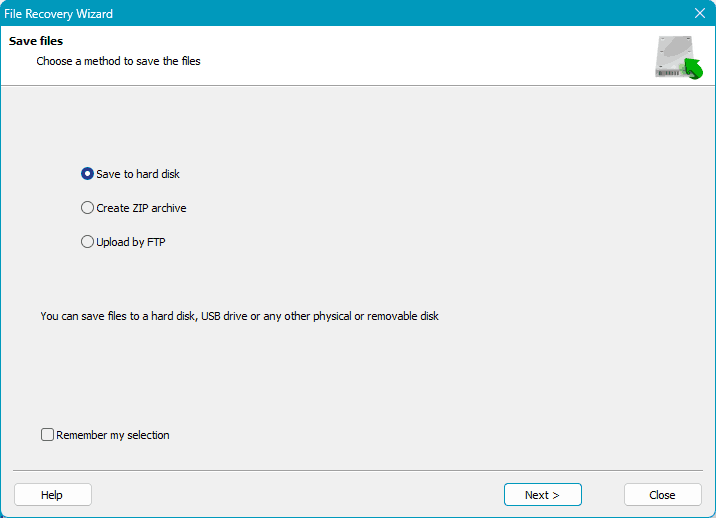
The recovered data will be used in case of data loss during RAID array recovery attempts.
If there are issues with automatic RAID array detection, manually adjust the detection by specifying the array parameters. Launch the RAID constructor.
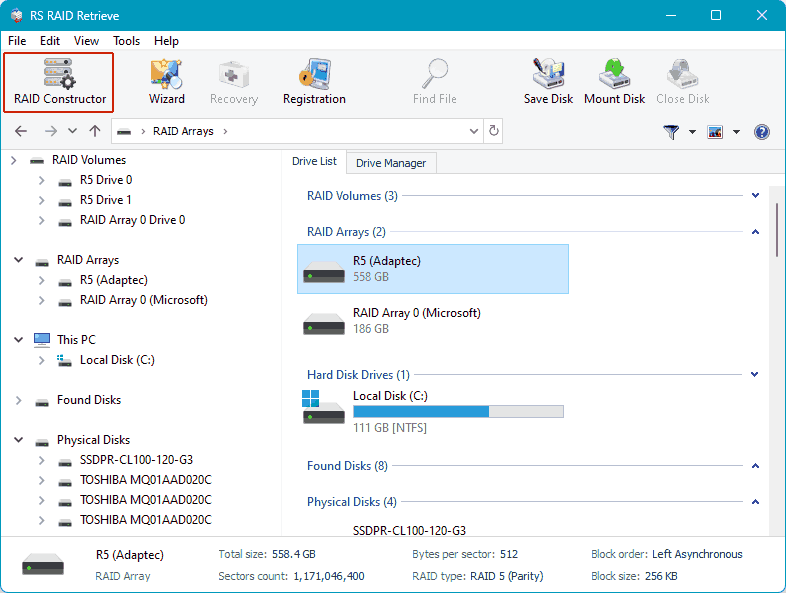
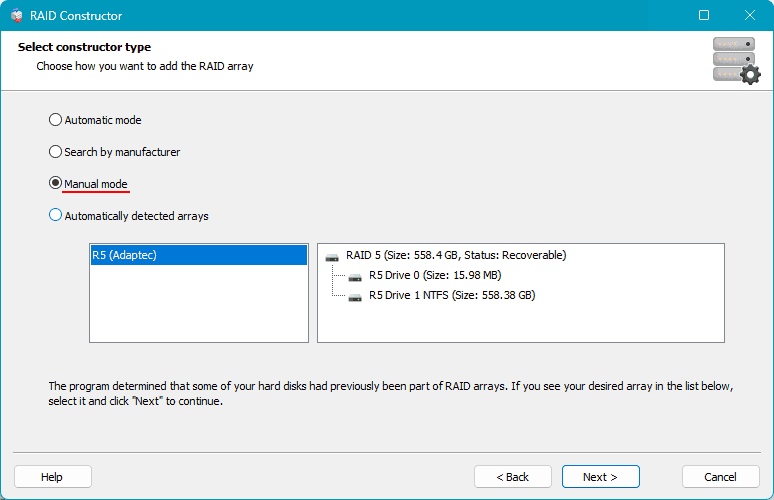
You can choose “Search by Manufacturer” and specify the RAID controller manufacturer. Alternatively, choose “Manual Creation” and enter the array data.
This data includes the RAID configuration, adding its drives, specifying their order, and other details. Enter the information and click “Add”.
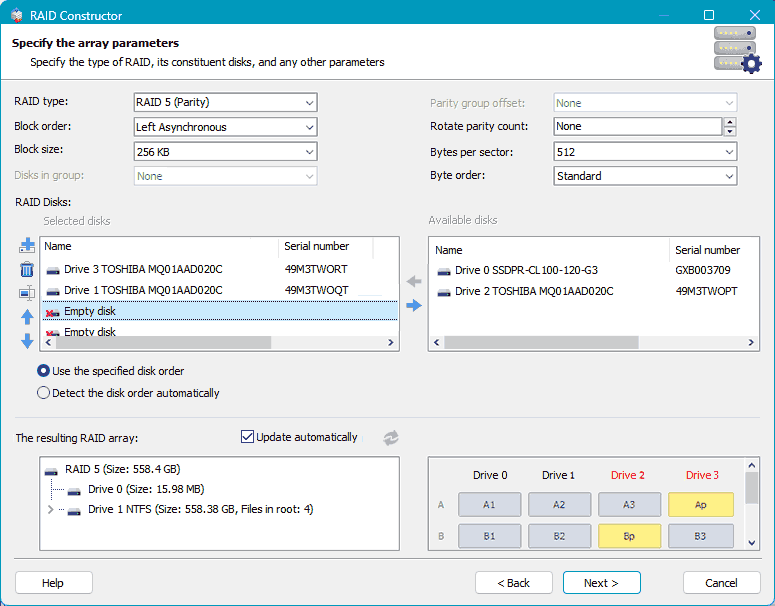
The array will now appear among other data recovery search areas. Select it and follow the same steps as described above for automatic RAID detection.
