Windows may start to malfunction, crash, and display errors, potentially leading to the loss of important system settings, programs, or files on the C drive. In the event of a serious Windows crash, it may even fail to boot altogether.
To avoid all these issues, it is necessary to periodically back up the operating system in its working state. This way, in case of problems, the system can be restored to this working state. There are various tools available for backing up Windows, one of which is its built-in archiving function. Let’s explore how it works.
Contents
- What is Windows Archiving
- Creating a One-Time Windows Backup
- Scheduled Automatic Windows Backup
- Restoring Windows
- How to Restore Files from a Windows Backup
- How to Recover Files If They Are Not in the Windows Backup
What is Windows Archiving
The built-in Windows function for backup is called archiving. It has been present in the system for a long time. The implementation that was introduced in Windows 8.1 remained unchanged in Windows 10 and 11. Therefore, working with this function is identical in Windows 8.1, 10, and 11.
Archiving is, unlike Windows restore points, a full system backup. Within this function, a copy of all system partitions and all files on the C drive is created.
Backups created using the archiving function are called archives. They include Windows partition images in VHD or VHDX virtual hard disk format. These images can be mounted by Windows tools to view and extract individual data without restoring the entire operating system.
Archiving allows for creating single backups and configuring scheduled automatic backups. With the latter, we can choose to exclude or include files in the Windows backup.
Note: there are many third-party programs available for backing up Windows, each with its own advantages. The advantage of Windows archiving is significant: the recovery mechanism from the archive is present in the Windows recovery environment. This environment launches automatically in case of system issues, including when Windows fails to boot.
To use Windows archiving, a non-system (different from C) logical disk is required to store the archives. This can be a partition on an internal or external hard drive with sufficient capacity. A network drive can also be used to store archives.
Let’s look at how the archiving function works: how to back up Windows and how to restore the system and individual files.
This function is located in the Windows Control Panel. It can be accessed using the system search.
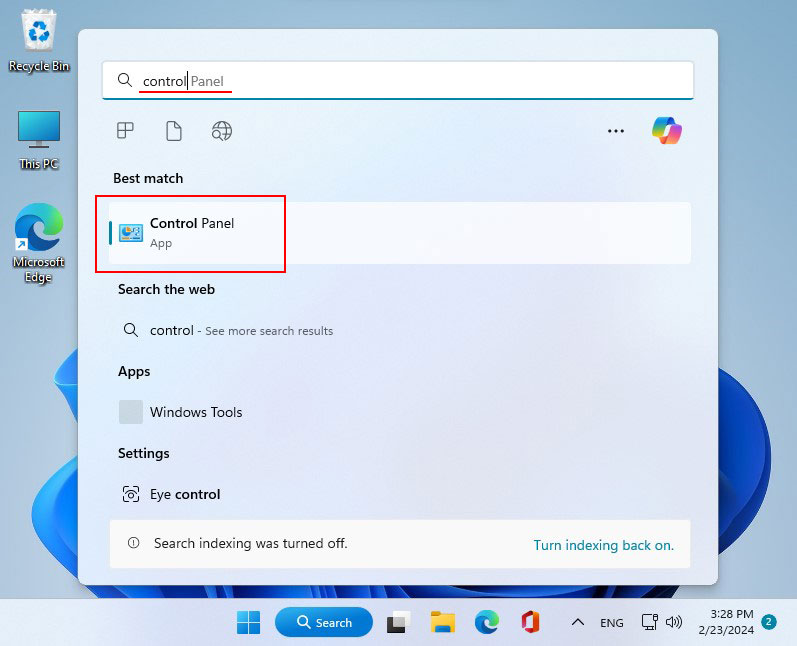
In the Control Panel, type the initial letters of the archiving function section, “Backup and Restore.”
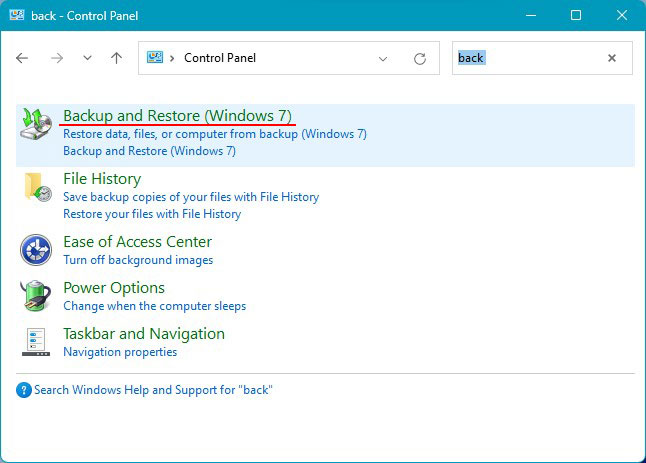
Create either single backups or configure scheduled automatic backups.
Creating a One-Time Windows Backup
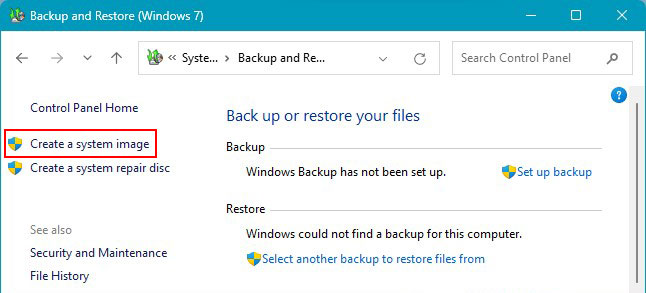
One-time backups can be created manually, periodically updating the state of Windows. To create a Windows backup, select “Create a system image” in the archiving section.
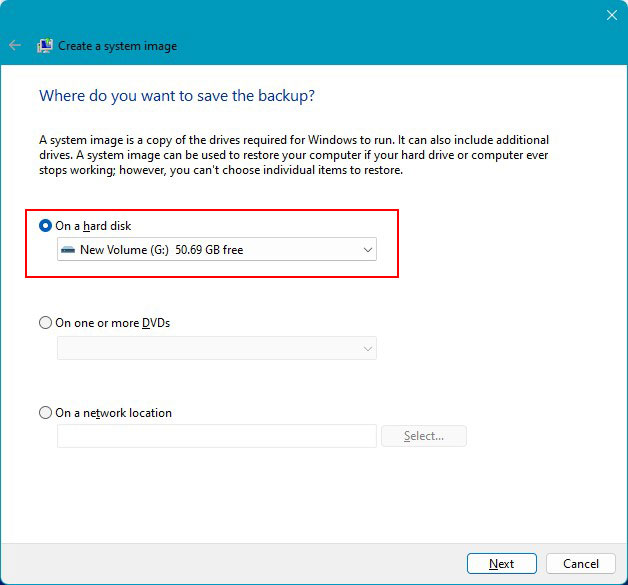
Specify the storage location for the Windows archive.
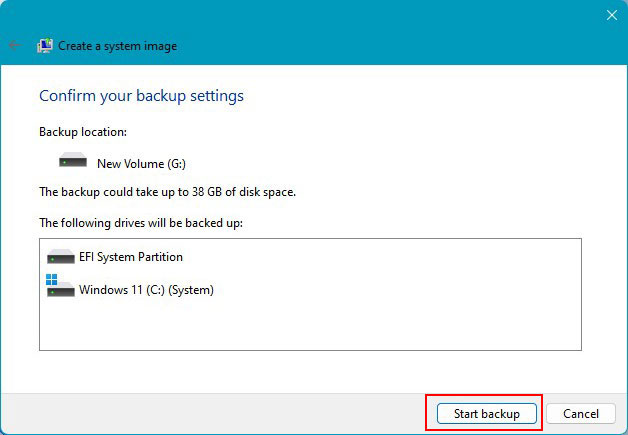
Click “Archiving.”
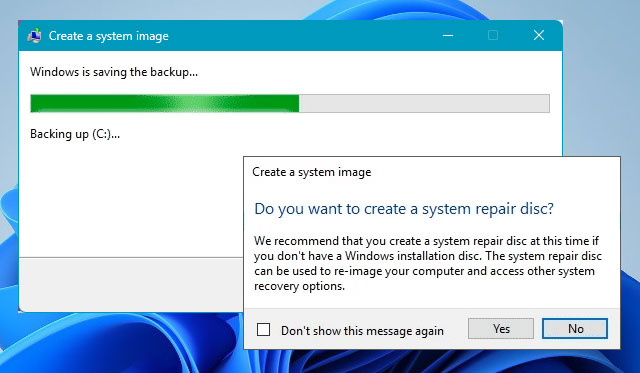
Wait for the archive creation process to complete. Upon completion, you may be prompted to create a recovery disk, decline this option. The archive creation is now complete.
In the future, when updating the state of the Windows backup is necessary, create a new archive in the same manner. When selecting the same storage disk, the new archive will overwrite the old one. Choosing a different storage disk will create a separate Windows archive.
Scheduled Automatic Windows Backup
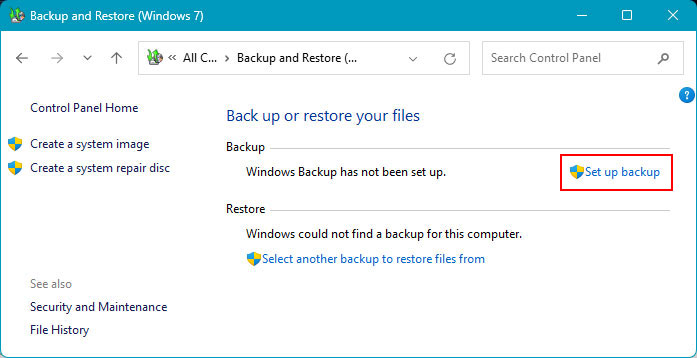
You can set up automatic creation of Windows archives using a configured scheduler. In the archiving section, select “Set up backup.”
Specify the storage location.
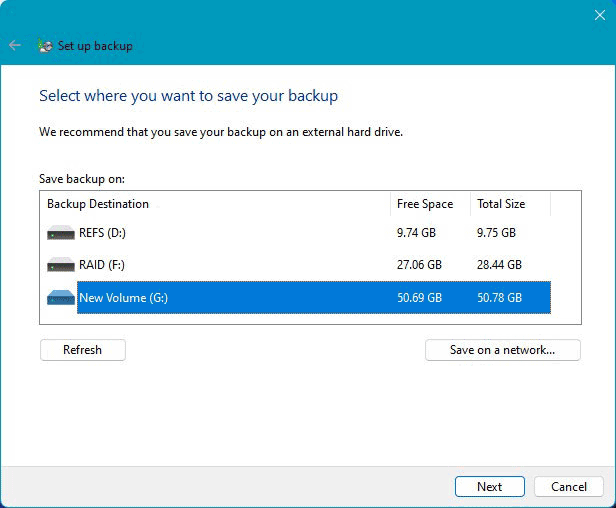
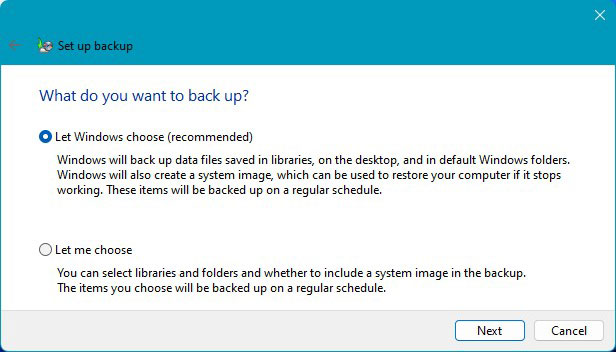
You will be presented with two options for automatic backup:
- “Let Windows choose” – includes all contents of the C drive;
- “Let me choose” – allows you to exclude folders and files on the C drive and include folders and files on other computer drives. Excluded data will not be overwritten during Windows restoration, while included data will be overwritten.
Choose an option.
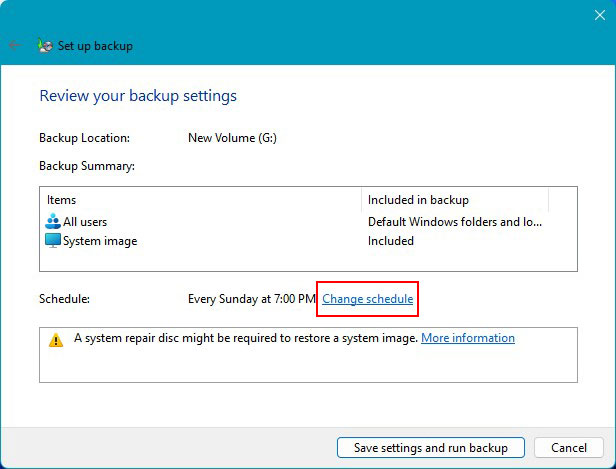
Click “Change schedule.”
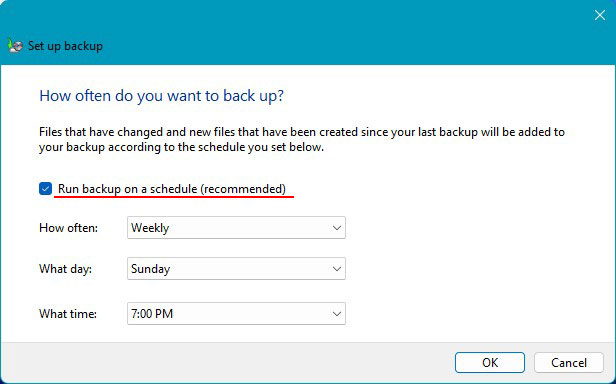
Specify how often the archive should be updated – monthly, weekly, daily. Choose the day and time.
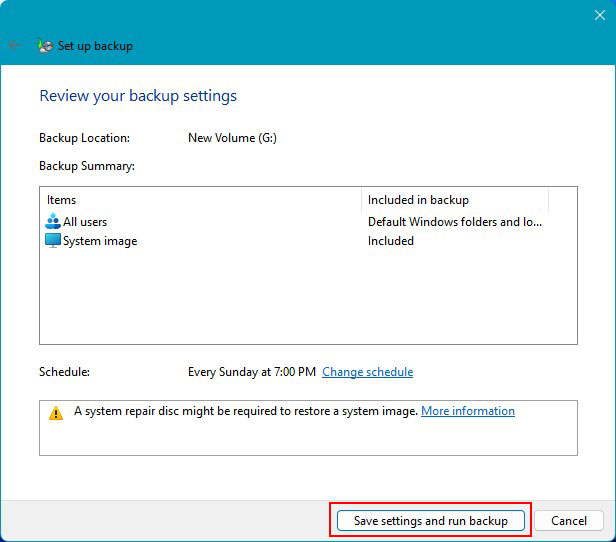
Click “Save settings and run archiving.”
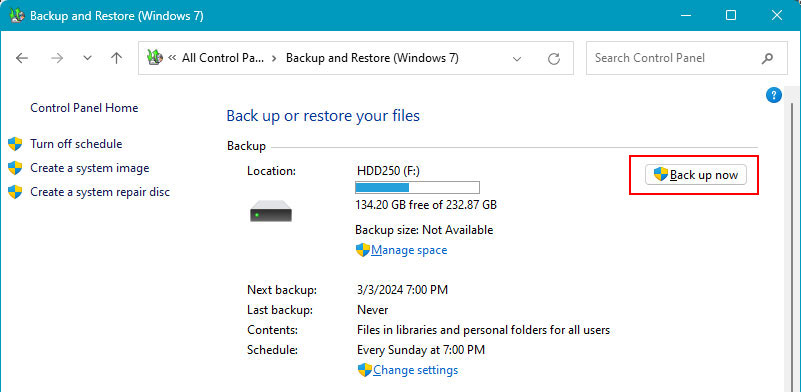
Background archiving will start. In the future, if you need to update the state of the Windows backup outside the scheduler’s operation, you can do so manually. In the archiving section, click “Archive data now.”
Restoring Windows
How to restore a Windows backup created using the built-in archiving function? This requires the Windows recovery environment. Usually, it launches automatically in case of issues with the operating system.
You can intentionally launch it in the “Settings” app. Follow this path:
- In Windows 8.1, go to “Update & Recovery → Recovery“;
- In Windows 10, go to “Update & Security → Recovery“;
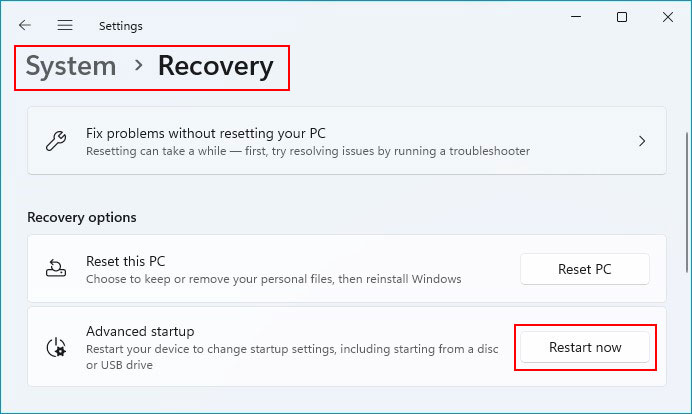
- In Windows 11, go to “System → Recovery“.
In the additional startup options block, click “Restart now.”
Confirm the computer restart.
In complex Windows failure cases, the Windows recovery environment may be damaged. In such cases, you can launch this environment from a Windows installation media. Boot the computer from it and run the installer.
Click “System Restore.”
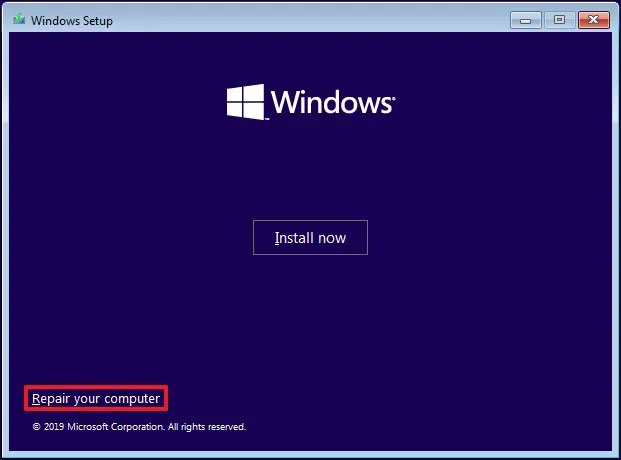
Using any of these methods, you will enter the Windows recovery environment. Choose “Find and fix problems,” then “Restore system image.”
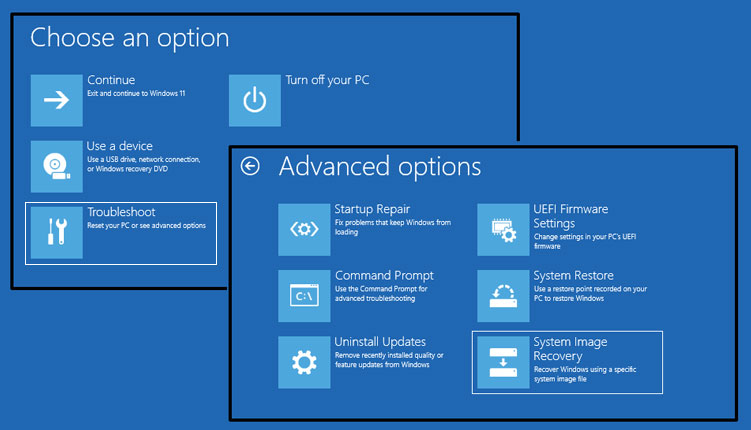
If you do not see the “Restore system image” option, select “See more recovery options” and look for this option among the additional parameters.
The Windows backup restoration will start. If multiple archives were created and the desired one is not selected by default, choose “Select a system image” and specify the path to the desired archive.
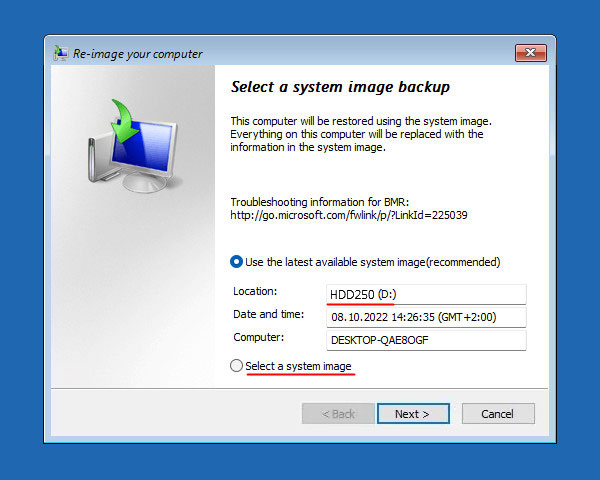
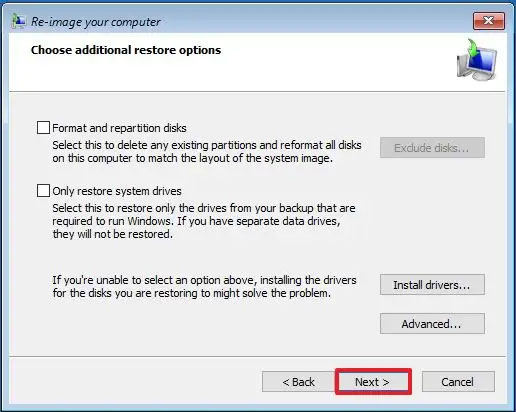
Proceed.
Click “Finish,” confirm the restoration.
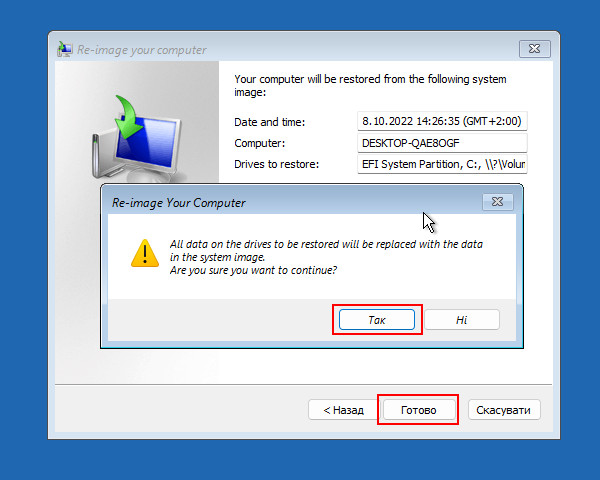
After the restoration is complete, restart the computer. Windows has been restored.
How to Restore Files from a Windows Backup
The Windows archiving function allows for extracting individual files from a Windows backup.
If you need to restore specific personal data without rolling back the entire operating system, you can simply retrieve them from the Windows archive. Moreover, you can attempt to restore the functionality of programs or even system functions by replacing damaged files with copies from the archive.
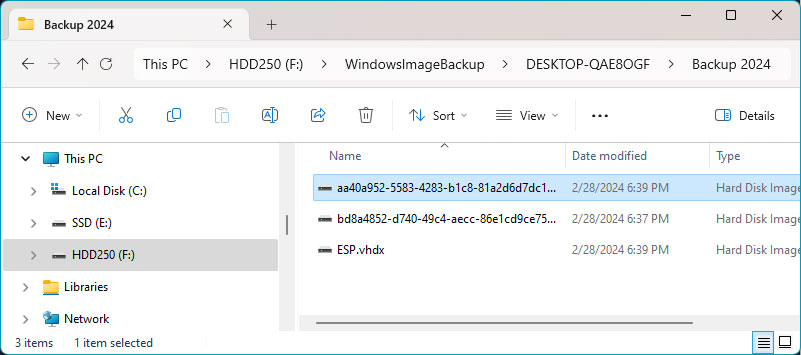
To extract individual files, open the storage disk of the Windows archive. Open the archive contents – the “WindowslmageBackup” folders, then open the subfolders with the computer name and backup date.
You will need VHD or VHDX files here. Based on their size, double-click the largest file, which will be the Windows C drive image.
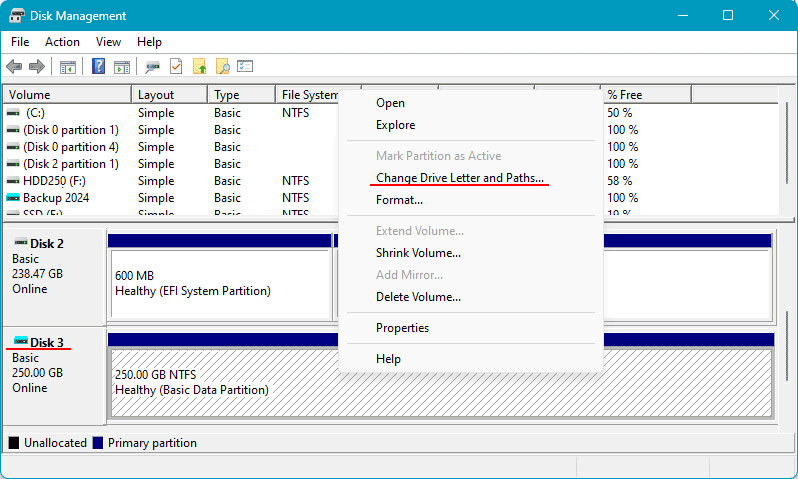
Next, launch Disk Management, which can be done using the system search or by pressing Win+X keys to access the menu. The mounted virtual disk with the Windows image will be displayed in Disk Management. Assign a drive letter to it. Right-click on the partition and choose the “Change Drive Letter” option from the context menu.
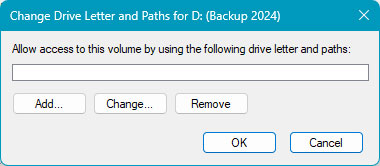
Click “Add” and specify the letter.
After this, the Windows C drive from the Windows backup will be accessible in File Explorer, allowing you to copy the necessary folders and files.
If scheduled automatic Windows backups are configured, there is another way to extract files from the backup. However, this method only applies to user data – files in user profile folders, in the “AppData” folder, and in folders on non-system partitions if they are included in the backup.
This feature is available in the archiving section of the Control Panel. Run the user file recovery function.
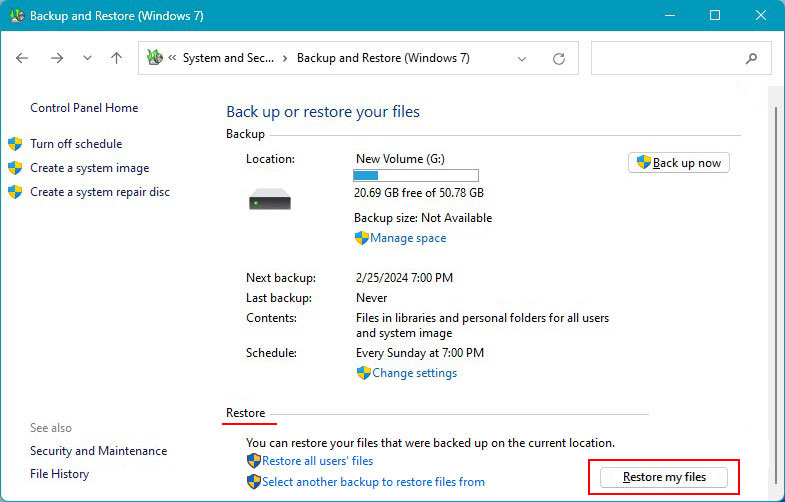
Here, you can use the search or browse window to add the necessary folders and files from the backup.
Specify where you want to restore the data – in their original location or in another location specified by you. Click “Restore.”
How to Recover Files If They Are Not in the Windows Backup
What should you do if the required data is not included in the backup, or if this data is sealed in outdated versions? What if you cannot restore the backup itself, for example, due to its corruption or destruction?
In such cases, you need to use data recovery programs. Some of the best programs for this purpose are RS Partition Recovery for SSD/HDD and RS RAID Retrieve for RAID arrays.

