System Backup is one of the crucial aspects of working with a computer. It ensures the restoration of the operating system to a functional state after a failure, virus attack, or unwanted user interference. Windows 11 has two built-in backup mechanisms, one of which is Windows 11 Restore Points. What is this mechanism? How do you create a restore point? How do you load a restore point and roll back the system to a working state? How do you do this from the Windows 11 recovery environment? We will address these and other questions below.

Contents
- Windows 11 Restore Point: What is this Backup Mechanism?
- Enabling System Protection in Windows 11
- Creating a Windows 11 Restore Point
- Restoring Windows 11
- Canceling a Restore Point Rollback
- Restoring Windows 11 in the Recovery Environment
- Viewing and Deleting Windows 11 Restore Points
- Restoring Personal Files
Windows 11 Restore Point: What is this Backup Mechanism?
A backup, or the process of creating a system snapshot, allows you to capture the operating system’s current state when it is functioning correctly. This snapshot can then be used to restore the system to a working state in case of a failure or other issues. Windows 11 inherits the classic functionality from previous versions, including two built-in backup functions.
The first function is Windows Backup. This is a comprehensive system backup that includes all areas of the operating system: the boot partition and the entire system partition, including user data stored in account folders.
The second function is system protection, which involves creating restore points. These provide a backup of only the critical areas necessary for the operating system’s functionality. This includes parts of the C drive and files related to Windows and installed programs. Windows 11 restore points do not back up the boot partition or user data on the C drive, such as files in the “Downloads,” “Documents,” “Videos,” “Music,” and similar folders.
Unlike a full Windows backup, restore points do not require a separate storage medium—no need for a separate hard drive partition or an entirely separate hard drive. Restore point snapshots are stored on the C drive among Windows data. This makes the backup mechanism vulnerable, as snapshots can be damaged in case of a failure or virus attack.
However, the fact that restore points do not cover the entire Windows area and are stored on the C drive does not diminish their value as a backup mechanism. Restore points are a must-have feature in the operating system. While they may be less reliable than a full Windows backup, they offer a significant advantage: speed.
Creating a system backup snapshot is quick because it is based on Windows’ shadow copy technology. Restoring from a snapshot is also relatively fast. In contrast, a full backup requires more time for these operations. Restore points should be considered an additional backup mechanism—simple, fast, and convenient, which can be used alongside a full backup.
Restore points are not only available for the C drive as a system backup mechanism but also for other logical partitions of the hard drive. By default, the system protection feature in Windows 11 is disabled. It needs to be enabled and configured.
Enabling System Protection in Windows 11
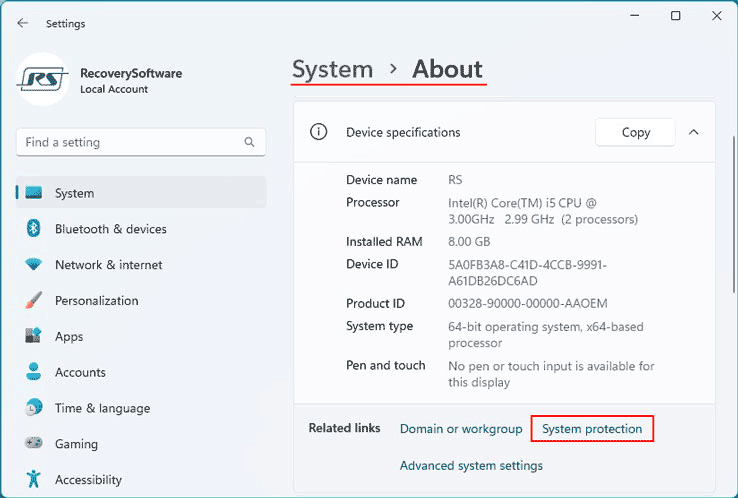
Enabling system protection and working with restore points is done through the “Settings” app. In the “System” section, go to the “About” subsection. Below the computer information, click the “System Protection” link.
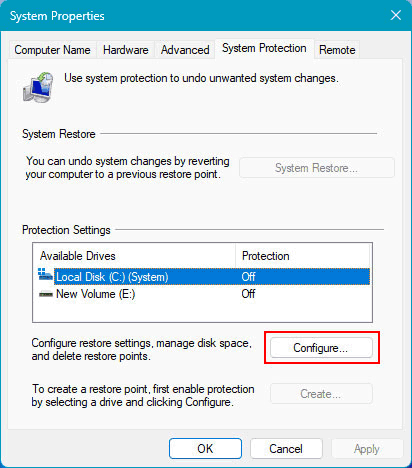
A system properties window will appear. Click on the C drive and select “Configure.”
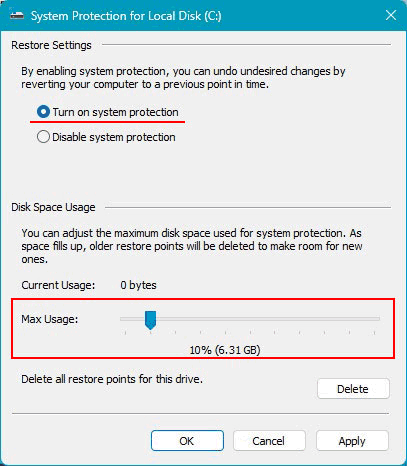
Select the “Turn on system protection” option. Pay attention to the “Max Usage” block at the bottom, which is a scale for limiting the space on the C drive for storing restore point snapshots. As new points are created, old ones will be overwritten within the allocated disk space.
If the C drive size does not exceed 100 GB, do not allocate too much space for storing snapshots, as it will clutter the C drive. An optimal range would be 7-10% of the total C drive size. If you do not adjust this option, the operating system will set a minimum of 5% by default. Then click “Apply” and “OK.”
Creating a Windows 11 Restore Point
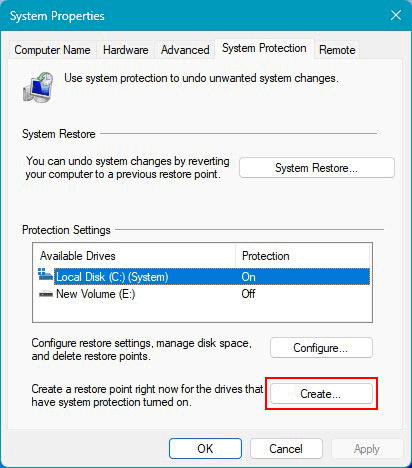
After this, return to the system properties window and create the first restore point.
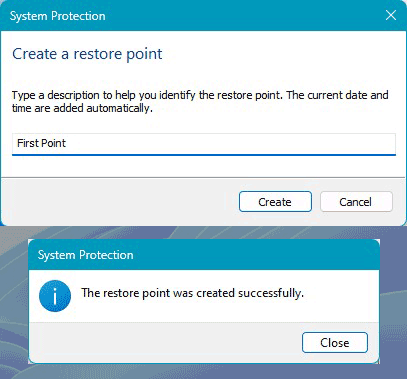
Give your restore point a name. Click “Create” and wait a bit for it to be created.
Restoring Windows 11
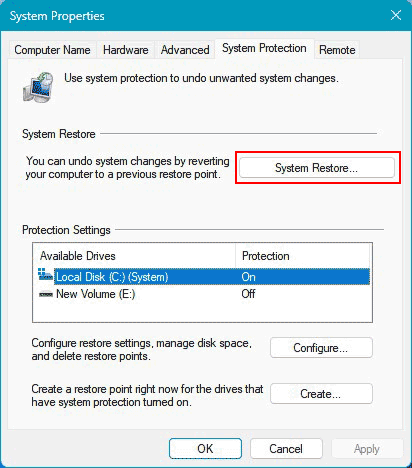
How do you load a Windows 11 restore point? This will allow you to restore Windows 11 to a previous state captured in the restore point. In the same system properties window, select “System Restore.”
The system restore wizard will launch.
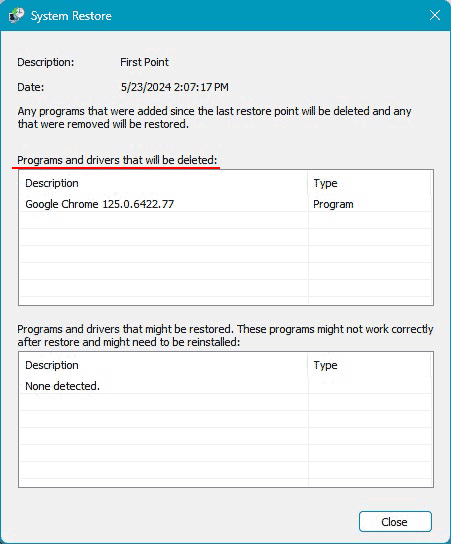
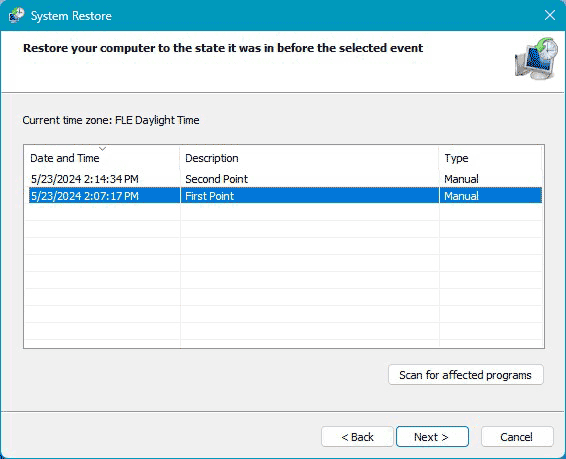
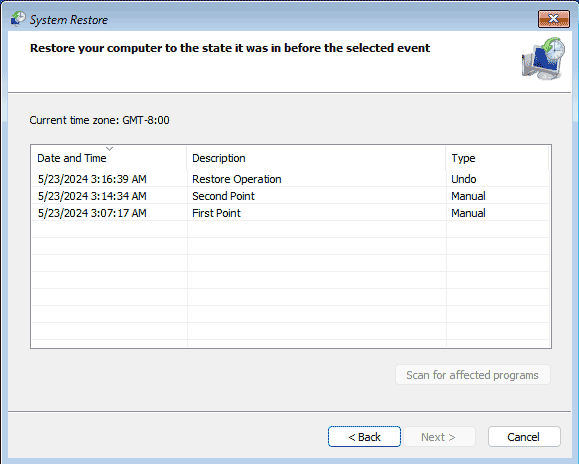
You will see all the restore points created in the system. Based on the name, date, and time, select a point. Click “Scan for affected programs.”
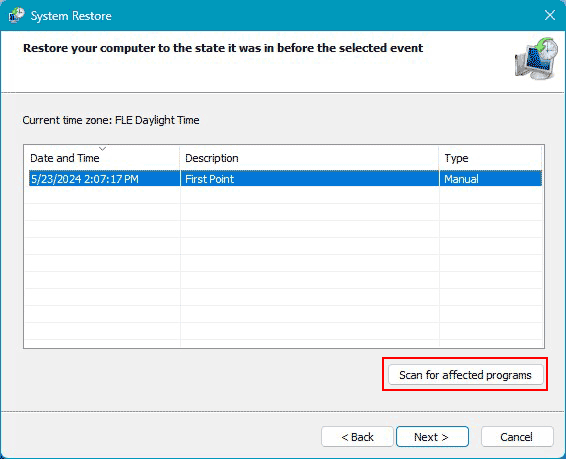
The scan for affected programs provides information about programs and drivers that will be removed or restored as a result of applying the restore point. This information is useful if any of these programs or drivers may have caused system issues or if their installation and configuration are particularly important, making it undesirable to roll back the system to a state without them. This allows you to choose the appropriate restore point from several options.
Decide on the restore point, click “Next.”
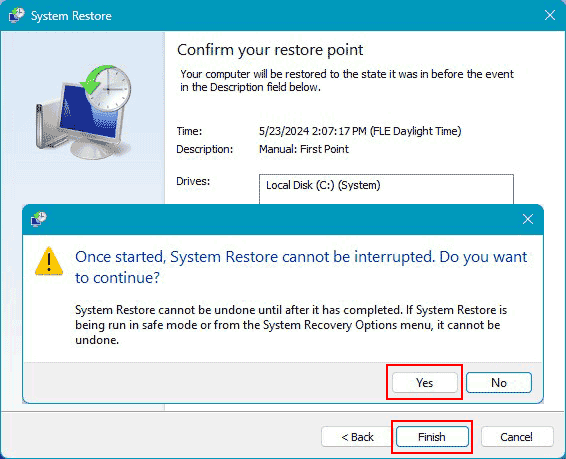
Click “Finish,” then “Yes.”
The rollback to the restore point will begin. The computer will restart, and the necessary operations will be performed.
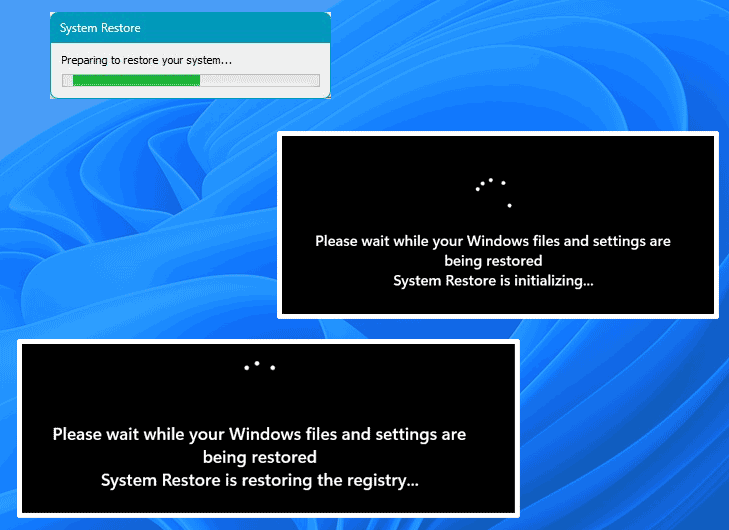
After the system starts, you will see a restoration report on the screen.
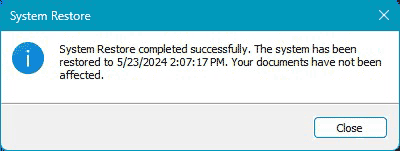
Canceling a Restore Point Rollback
Note a useful feature of restore points. Before rolling back to a point, the system automatically creates a snapshot of the current state of the operating system. If the rollback does not resolve your issues, you can return to this state. This is known as canceling the system restore. To do this, launch the system restore as described above. After performing the rollback, the system restore wizard will have an additional step at the beginning—choosing to cancel the system restore or selecting another restore point.
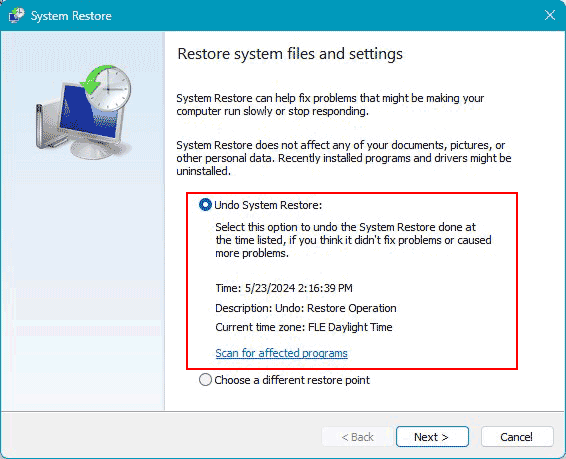
Canceling the restore will also be listed among the restore points, as it is essentially a restore point created by Windows itself.
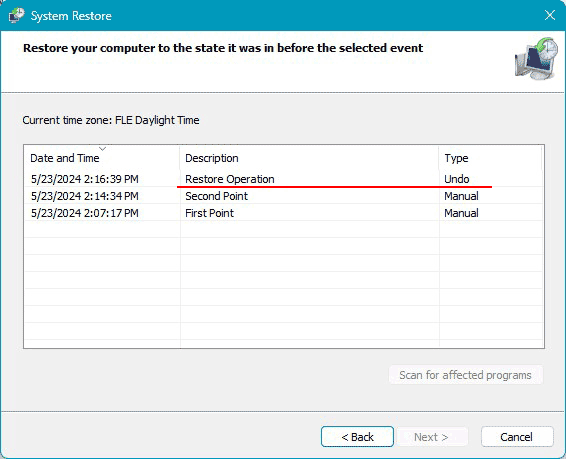
Canceling the restore works the same way as rolling back to a restore point.
Restoring Windows 11 in the Recovery Environment
What if the Windows 11 system restore fails? If there are multiple restore points, you can try others. The snapshot may be damaged, or there may be an issue with the rollback mechanism itself. In such cases, you can try performing the rollback in the Windows 11 recovery environment.
How do you access the Windows 11 recovery environment? If the operating system is working, go to the “Settings” app in the “System” section and enter the “Recovery” subsection. In the “Advanced startup” block, select “Restart now.”
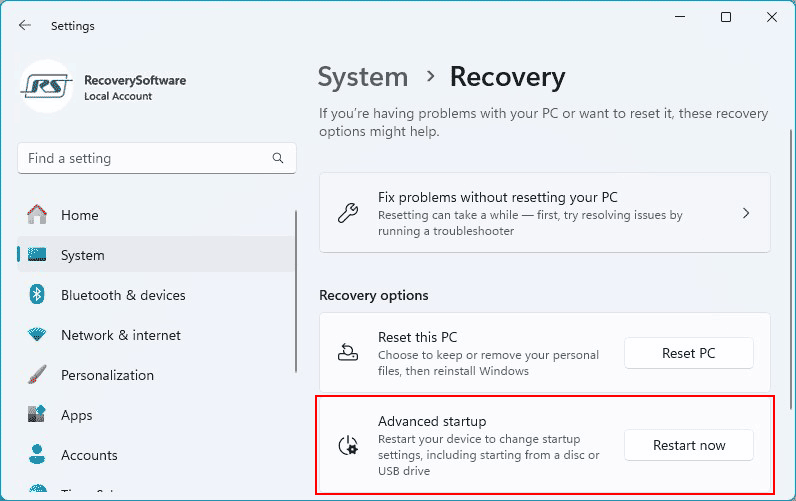
Confirm again by clicking “Restart now.”
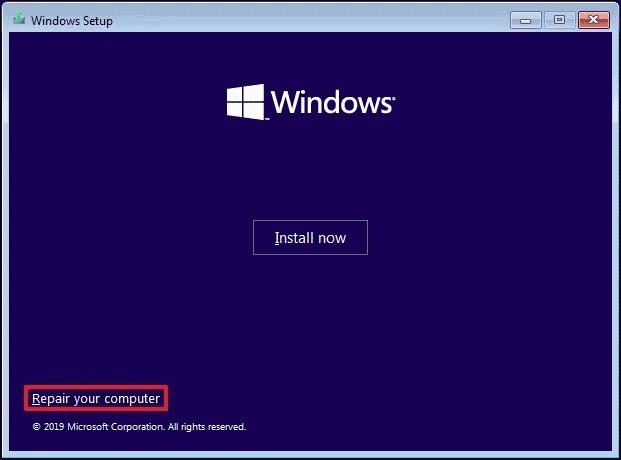
If the operating system is not working, the recovery environment usually starts automatically. If it is also damaged, you can launch it from a Windows 11 installation media (or Windows 10 or 8.1 media). Boot the computer from the Windows installation flash drive. And select “Repair your computer.”
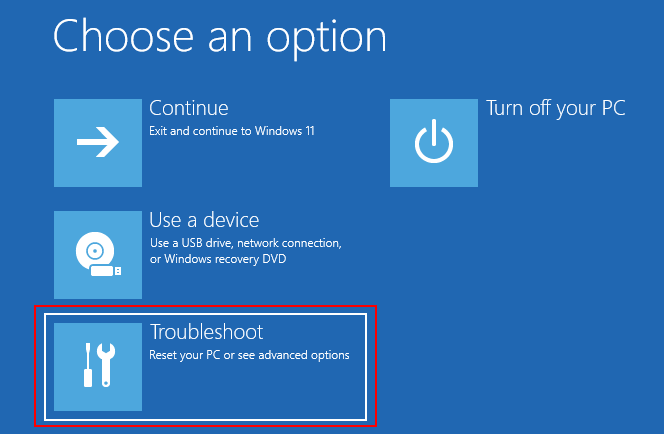
You will enter the recovery environment. Choose “Troubleshoot.”
Next, select “System Restore.”
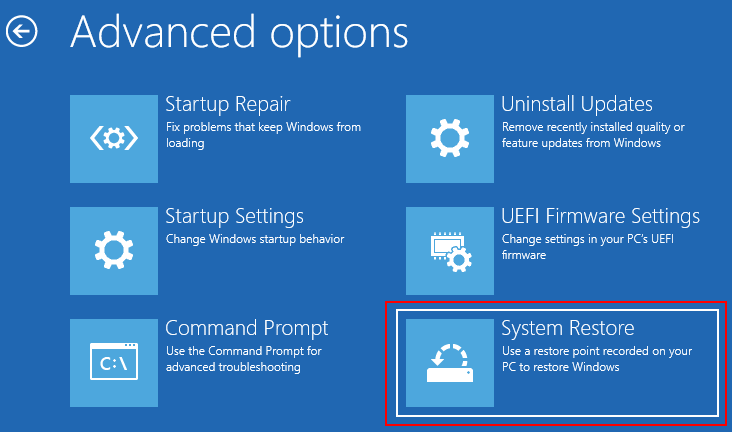
Select the appropriate operating system, Windows 11. The same system restore wizard will launch as in the working system. Follow the same steps as described above to roll back Windows 11 to a restore point.
Viewing and Deleting Windows 11 Restore Points
Where can you view Windows 11 restore points? How can you delete Windows 11 restore points if they are no longer needed? All existing restore points are displayed at one of the steps in the system restore wizard before starting the restoration operation. You can delete restore points in the settings where you initially enabled the system protection feature. Here, at the bottom, you have the option to delete all restore points in the operating system.
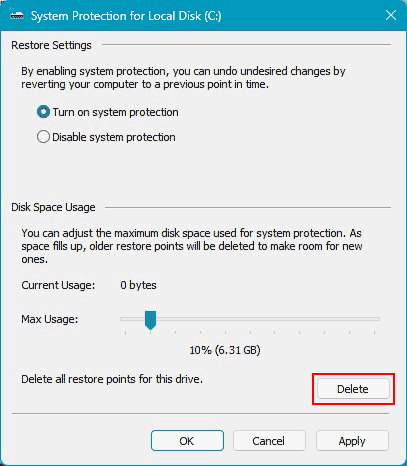
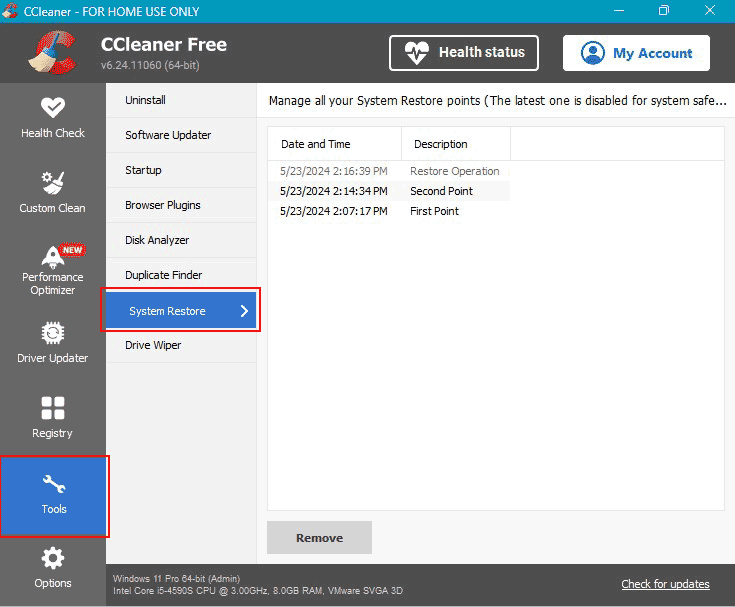
However, the built-in mechanism allows you to delete only all points together. To delete individual points, you can use a free program like CCleaner. In the “Tools” section, under “System Restore,” you can view the restore points in the system and delete individual ones, except for the last one. Deleting the last one is disabled for system safety.
Restoring Personal Files
Pay special attention to restoring personal data. As mentioned earlier, the restore point mechanism only covers system and program data and does not include personal files stored on the C drive in folders like “Downloads,” “Documents,” “Videos,” “Music,” and others. It also does not cover data stored on other hard drive partitions and removable media.
If you have deleted important personal files and emptied the recycle bin, you can only recover these files through data recovery. For this, you need to use specialized programs, preferably those with advanced recovery algorithms. RS Partition Recovery is such a program. Using RS Partition Recovery is very simple: analyze the locations where your files were stored, find these files, and recover them.


