OpenMediaVault (OMV) is a specialized operating system for independently assembled NAS storages. It is based on Debian Linux, one of the popular operating systems, and provides software for creating data storage based on various hard drive arrays. So, how can you recover data from a NAS storage created in OpenMediaVault?

Contents
- Main reasons for data loss in OpenMediaVault
- Features of data recovery on OpenMediaVault
- How to recover data from storage created in OpenMediaVault
Main reasons for data loss in OpenMediaVault
- Hardware failures: Failure of the hard drive, power supply, or other hardware components can result in data loss.
- User Errors: Improperly deleting files, overwriting important data, or accidentally formatting disk partitions can cause data loss.
- File system problems: Damage to the file system on the disk (for example, due to power failures or write errors) can make data unavailable.
- Software Issues: Incorrect OpenMediaVault settings, conflicts between plugins, or software bugs can cause performance problems and resultant data loss.
- Power Outage: Sudden power outages or power surges can wreak havoc on your server and result in data corruption or loss.
- Invalid updates: OpenMediaVault updates or installation of additional plugins can cause conflicts and system crashes, which can lead to data loss.
- Physical Damage: Physical damage to the server or data storage may result in data loss.
- Unauthorized access: If unauthorized access is gained to the OpenMediaVault server, attackers can delete or steal data.
To prevent data loss in OpenMediaVault, it is recommended to regularly back up data to external media or to the cloud, ensure a reliable power supply, monitor the health of not just the hard drives, regularly update the system, and pay due attention to system monitoring and security.
Features of data recovery on OpenMediaVault
OpenMediaVault, like most NAS devices, uses mdadm RAID and LVM2 technologies, which allow you to create RAID 0, 1, 5, 6 for data storage.
To learn more about the differences between mdadm RAID and LVM2
Data loss is always sudden, whether it’s accidental deletion of files, erroneous formatting of a partition, or failure of one of the disks, which can lead to the failure of the RAID array.
If the RAID array or disks fail, then to restore data, you need to disconnect the disks from the NAS device and connect them to a PC.
It would be ideal if the data recovery application automatically detects the RAID, meaning it recognizes its configuration and important parameters on its own. In this case, we wouldn’t need to provide all this data ourselves. However, many programs require us to do this manually, as not all of them have an automatic RAID detection function. If we mark something incorrectly, we may not be able to restore the data.
To recover data from the OMV storage, you can use specialized programs for data recovery from RAID.
How to recover data from storage created in OpenMediaVault
The OpenMediaVault system had a data warehouse assembled based on RAID 5 of three disks. The Btrfs file system was used.
Let’s look at how to recover data from OpenMediaVault storage disks connected to a computer using RS RAID Retrieve.

Data recovery from damaged RAID arrays
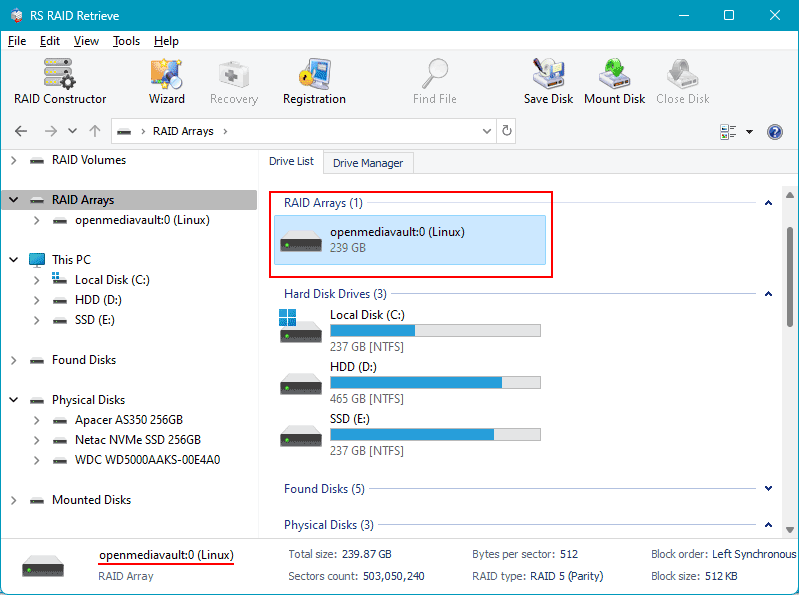
The program has a familiar Windows Explorer interface, which allows you to clearly see all used disks and RAID arrays. The program automatically detected the OMV RAID storage.
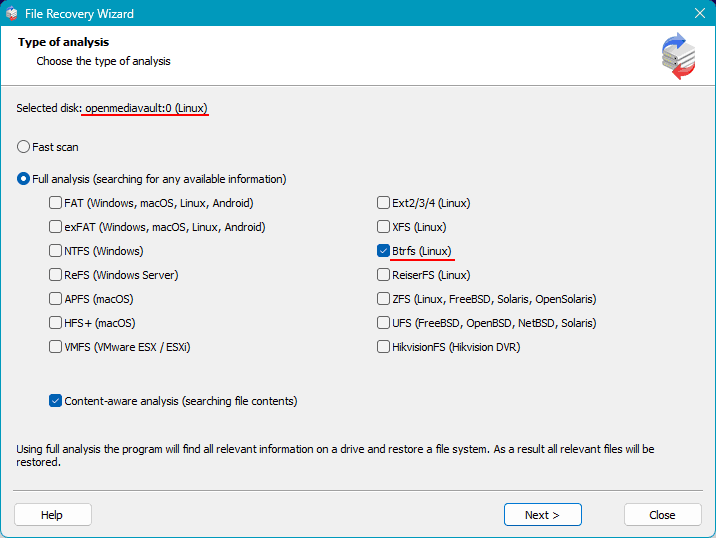
Double-click on it or launch the Recovery Wizard, and you will be prompted to choose a fast or complete analysis method.
Quick analysis is for accessing deleted and existing files, while complete analysis is for after formatting or failure of one of the drives.
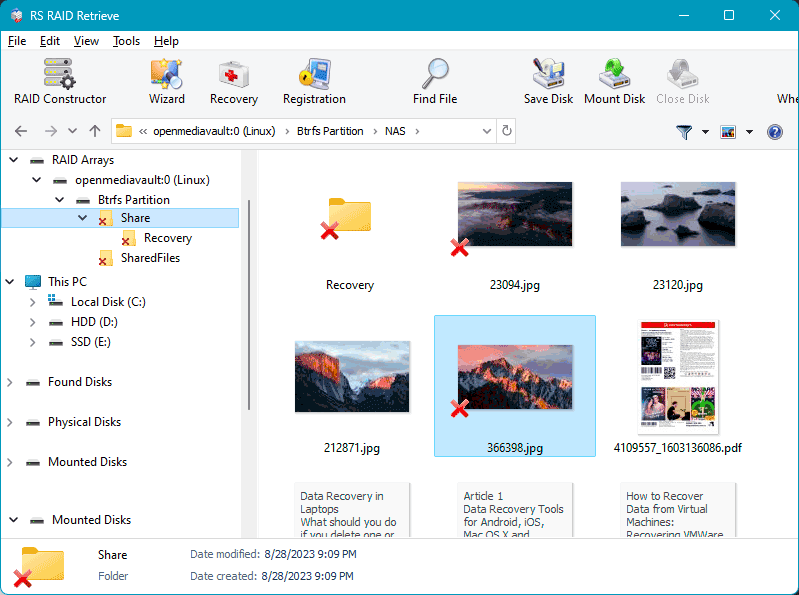
Once the analysis is complete, the program will display the data that can be recovered. Select the required files and click the “Recover” button.
Choose where and how to save the recovered data.
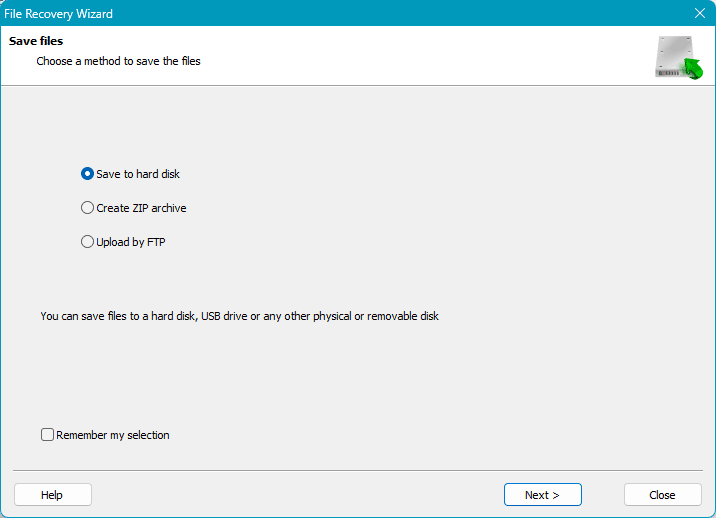
As you can see, the process of recovering data from a RAID array created in OpenMediaVault is simple. Just connect the disks to the computer and analyze them with the RS RAID Retrieve program.

