How to Recover Data from a hard drive after RAID? Whether the hard drive has been placed in a RAID array or, conversely, after the RAID has been removed, the task is challenging. In the latter case, it may require a minimum number of operational hard drives or even all hard drives that were part of the RAID array, depending on the RAID configuration (level). We will tackle this task using effective data recovery software.
Contents
- Recovering Data from an Individual hard drive
- Recovering Data from a Reconstructed RAID
- Restoring Hard Drive Recognition after RAID
Recovering Data from an Individual hard drive
Let’s consider scenarios where data needs to be recovered from an individual hard drive.
For example, you may have RAID 1 mirror disks (or a single mirror disk) left after the RAID array has collapsed or been removed. In such cases, the chances of data recovery are high.
Another example is when a disk was mistakenly added to a RAID array. The disk needs to be excluded from the array if the RAID software allows for such an operation. If not, you need to delete the RAID and recreate it without including the mistakenly added disk.
When hard drives are added to a fault-tolerant RAID, they typically undergo an initialization process. This procedure includes physically clearing the disk blocks (or SSD cells) of data by overwriting them with zeros. Recovering data after such a procedure is difficult but not impossible.
One of the effective programs for complex data recovery cases is RS Partition Recovery. It recovers data from logically damaged disks, after partition formatting or deletion, and from mirror disks after RAID collapse or removal. It even offers a chance to recover data after disks have been overwritten with zeros.
The software is licensed, but the licensing issue only needs to be addressed at the data recovery stage. Before that, you need to analyze the data to determine if it can be recovered. If the analysis reveals the necessary data, it is guaranteed to be recovered. This analysis can be performed for free using the software.
Download and install RS Partition Recovery.

All-in-one data recovery software
Follow the wizard that launches.
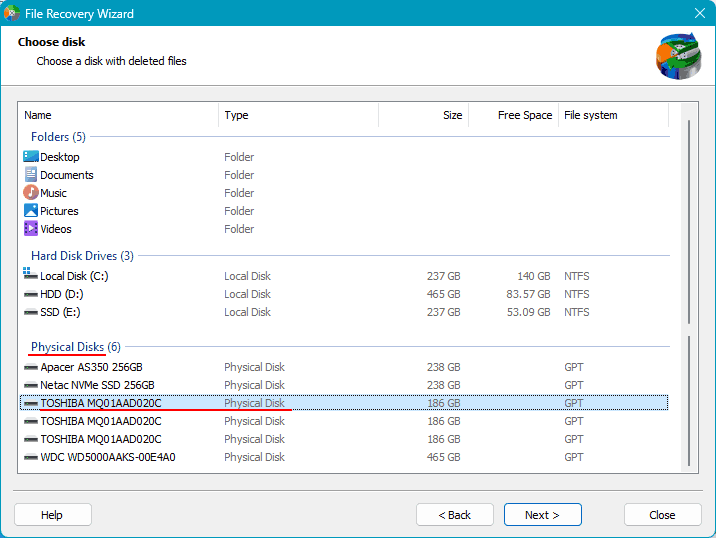
Select the area from which you need to recover data – the disk after RAID. Mark it in the physical disks block.
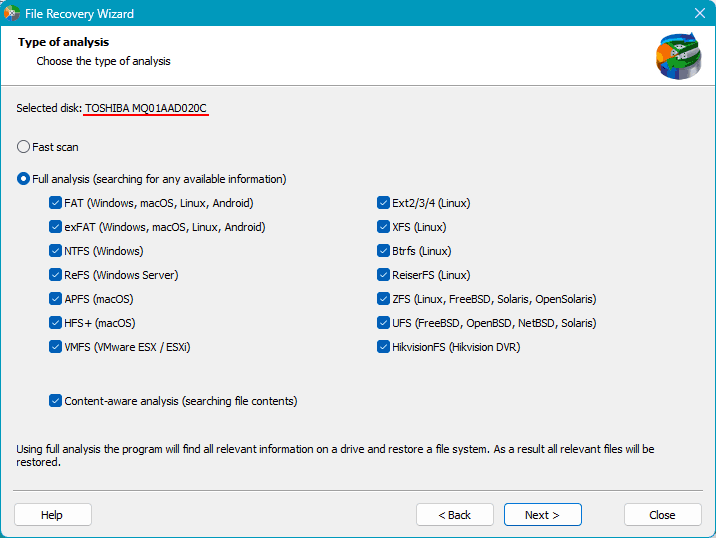
In the next step, choose the type of analysis to determine the possibility of data recovery. There are two types. One is quick scan, which is fast and suitable for simple data recovery cases, such as RAID deletion.
The other type of analysis is a full scan. It takes longer and is intended for complex data recovery cases, such as disk overwriting with zeros.
Initially, you can try the quick scan. If necessary, follow up with a full scan.
After the analysis, the software will present the results – data available for recovery. Select the necessary files and click “Recover”.
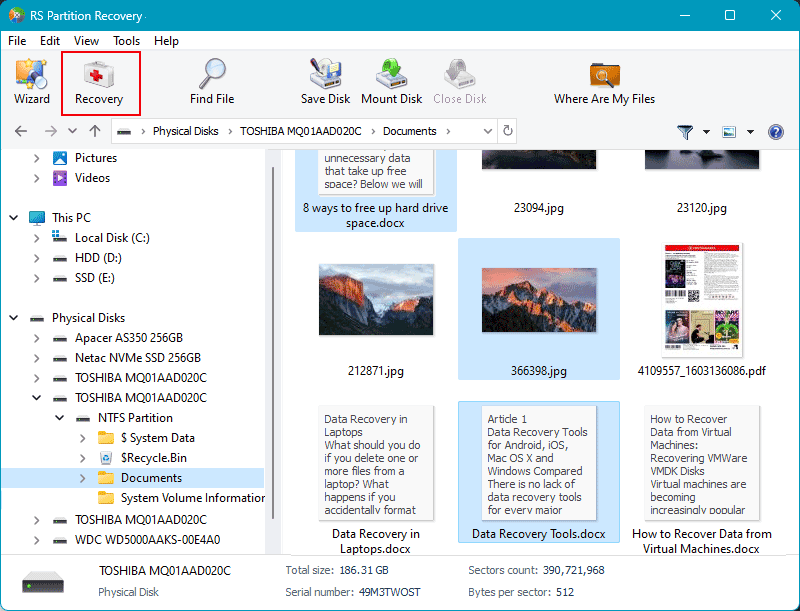
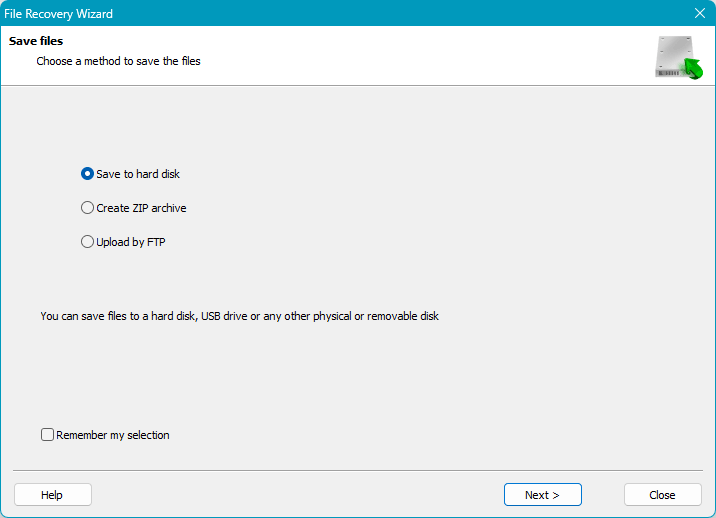
Specify the method of data recovery.
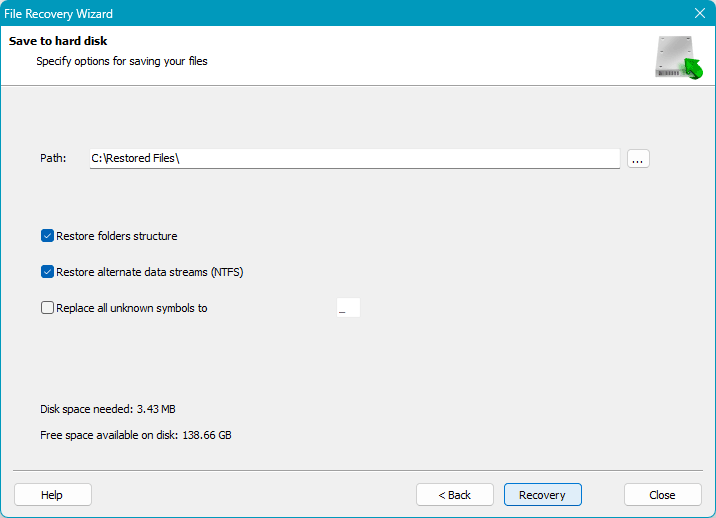
Specify the path to save the recovered data and click “Recover”.
Finally, you will get the recovered data at the specified path.
Recovering Data from a Reconstructed RAID
How to recover data from a RAID after it has collapsed or been removed in the case of other array configurations? For RAID 0, all disks in the array must be recognized by the computer. For other configurations – RAID 5, 6, 10, etc. – it is sufficient for the computer to recognize the minimum number of disks required to ensure data integrity.
To solve this task, you need RAID recovery software that includes a RAID Reconstructor function. This function allows you to reconstruct the RAID to extract data from the disks that were part of the array.
One such program is RS RAID Retrieve. It recovers data in the event of RAID collapse or removal, even without a hardware RAID controller and with an incomplete set of hard drives.
The RAID Reconstructor function in this software is called RAID Constructor. It is notable for its ability to automatically detect collapsed or removed RAID arrays with their exact parameters. If necessary, it allows you to manually reconstruct the array with specified parameters.
Like RS Partition Recovery, RS RAID Retrieve is also licensed. However, before addressing the licensing issue, the software allows you to perform a free data analysis, guaranteeing the recovery of the identified data.
Download and install the software.

Data recovery from damaged RAID arrays
At startup, you will see the RAID Constructor automatically launched. For now, cancel it.
Check in the main window if the program detects the collapsed RAID.
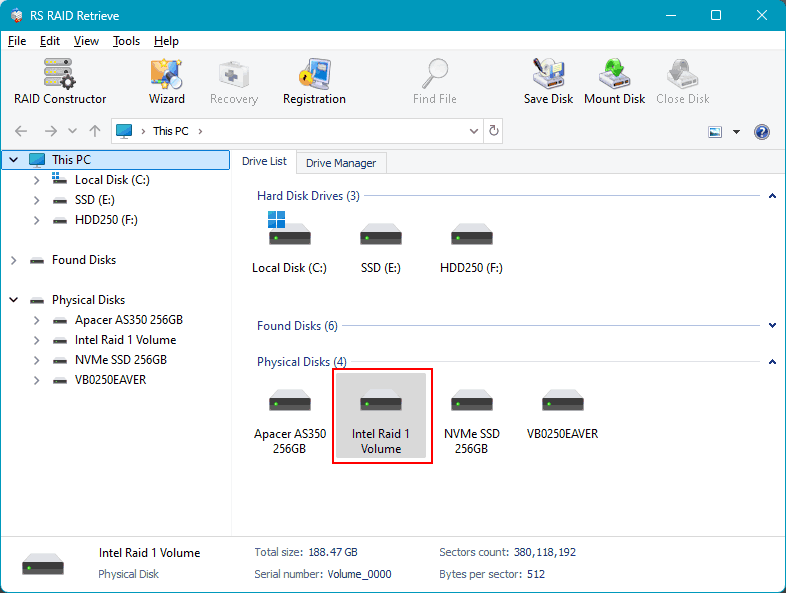
Or if it sees the individual hard drives after RAID removal.
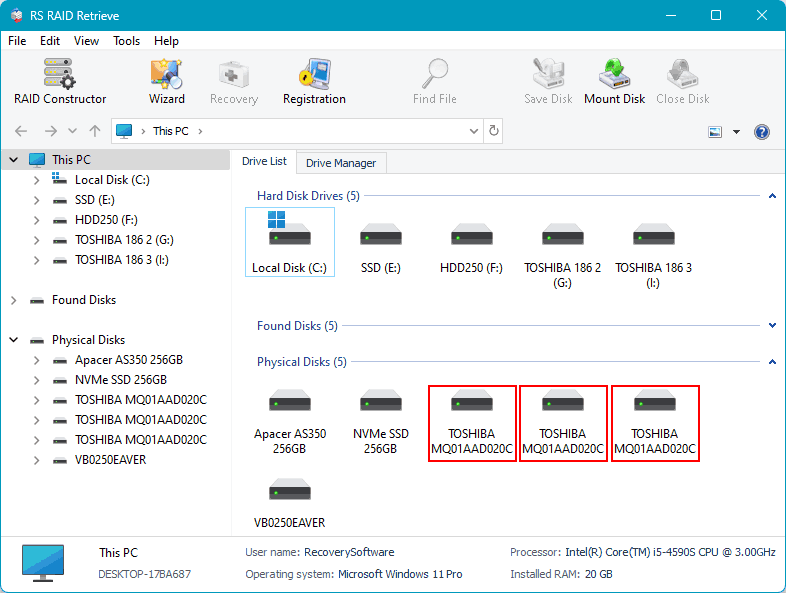
If not, refer to the last section of the article.
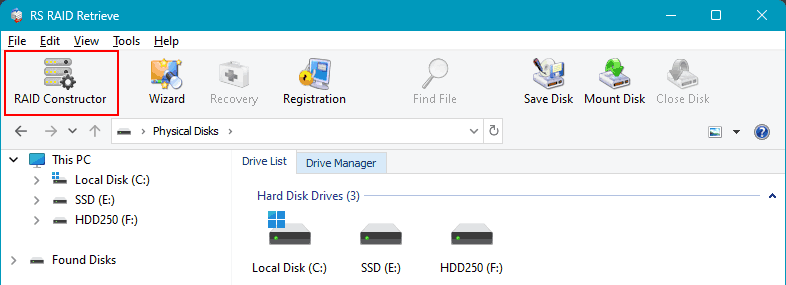
If the collapsed RAID is detected, you can double-click on it to start data analysis. If the RAID has been removed, you need to reconstruct it. To do this, launch the RAID Constructor.
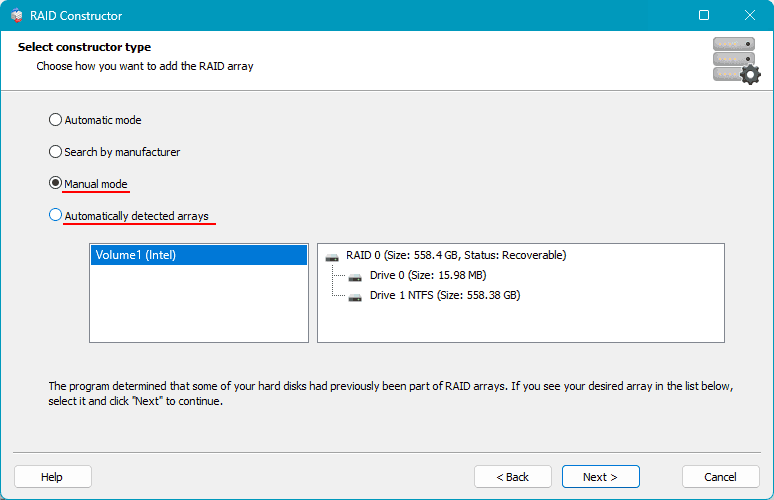
As mentioned, the program can automatically detect that some of the computer’s disks previously constituted a RAID array. In such cases, it will suggest the configurations of these arrays. You can choose one. If RS RAID Retrieve does not detect previously existing arrays and does not suggest their configurations, select “Manual Creation”.
Next, you need to configure the removed RAID. If it is a configuration suggested by the program, you can adjust some RAID parameters. If you are creating the RAID manually, specify the disks included in the array and other parameters. Click “Add”.
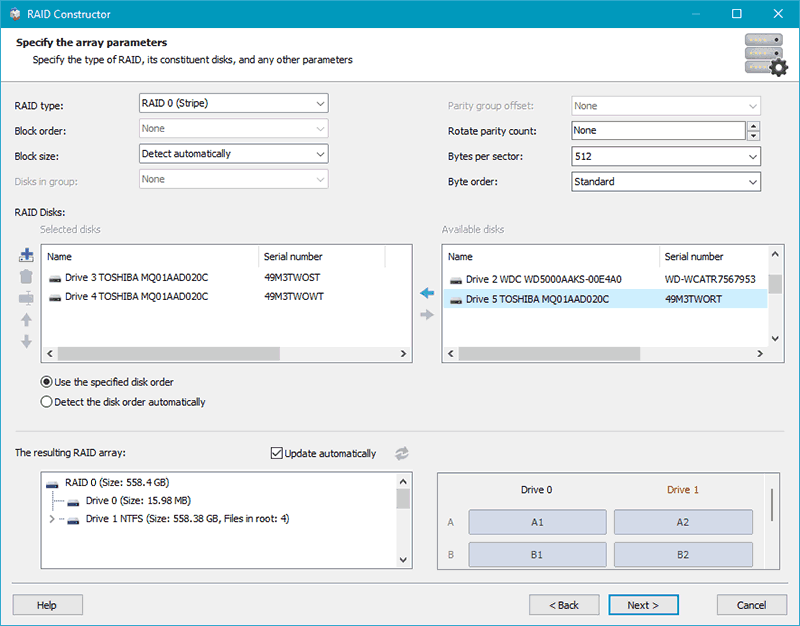
The configured array will be displayed in the RAID arrays block. There may be several configurations suggested by the program. Click on the array.
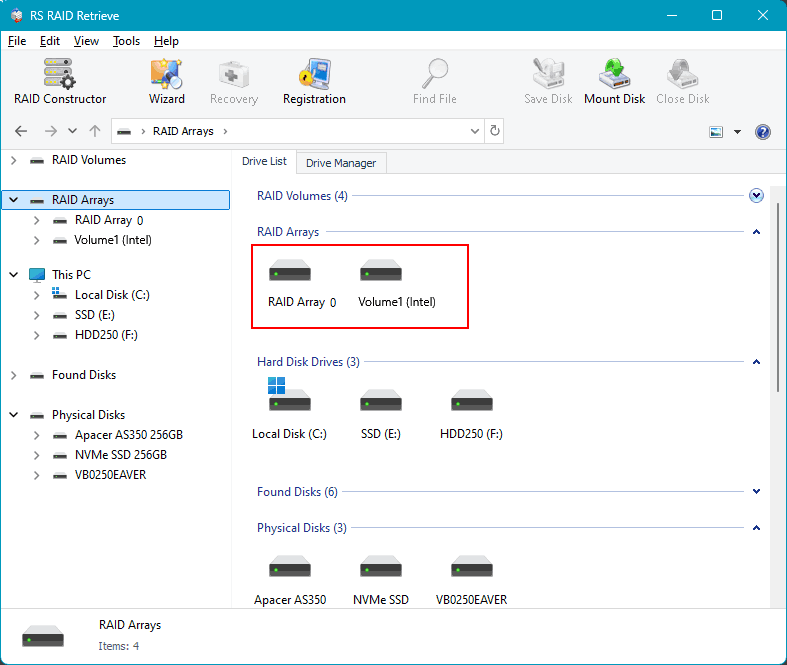
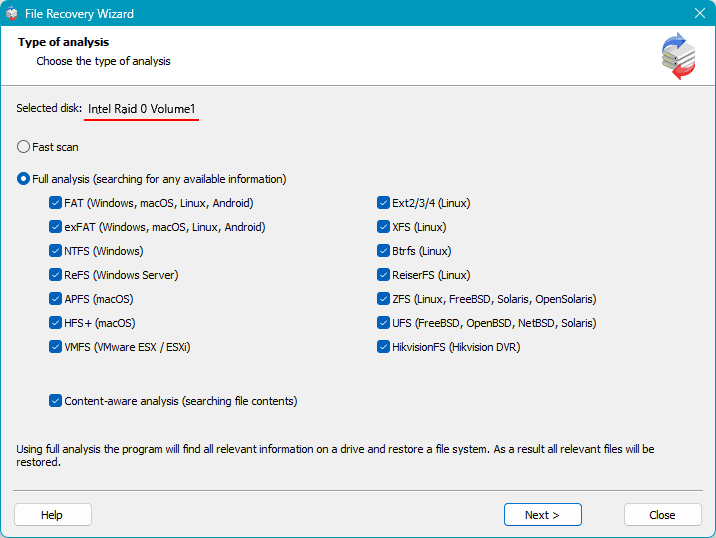
Start the data analysis for recovery. Like RS Partition Recovery, RS RAID Retrieve offers two types of analysis. One is a quick scan for operational analysis. The other is a full scan for complex cases.
First, try the quick scan. If it does not find the necessary data, restart the recovery from the configured RAID and use the full scan.
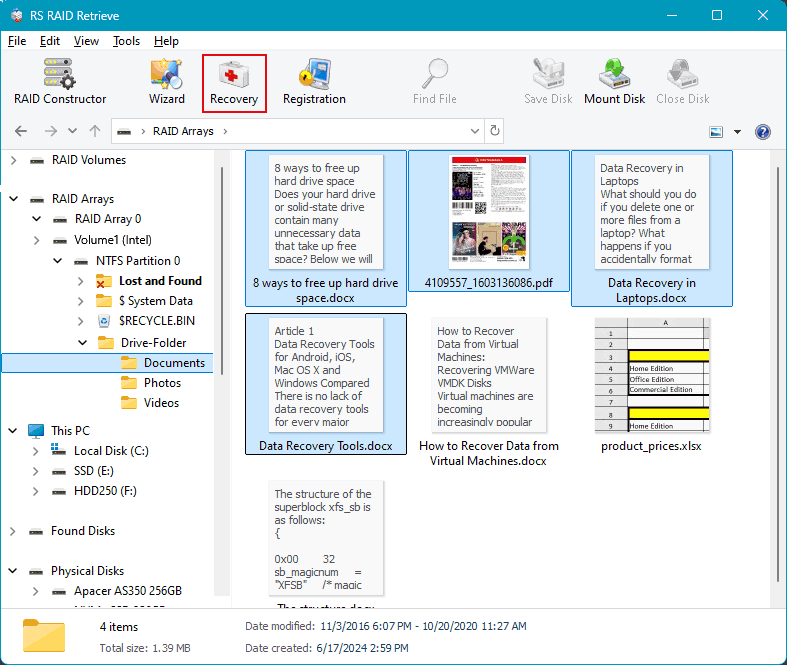
After the analysis, you will see the data available for recovery. Select the files you want to recover and click “Recover”.
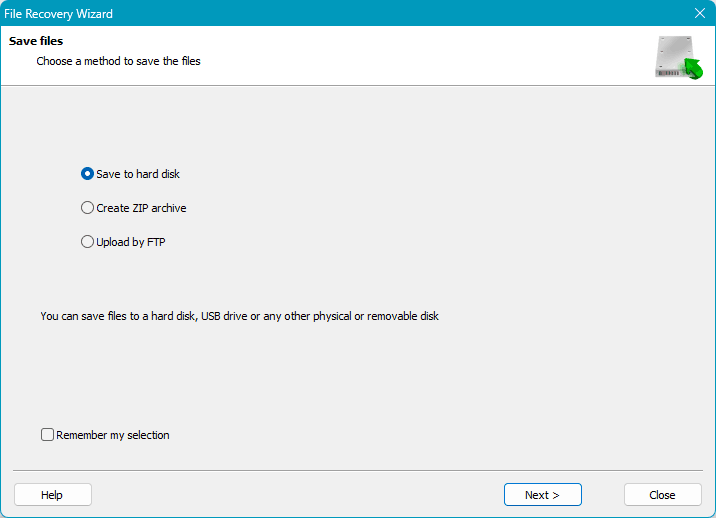
Next, specify the method for saving the recovered data. And specify the path for saving.
Restoring Hard Drive Recognition after RAID
In some cases, it may be necessary to restore the computer’s recognition of disks after their participation in a RAID.
For instance, a collapsed RAID may not be recognized by either the computer or data recovery programs. In such cases, neither the collapsed RAID nor its individual disks may be recognized. This RAID needs to be deleted in its software so that the computer can see the individual disks.
Disk recovery after RAID may be required in non-standard situations where a disk is removed from the RAID. For example, if this operation was incorrectly performed by the RAID software or if a non-working disk was replaced with another, and then the original disk regained functionality.
Such a disk may not be recognized by the computer, but it should be recognized by the RAID software. Using this software, the disk can be restored to be recognized by the computer.
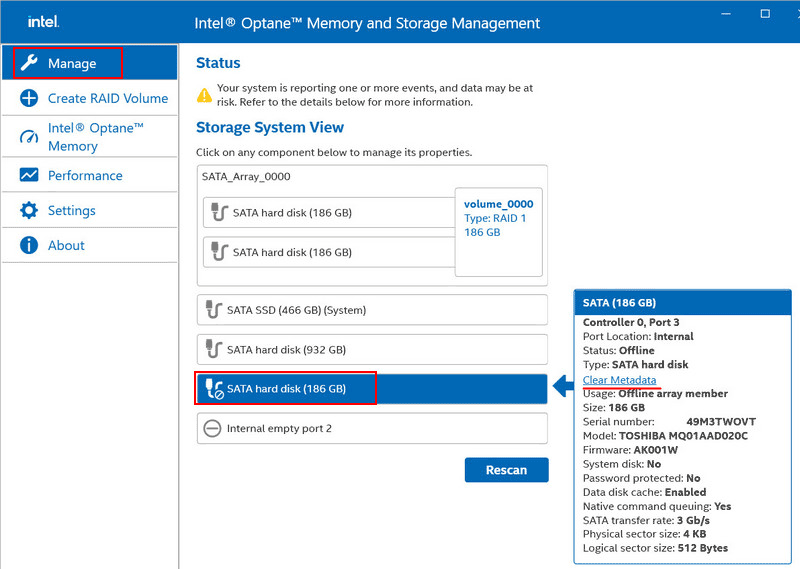
Let’s consider an example with a RAID created by the Intel Optane Memory and Storage Management program. This program identifies the problematic disk with an offline status. In the disk properties, there is an operation called “Clear Metadata”. This clears the disk of RAID array configuration (metadata). Run this operation.
Confirm by clicking “Clear”.
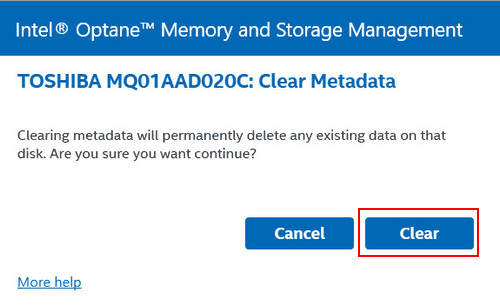
After this clearing, the hard drive will be recognized by the computer as a regular hard drive.
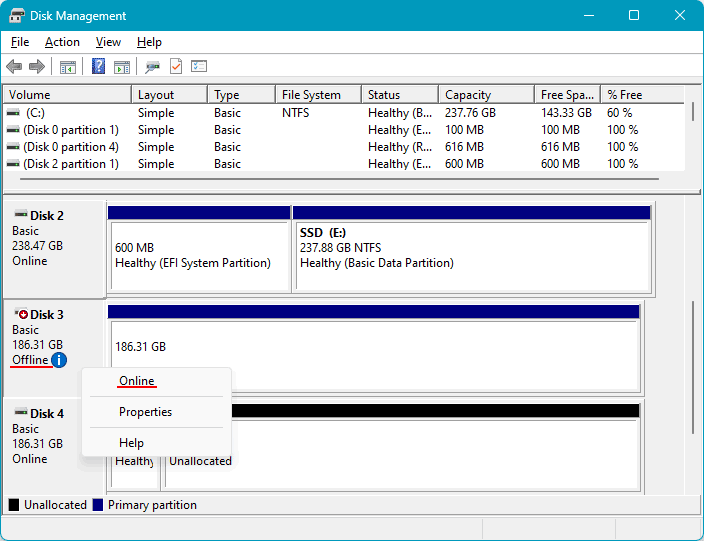
If such an operation is not available in the RAID software, resolve the issue using Windows tools. First, check the disk status in Windows Disk Management. Launch it (you can do this via the Win+X menu).
Check the list of computer hard drives. The problematic disk may be listed as “Offline”. Right-click on the disk and select “Online”. After this, the disk should become accessible to programs in the Windows environment.
In extreme cases, you can clear RAID parameters in the Windows command line. However, to make the disk accessible to Windows, you need to temporarily change the disk controller mode in the computer’s BIOS from RAID to another mode, such as AHCI.
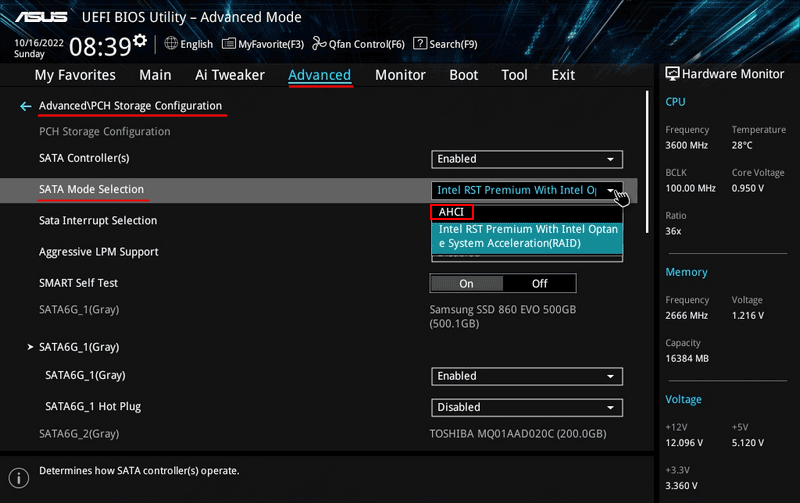
In this case, Windows may not start, and you will need to work in a WinPE environment from a bootable media.
Note: You can launch the Windows command line by booting from the installation media of this operating system. After booting from the media, press Shift+F10 to launch the command line.
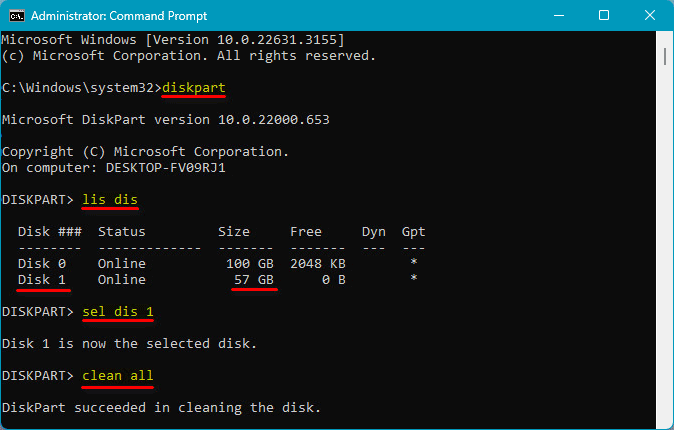
In the command line, enter:
diskpart
lis dis
Check the number assigned to the problematic disk. Then enter:
sel dis 1
clean all
Replace 1 with your disk number.
