If your NAS WD My Cloud Mirror (Gen 1) stopped working or your files disappeared, the problem is often related to a RAID issue or disk failure. Even reliable NAS systems can experience errors that make data inaccessible. Here we explain, in a simple and friendly way, what usually goes wrong with the NAS WD My Cloud Mirror (Gen 1) and how you can restore your files without technical stress.
NAS Hardware Specifications and RAID Architecture
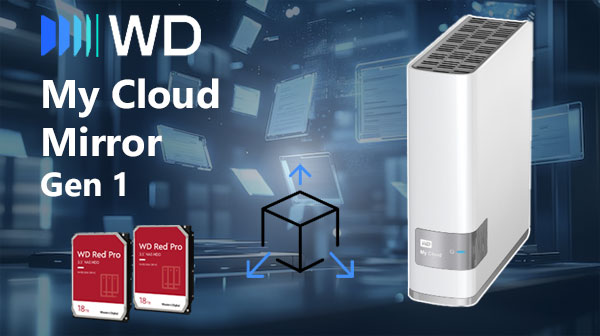
The WD My Cloud Mirror (Gen 1) NAS is equipped with 2 drive bays, supporting RAID 0/1/5/6 configurations depending on the installed firmware. Its controller manages data distribution across disks to ensure redundancy and optimized throughput. File systems include EXT4 and Btrfs, with the latter providing snapshotting and enhanced data integrity features.
During recovery operations, the RAID metadata, partition tables, and stripe order must be analyzed to rebuild the logical volume correctly.
Key Points of Recovering Data from WD My Cloud Mirror (Gen 1)
A two-disk NAS like WD My Cloud Mirror (Gen 1) usually works in RAID 0 or RAID 1. If you used RAID 0, both disks are needed; if RAID 1, one disk may be enough. When the NAS stops working, the drives must be removed and scanned on a computer. Specialized tools rebuild the array and extract the files.
Main Features of the NAS WD My Cloud Mirror (Gen 1)
| Drive Bays | Supported Drives | Hot Swappable | RAID Levels | File Systems | Maximum volume |
| 2 | 2.5" or 3.5" HDD | ✗ | RAID 0, RAID 1, JBOD | EXT4 | 12 Tb |
The device is characterized as a mirrored storage configuration operating in RAID 1 with on-disk volumes formatted as EXT4. Presentation and array coordination are handled by the appliance software stack, identified as My Cloud OS 3, running on a Marvell Armada 370 processor with 512MB DDR3 of memory and with no SSD cache. Given those explicit elements, the single most probable model-specific failure point is the OS-level metadata and mirroring management inside My Cloud OS 3, because that component is responsible for orchestrating the mirror, maintaining metadata and exposing the EXT4 volumes to clients under the constraints of the listed SoC and memory.
If the OS-level metadata or its presentation layer becomes corrupted or stops functioning, clients will observe logical inaccessibility even though persistent data blocks remain on the drives. Recovery outside the NAS therefore relies on direct access to the persistent EXT4 image on the mirrored media: a single drive from a healthy mirror should contain a coherent EXT4 filesystem that can be mounted or examined by a host that understands the on-disk format, or the mirror can be reconstructed from the raw disk contents on such a host. The absence of an SSD cache means there is no separate cache artifact to reconcile; recovery actions are taken against the persistent EXT4 copies on the drives.
Easy Step-by-Step Guide: How to Recover Data from a 2-Disk NAS
If your 2-disk NAS has stopped working, don’t worry — most cases of data loss can be fixed even if the system won’t boot, the RAID has failed, or the NAS says the volume is “degraded.” This beginner-friendly walkthrough explains each step in clear language so you can recover your files safely and confidently.
-
Step 1 Turn off the NAS and carefully remove both drives.
Make sure the NAS is fully powered down before opening it. Gently slide out the disks and label them according to their original order. This helps the recovery software rebuild the RAID correctly.
-
Step 2 Connect the drives to your computer.
Use SATA ports if possible, or high-quality USB-to-SATA adapters. Both disks must be connected at the same time — this is essential for proper RAID reconstruction.
-
Step 3 Open RS RAID Retrieve — the recovery app for NAS drives.
The program automatically scans your disks and tries to detect how the RAID was originally configured. It works in safe read-only mode, so your data stays untouched.

Data recovery from damaged RAID arrays
Available for: Windows, macOS, Linux -
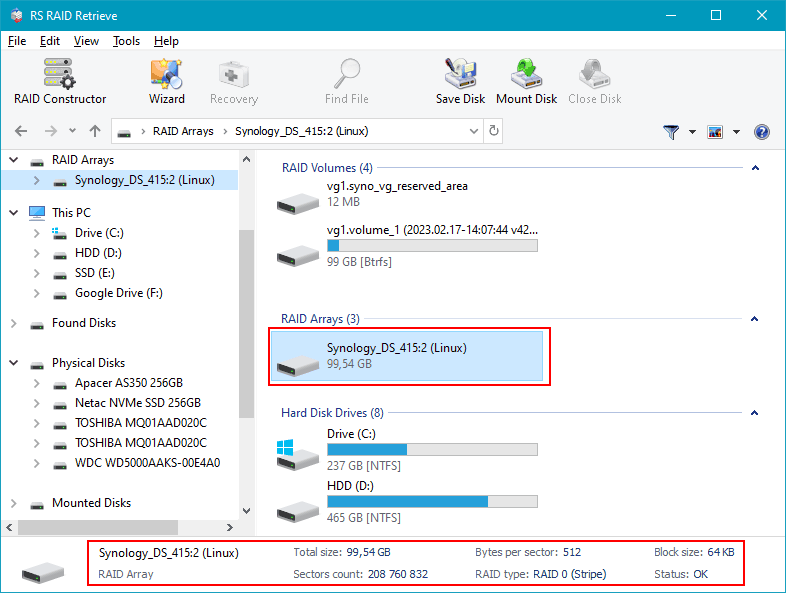
Step 4 Check the RAID configuration found by the software.
The tool usually determines everything on its own, but if something looks incorrect, you can adjust the parameters manually (RAID level, block size, disk order, etc.).
-
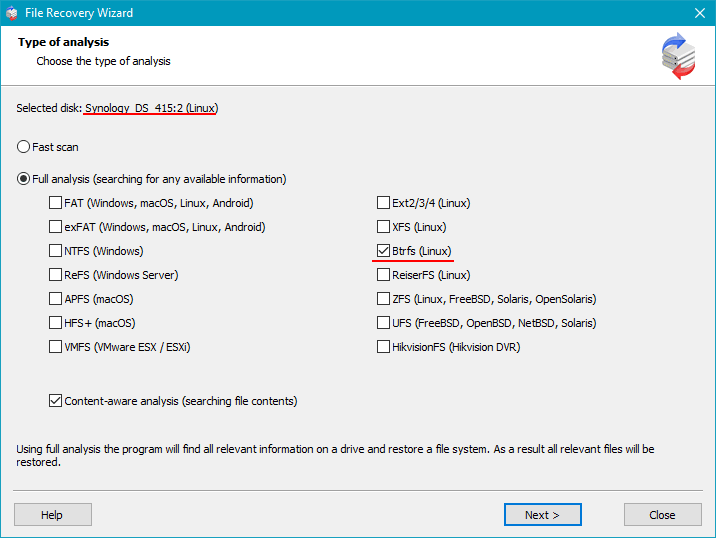
Step 5 Start scanning the reconstructed RAID.
The deep scan searches for lost folders, documents, photos, videos and other file types — even if the file system is damaged or the partition was lost.
-
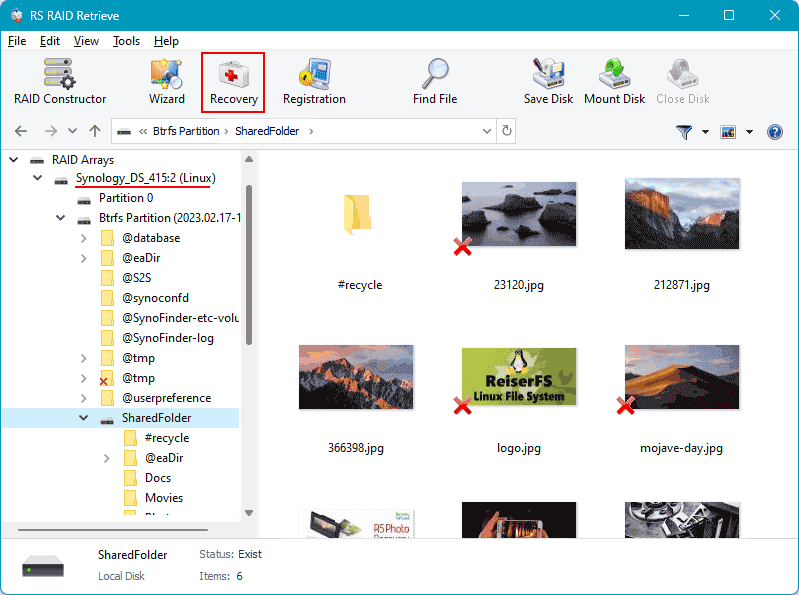
Step 6 Review the recovered folder tree.
Once the scan is complete, you’ll see all available files, including those that were previously inaccessible or accidentally deleted. Browse through the structure and verify that your important data is present.
-
Step 7 Save the recovered files to another disk.
Choose a safe location — for example, an external drive or a separate internal disk. Avoid writing anything to the original NAS drives.
Tip: Never save files back onto the original NAS disks. This prevents overwriting and keeps the recovery clean and safe.
Technician-Level Causes of RAID Failure in NAS WD My Cloud Mirror (Gen 1)
In two-disk NAS systems such as NAS WD My Cloud Mirror (Gen 1), RAID degradation is typically the result of predictable mechanical, logical, or operational faults. From a technician’s perspective, each failure scenario presents a set of identifiable indicators, allowing structured diagnostics and controlled data-recovery workflow.
Drive desynchronization under continuous workload. Long-term operation causes sector reallocation, uneven read delays, and latency spikes. When one disk falls behind the RAID controller’s timing thresholds, the array marks it as out-of-sync, initiating a degraded state.
Unrecoverable Read Errors (URE) during resync. Two-bay systems using RAID 1 or RAID 0 are highly sensitive to URE. If a disk develops unreadable blocks during reconstruction, the process halts, resulting in a failed volume.
Thermal instability inside compact NAS chassis. Poor airflow, clogged vents, or aging cooling systems elevate temperature. Drives operating outside optimal thermal parameters demonstrate increased write errors and mechanical instability.
Controller-level inconsistencies. Firmware aging, interrupted writes, or voltage fluctuations lead to metadata corruption, causing RAID misalignment. Once the controller cannot match parity or mirror mapping, the array enters failure mode.
- Sector-level delays and SMART warnings accumulate unnoticed over weeks;
- Filesystem metadata desynchronizes after abrupt power loss or improper shutdown;
- Disks with different wear levels diverge in I/O throughput, accelerating RAID degradation.
This set of failure patterns is standard for NAS WD My Cloud Mirror (Gen 1) devices, and each requires targeted recovery actions, sector-by-sector imaging, and controlled RAID reconstruction.