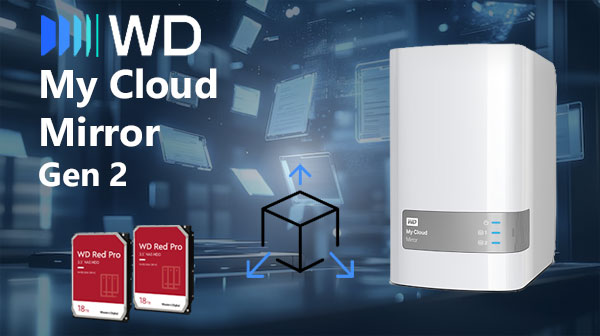
A failing RAID array on NAS WD My Cloud Mirror (Gen 2) can instantly make the entire storage pool inaccessible. RAID 1 mirror inconsistencies, metadata corruption, failed resync operations, or unexpected disk dropouts are common triggers for data loss. In this article, we outline the most frequent RAID-related issues affecting the NAS WD My Cloud Mirror (Gen 2) and explain how to recover data safely without risking overwriting or additional damage.
NAS Technical Basics: What’s Inside Your Storage Device
The NAS WD My Cloud Mirror (Gen 2) is built to give home users and beginners a simple way to store and protect their files. With 2 drive bays, it supports RAID 0 and RAID 1 — two basic modes that either boost speed or keep a safe backup copy of your data. The device uses EXT4 or Btrfs file systems, which help the system stay stable and recover quickly after minor errors.
If a disk stops working or files are removed accidentally, data recovery software can scan the NAS and rebuild lost information based on the remaining RAID structure.
What Makes Data Recovery on WD My Cloud Mirror (Gen 2) Unique
Two-bay NAS systems like WD My Cloud Mirror (Gen 2) are compact yet powerful, and their RAID structure directly affects how the data is recovered. Whether your files were mirrored in RAID 1 or divided across disks in RAID 0, our tools reconstruct your storage step by step. Even if DSM stops responding or the NAS refuses to mount volumes, the content can still be restored by analyzing each disk independently. This approach ensures safe and effective recovery of photos, business documents, backups, and multimedia libraries.
Main Features of the NAS WD My Cloud Mirror (Gen 2)
| Drive Bays | Supported Drives | Hot Swappable | RAID Levels | File Systems | Maximum volume |
| 2 | 2.5" or 3.5" HDD | ✗ | RAID 0, RAID 1, JBOD | EXT4 | 16 Tb |
The device implements a mirrored storage configuration (RAID 1) over block devices formatted with EXT4, with RAID management and filesystem access provided by My Cloud OS 3 running on the Marvell Armada 385 subsystem backed by 512MB DDR3 and no SSD cache. In operational terms the architecture places the array metadata and mount logic inside the appliance software stack on the Marvell SoC; accordingly the single most probable model-specific failure point is that SoC/firmware layer (the combination of Marvell Armada 385 executing My Cloud OS 3), because it both controls the RAID presentation and performs the EXT4 mounts within the constrained 512MB memory envelope.
When that controller/OS layer becomes nonfunctional the array and filesystem are no longer presented even though the drives retain on-disk blocks and EXT4 structures; logical inaccessibility therefore stems from the loss of the appliance’s RAID and mount services rather than immediate destruction of on-disk data. Recovery outside the NAS follows the principle of bypassing the failed controller: access the raw drives with a host that can interpret a RAID 1 layout and read EXT4 volumes, reconstructing or mounting the mirrored member(s) externally to expose file-level contents. The absence of SSD caching simplifies the on-disk layout because there is no external cache state to reconcile.
Advanced NAS Recovery Workflow for 2-Disk Systems
When a 2-disk NAS fails — whether due to RAID degradation, accidental deletion, corrupted partitions or an unexpected power loss — you can still recover your files using a structured, technician-level workflow. Follow this detailed procedure to safely rebuild the RAID and extract your data.
S.M.A.R.T. Diagnostics. Before starting, check the health of the drives to avoid worsening any damage. In RS RAID Retrieve, open the File -> Smart Monitor menu (or press Ctrl+I), or select this item from the drive's context menu. The opened window will display the wear parameters as well as the current temperature of the drive.
Sector-by-Sector Copy. To work safely with failing drives, be sure to create their exact images. Select the target drive from the list, go to the Tools -> Save Disk menu (or use the context menu), and save the image. Perform all further actions exclusively with this file.
-
Step 1 Power down the NAS and remove both drives.
Shut the unit down completely, disconnect all cables and carefully slide out the disks. Label them “Disk 1” and “Disk 2” to preserve the original RAID ordering, which is crucial for accurate reconstruction.
-
Step 2 Attach the disks directly to a PC.
Use SATA ports whenever possible for stable I/O throughput. Both disks must be connected simultaneously — NAS RAID cannot be rebuilt using single-drive access.
-
Step 3 Launch RS Raid Retrieve and load the drives.
The software will read RAID metadata, internal partition tables and filesystem signatures (EXT4, XFS, Btrfs). It reconstructs the original RAID configuration automatically but allows manual correction for expert users.

Data recovery from damaged RAID arrays
Available for: Windows, macOS, Linux -
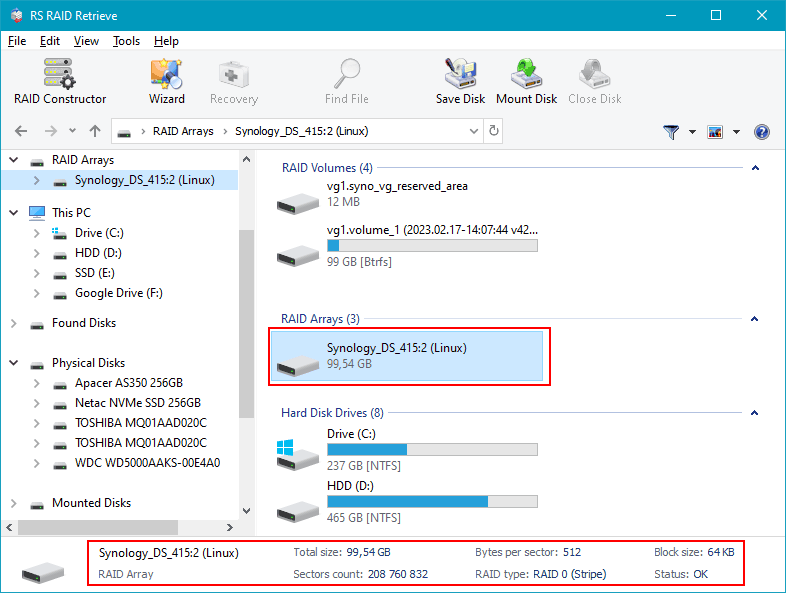
Step 4 Verify RAID parameters detected by the software.
Check strip size, disk order, parity rotation and block alignment. Incorrect parameters cause incomplete folder structures or unreadable files, so validate them carefully.
-
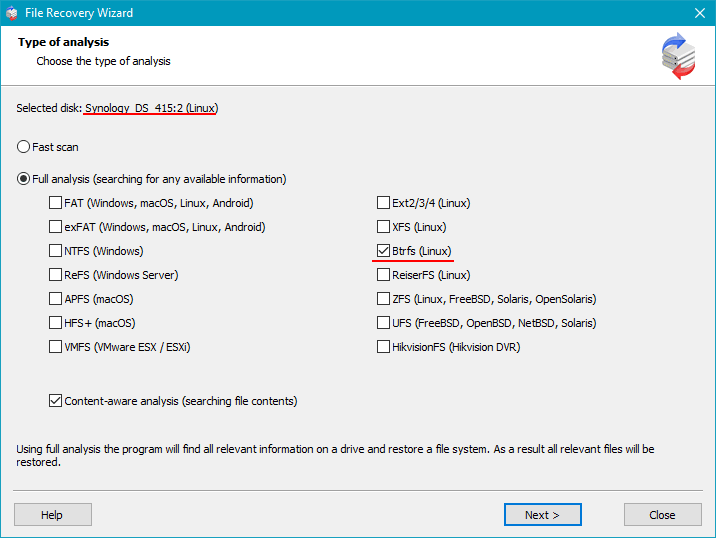
Step 5 Begin a full deep scan.
The program analyzes both disks sector-by-sector, reconstructs directory trees and identifies fragmented or deleted items. Deep analysis is recommended for damaged NAS volumes.
-
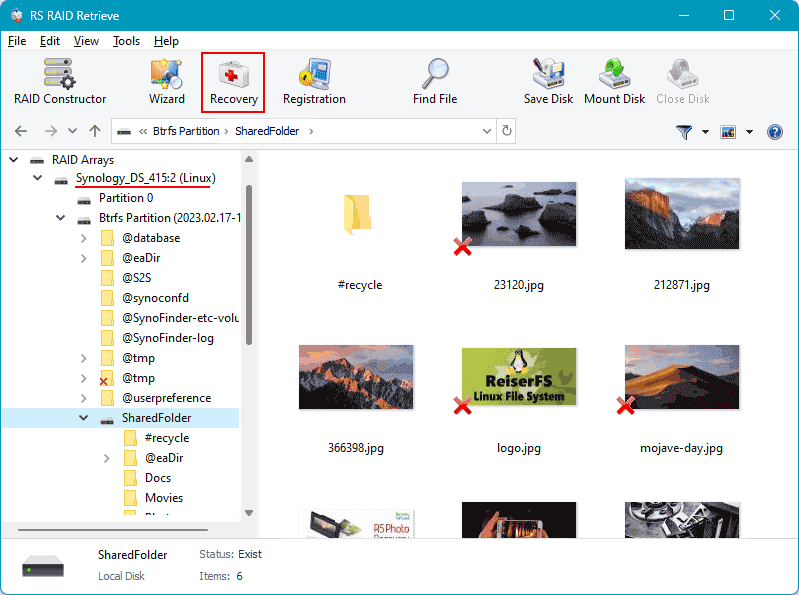
Step 6 Review detected files and validate recovered structures.
Open folders, preview thumbnails, and ensure key documents, virtual machine images, photos and multimedia content are present.
-
Step 7 Export your recovered data.
Always save files to a different drive — never to the original NAS disks — to prevent overwriting data remnants.
Tip: Avoid rebuilding the RAID inside the NAS until you’ve created a full backup of the recovered data.
Step-by-Step Guide: Why RAID Fails in 2-Bay NAS WD My Cloud Mirror (Gen 2) and How to Identify the Causes
RAID failures in 2-bay NAS WD My Cloud Mirror (Gen 2) often start with subtle symptoms that users overlook. By following a structured diagnostic approach, you can quickly pinpoint the underlying cause and reduce the risk of data loss. This tutorial walks you through the most common triggers and shows how to detect them in time.
Step 1: Check Disk Visibility in the NAS Interface. Log into the NAS dashboard and verify whether both drives are recognized. If one disk disappears or reports abnormal behavior, the RAID may already be degrading.
Step 2: Review Performance Trends. Slow file openings, delayed folder browsing, or drastically reduced transfer speeds often indicate that one disk is struggling to maintain synchronization.
Step 3: Inspect RAID Status Messages. Alerts like “Degraded,” “Crashed Volume,” or “Rebuilding Failed” usually mean that the filesystem and array metadata are compromised and require immediate attention.
Step 4: Examine Power and Temperature Logs. Power fluctuations, overheating, or constant fan noise can accelerate disk wear and trigger failure sequences in two-disk RAID setups.
- SMART warnings frequently highlight mechanical wear and imminent read errors.
- Metadata inconsistencies arise after failed rebuild attempts or firmware bugs.
- Disk desynchronization appears after improper shutdowns or unstable power supply.
Following these steps helps identify RAID failure early and increases the success rate of data recovery on NAS WD My Cloud Mirror (Gen 2) devices.