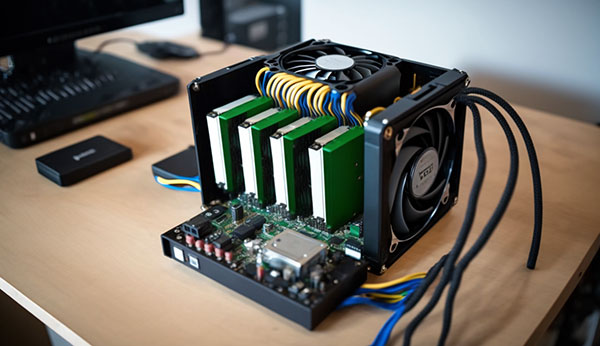
When a TerraMaster F2-424 NAS stops responding or its RAID array degrades, recovering data is crucial. Issues often stem from disk failures, interrupted rebuilds, corrupted RAID metadata, or logical corruption that blocks filesystem access. Files suddenly disappearing usually signals RAID inconsistencies or controller problems. This guide covers common failure scenarios on the TerraMaster F2-424 and outlines recovery steps aimed at avoiding further data loss.
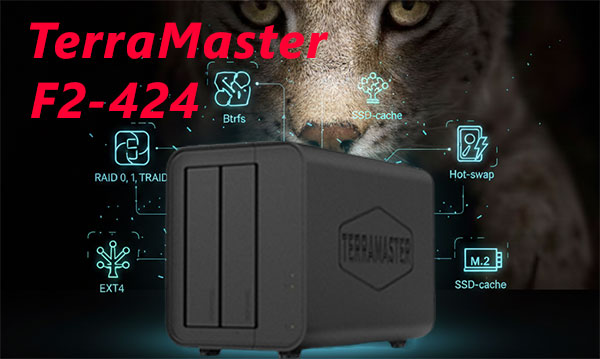
Technical Specifications of NAS TerraMaster F2-424
The TerraMaster F2-424 comes with 2 drive bays, suitable for home or small office setups. It supports RAID 0 and RAID 1, allowing either performance improvements through striping or data protection via mirroring. The unit handles EXT4 and Btrfs filesystems; this matters because Btrfs’s metadata and snapshot features can complicate recovery after corruption or disk failure.
Recovering data from a TerraMaster F2-424 requires accurately determining the RAID configuration, drive order, and filesystem. Getting any of these wrong often leads to partial or failed file recovery after disk issues or accidental deletions.
Key Specifics of Data Recovery on TerraMaster F2-424
Recovering data from a TerraMaster F2-424 NAS requires understanding its two-bay RAID setups. This model typically uses RAID 0 for performance and RAID 1 for redundancy. In RAID 0, failure of one disk usually means the entire array is lost, so recovery involves using specialized reconstruction tools to reassemble the striped data. RAID 1 mirrors data across drives, but if both disks get corrupted or the EXT4 or Btrfs file systems become inconsistent or damaged, recovery shifts to direct disk imaging and forensic analysis on a workstation.
These two-bay units often store photos, videos, and important work files. As a result, recovery usually focuses on retrieving personal media collections and critical office documents affected by degraded arrays or interrupted rebuilds.
Main Features of the NAS TerraMaster F2-424
| Drive Bays | Supported Drives | Hot Swappable | RAID Levels | File Systems | Maximum volume |
| 2 | 2.5" or 3.5" HDD, SSD | ✓ | RAID 0, RAID 1, JBOD, TRAID | EXT4, BTRFS | 44 Tb |
On this unit the primary storage architecture is TRAID, a drive-aggregation layer exposed by the device firmware running TOS 5.1 / 6.0. The NAS supports multiple array modes (RAID 0, RAID 1, JBOD, SINGLE) with filesystems formatted as BTRFS or EXT4, and an optional SSD cache. Because TRAID within TOS is responsible for array assembly and on-disk layout, the single most probable model-specific failure point is corruption or loss of the TRAID metadata managed by TOS, which prevents correct reconstruction of the logical volume.
When TRAID metadata is inconsistent or lost the system cannot present the constituent drives as a coherent logical device, rendering the underlying BTRFS or EXT4 volumes logically inaccessible despite intact physical sectors. Recovery outside the NAS therefore focuses on imaging or exporting the raw drives, reconstructing the TRAID layout and metadata on an independent workstation, and then mounting or repairing the recovered BTRFS/EXT4 filesystems to extract data. This approach isolates array metadata repair from the device firmware and allows file-level recovery once the volume is reassembled.
Step-by-Step Guide to Recover Data from NAS TerraMaster F2-424
Recovering data from a two-bay TerraMaster F2-424 NAS is possible even after RAID issues, disk failures, or file system damage (EXT4/Btrfs). Use this workflow to retrieve your files while limiting further risks:
-
Step 1 Power off the NAS and remove both drives.
Make sure the device is fully shut down before pulling the disks. Note their exact slot positions, since drive order is key for RAID metadata reconstruction.
-
Step 2 Connect the drives to a workstation.
Use direct SATA connections or reliable USB-to-SATA adapters. Both disks need to be accessible at the same time for proper RAID assembly and metadata reading.
-
Step 3 Open your RAID recovery software.
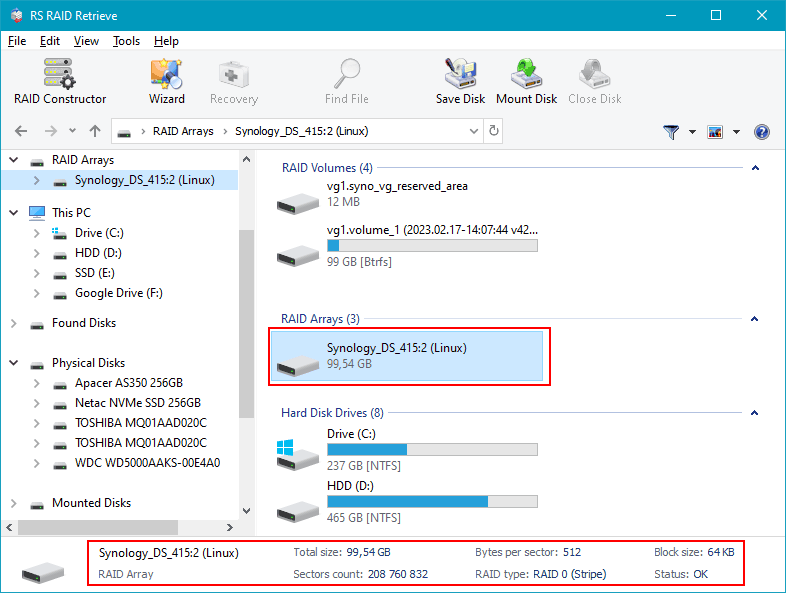
Launch RS RAID Retrieve. It will scan both drives and try to detect RAID parameters automatically. Check the RAID level, stripe size, and disk order shown at the bottom of the window.

Data recovery from damaged RAID arrays
Available for: Windows, macOS, Linux -
Step 4 Confirm or set RAID parameters manually.
If auto-detection fails due to corrupted metadata or interrupted rebuilds, enter RAID 0 or RAID 1 settings yourself based on your NAS configuration.
-
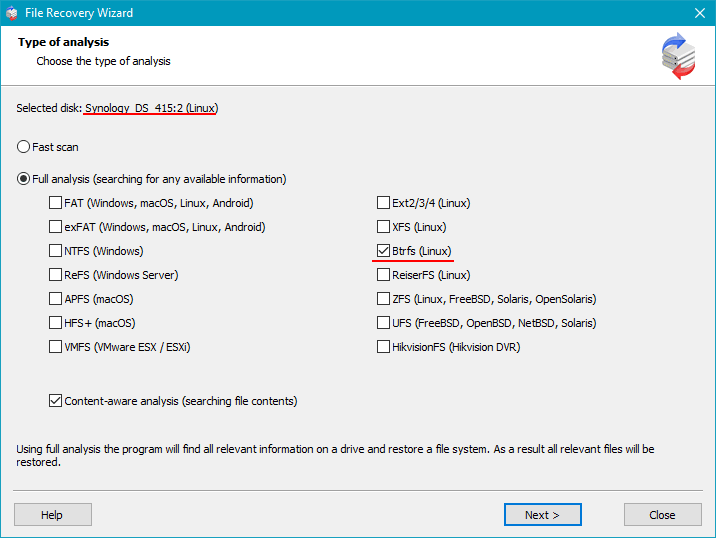
Step 5 Run a full scan.
The software will rebuild the filesystem structure and try to recover files affected by corruption or accidental deletion.
-
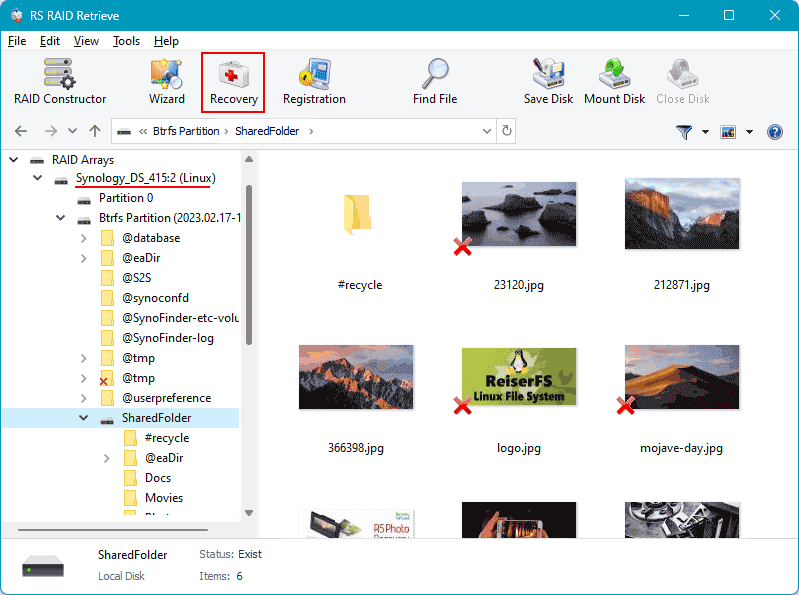
Step 6 Review recovered folders.
Browse through recovered files—photos, videos, documents—to check their condition before exporting.
-
Step 7 Export the recovered data.
Copy the recovered files to a different drive or partition to avoid overwriting the original disks and risking further data loss.
Tip: Do not write new data to the original NAS drives during recovery to keep remaining data intact.
Why RAID fails in 2-disk NAS TerraMaster F2-424
RAID failures on a 2-disk TerraMaster F2-424 NAS usually result from a combination of hardware wear, unstable system conditions, and file system errors that feed into each other. With only two drives tightly linked, even minor differences in drive health or early SMART warnings can speed up array failure. Below are common failure modes seen during actual recovery cases that often force data restoration.
1. One disk disappears. A common first sign of RAID trouble is when a drive suddenly stops showing up in the NAS interface without warning. This often points to firmware bugs, brief electrical glitches, or gradual mechanical issues causing the controller to drop the disk. Once a drive is lost, the array immediately loses redundancy.
2. Noticeable slowdown. In a two-disk RAID, degraded performance shows up as slow file access, lower throughput, and longer delays browsing directories. These symptoms usually come from failing sync processes, where the system struggles to rebuild parity or mirror data due to intermittent read errors or disk slowdowns.
3. “Degraded” or “Crashed Volume” warnings. When the NAS dashboard flags the volume as Degraded, it means redundancy is compromised and the RAID’s integrity is at risk. Ignoring this can lead to a full Crashed Volume state, where metadata corruption or multiple disk failures require urgent professional recovery to prevent permanent data loss.
4. Files become unreadable. In RAID 0 setups or when both disks fail simultaneously, files may become completely inaccessible. Users often see errors like “File Corrupted” or “Directory Unavailable,” indicating the stripe or mirror data is damaged beyond the NAS’s ability to recover.
- Undetected disk disconnects or controller dropouts
- Parity or mirror sync failures causing data inconsistencies
- Sector-level degradation flagged by SMART leading to read retries and timeouts
- Unexpected power loss causing RAID metadata corruption and array dropouts
The main causes of data loss in NAS devices
Disk failure. Physical wear or outright failure of HDDs or SSDs is a common source of data loss, especially in 2-disk NAS setups where RAID0 lacks redundancy and RAID1 offers only basic fault tolerance. Quick identification of the failed drive is crucial to prevent further array damage.
Human errors (deletion, formatting). Accidental deletions or unintended formatting often make data inaccessible. However, metadata structures sometimes remain intact, allowing partial recovery if action is taken before data is overwritten.
Firmware or DSM update errors. Interrupted or failed firmware or DiskStation Manager updates can corrupt partition tables or filesystem metadata. This may cause RAID arrays to drop or volumes to become unmountable, requiring RAID metadata reconstruction or manual filesystem repairs.
Power problems and sudden shutdowns. Unexpected power loss during write operations can lead to filesystem inconsistencies and RAID corruption. This typically results in degraded arrays or journal replay failures, demanding thorough filesystem checks and RAID metadata validation to prevent permanent data loss.