For organizations relying on the NAS Synology DS218play, any disruption — RAID degradation, disk failure, or system corruption — can result in costly downtime. Understanding how data loss occurs on this model is essential for maintaining business continuity. This guide outlines the key risks affecting the NAS Synology DS218play and provides practical recovery strategies for professional environments
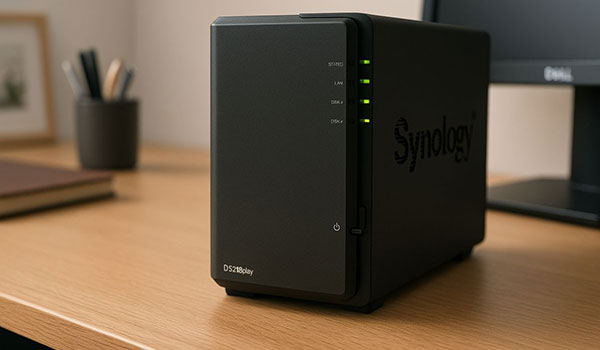
Key NAS Specifications That Ensure Reliability and Data Protection
The Synology DS218play NAS combines performance, security, and convenience in a compact solution designed for home offices and professionals. With 2 drive bays, it supports RAID 0/1 configurations, allowing you to choose between faster performance or improved data protection. Its modern EXT4 and Btrfs file systems offer advanced stability, while seamless network integration ensures quick access to your files from any device.
If the unexpected happens — disk failure, corruption, or accidental deletion — the system’s well-structured RAID architecture makes data recovery fast and highly effective using specialized tools.
Technical Specifics of Data Recovery on Synology DS218play
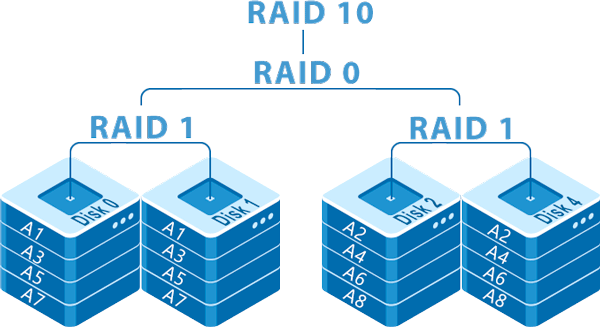
Data recovery on the Synology DS218play requires understanding of its dual-bay architecture and RAID metadata layout. RAID 0 stripes are distributed in fixed-size blocks, while RAID 1 mirrors maintain identical superblocks across disks. The device typically utilizes EXT4 or Btrfs, each with its own journal and tree-structure constraints. During recovery, drives must be imaged sector-by-sector to prevent metadata corruption, and RAID parameters (chunk size, order, layout) must be reconstructed manually or via specialized tools.
Main Features of the Synology DS218play NAS
| Drive Bays | Supported Drives | Hot Swappable | Supported RAID | File Systems | Maximum volume |
| 2 | 2.5" or 3.5" SATA | ✓ | RAID 0, RAID 1, JBOD, SHR | EXT4, BTRFS | 24 Tb |
In the DS218play the storage stack is a classic Synology layout: hardware RAID is managed by mdadm with Synology’s variant SHR, a Linux LVM layer presenting logical volumes and either EXT4 or BTRFS as the on-disk filesystem under DSM 7.2. Model-specific failure points we see in diagnostics are damaged mdadm superblocks or mismatched metadata versions after a failed upgrade, lost or overwritten LVM metadata, and filesystem metadata corruption in BTRFS trees or EXT4 journals. There is no SSD cache to mitigate IO pressure. The device’s constrained runtime environment (1 GB RAM) increases the risk that intensive operations such as rebuilds, scrubs or DSM kernel updates will be interrupted, producing incomplete writes or OS-level hangs that leave arrays degraded or LVM inactive.
Logical inaccessibility typically arises when RAID members are flagged missing or mdadm metadata is inconsistent, preventing array assembly; when LVM cannot activate volume groups due to corrupted VG headers; or when filesystem superblocks/trees cannot be validated, yielding read-only mounts or mount failures. Recovery principle is to avoid further in‑place modification: image all physical volumes, then perform offline assembly and metadata restoration on a controlled Linux workstation using the original mdadm/SHR parameters and restore or rebuild LVM headers before probing EXT4 or BTRFS structures. This staged, read-only-first workflow preserves evidence and enables data extraction outside the NAS environment without relying on the device’s constrained OS.
Step-by-Step NAS Synology DS218play Data Recovery Guide
When your 2-disk NAS Synology DS218play stops responding — whether after a RAID failure, file-system corruption, accidental deletion or power loss — the situation feels urgent. This guide is built to reduce cognitive load and help you move through recovery with clarity. Every step is actionable, simplified, and aligned with best practices used by data-recovery professionals.
-
Step 1 Power down your NAS DS218play and remove the drives.
Shut the device down completely. Slide out both disks carefully and label them “Disk 1” / “Disk 2” to preserve array order — a critical UX-safe detail for accurate RAID reconstruction.
-
Step 2 Connect both drives to your computer.
Use SATA ports or adapters. Ensure both disks are mounted simultaneously; the software needs full access to rebuild the RAID architecture correctly.
-
Step 3 Launch RS RAID Retrieve.
The interface guides you through detection, RAID auto-assembly, and scan options. The preview panel displays configuration details so you can validate the restored RAID layout before scanning.

Data recovery from damaged RAID arrays
Available for: Windows, macOS, Linux -
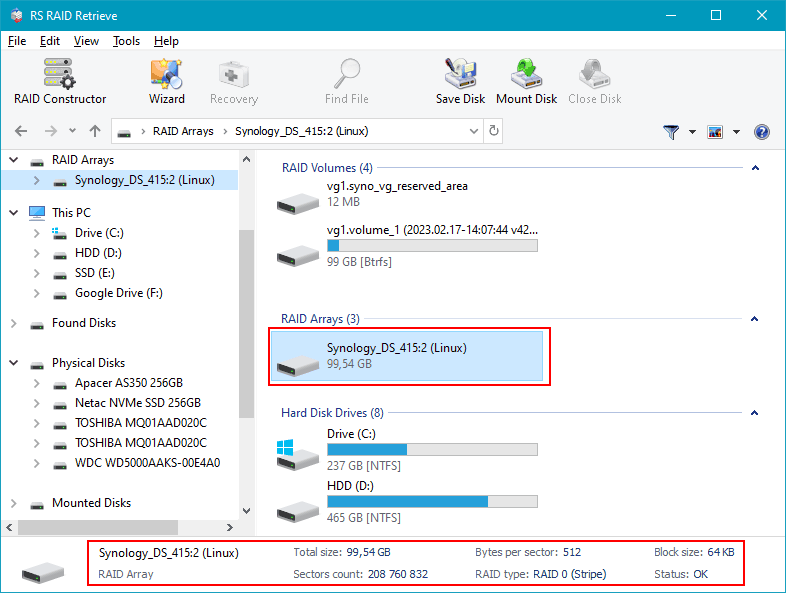
Step 4 Verify RAID parameters.
The tool usually identifies stripe order, block size, and RAID type automatically. If not, you can adjust settings manually with real-time feedback in the UI.
-
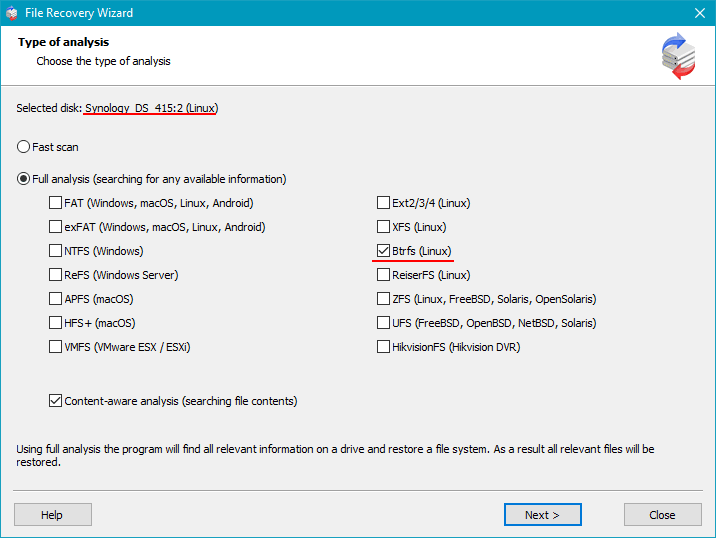
Step 5 Run a deep scan.
The algorithm reconstructs folders, recovers deleted items, and restores media metadata for photos, videos, documents, and more.
-
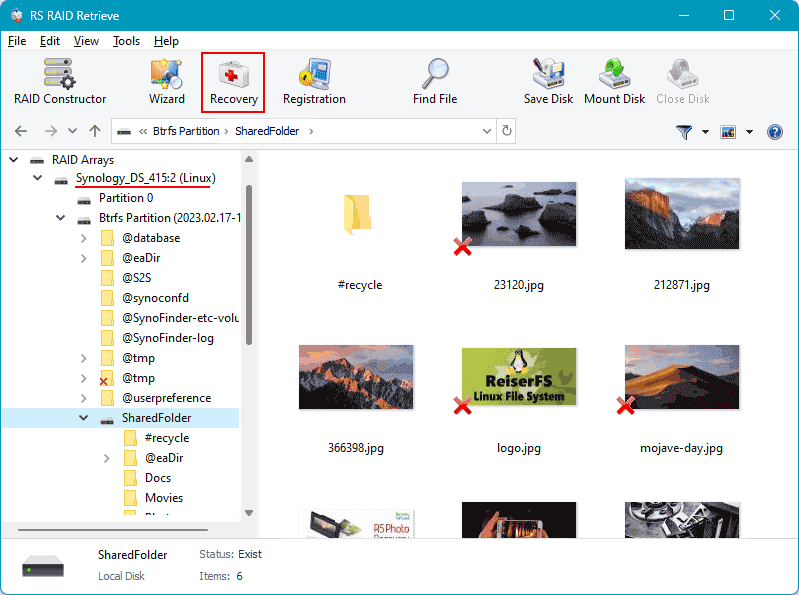
Step 6 Review the tree structure.
Explore the recovered directory: thumbnails, file types, timestamps — everything is organized for intuitive navigation.
-
Step 7 Export your files.
Select any safe storage location — external HDD, SSD, or a separate partition. Avoid writing anything back to the original drives.
Tip: Keep the recovered data on a new device to prevent overwriting and ensure maximum recovery success.
Common Causes of Data Loss in NAS Devices
Data loss in NAS systems often occurs due to RAID failures, accidental deletion, firmware corruption, disk degradation, and power outages. Misconfigured RAID arrays or simultaneous disk failures also frequently lead to inaccessible volumes or damaged file structures.
Why RAID Fails in NAS Synology DS218play
When a NAS Synology DS218play with two drives starts acting strangely, it usually hints at deeper RAID issues. UX-focused diagnostics show that users often notice early signals long before an actual failure — and recognizing these patterns helps protect data before it’s too late.
Drive desynchronization over time. Even if both disks seem healthy, subtle delays in read/write tasks gradually break RAID harmony. These small inconsistencies accumulate and eventually cause degraded status.
Hidden disk wear. A 2-bay NAS relies on perfect cooperation between drives. But sectors fail silently: the NAS keeps running, performance drops, and users start experiencing delays while opening or copying files.
Thermal imbalance. Many RAID failures originate from simple overheating. If the enclosure can’t maintain airflow, one disk ages faster, leading to mismatched performance that threatens the whole RAID.
Firmware conflicts. Different firmware versions between drives or outdated NAS OS can cause synchronization failures, unexpected rebuild loops, or forced RAID degradation.
- early disk dropouts
- slower file access or freezing directories
- repeated “Degraded” notifications from the NAS interface
File access disruption. When RAID 0 fails — or when both drives show errors at once — files become unreadable or completely inaccessible, triggering urgent data recovery.