A failing RAID array on NAS D-Link DNS-326 can instantly make the entire storage pool inaccessible. RAID 1 mirror inconsistencies, metadata corruption, failed resync operations, or unexpected disk dropouts are common triggers for data loss. In this article, we outline the most frequent RAID-related issues affecting the NAS D-Link DNS-326 and explain how to recover data safely without risking overwriting or additional damage.
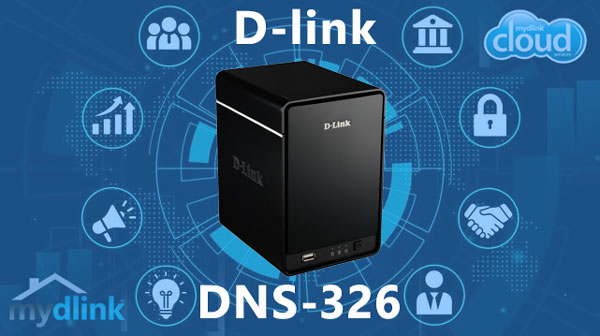
Hardware Overview of NAS D-Link DNS-326
The D-Link DNS-326 NAS comes with 2 drive slots, making it a simple and reliable solution for everyday storage needs. Even if you’re new to NAS devices, the setup is straightforward: install your drives, choose RAID 0 for speed or RAID 1 for safety, and you're ready to go. The system uses either EXT4 or Btrfs file formats, both designed to keep your files organized and protected.
If something goes wrong—like a disk failure or accidental deletion—understanding these basic technical details helps you restore your data more effectively.
Technical Aspects of Data Recovery on D-Link DNS-326
The D-Link DNS-326 architecture relies on two-disk RAID layouts, typically RAID 0 (striping) or RAID 1 (mirroring). Data recovery requires rebuilding metadata structures from EXT4 or Btrfs volumes, interpreting RAID parameters, and restoring logical block mapping. RAID 0 presents the highest risk due to the absence of redundancy, while RAID 1 allows partial reconstruction even when one drive is degraded. Advanced cases involve partition table corruption, DSM filesystem issues, and scenarios where both disks enter “crashed” state.
Main Features of the D-Link DNS-326 NAS
| Drive Bays | Supported Drives | Hot Swappable | Supported RAID | File Systems | Maximum volume |
| 2 | 2.5" or 3.5" SATA | ✗ | RAID 0, RAID 1, JBOD | EXT3 | 8 Tb |
The unit implements a mirrored storage architecture identified as RAID 1 on top of an EXT3 filesystem running in a Linux (NVR Edition) environment driven by a Marvell 88F6282 SoC with 128 MB of system memory. There is explicitly no SSD cache, so all IO and metadata work is serviced by the primary platter devices and the SoC/RAM pair. Analytically, the single most probable model-specific failure point is the filesystem journal and metadata handling under constrained memory and SoC resources: incomplete journal commits or corrupted metadata structures are the most direct failure locus that follows from the listed combination of EXT3, limited RAM and the onboard processor.
When the on-box journal or metadata becomes inconsistent, the kernel will refuse a clean mount and the mirror can present divergent block images, producing logical inaccessibility even though raw blocks remain present. Recovery therefore proceeds outside the appliance by treating each mirrored disk as an independent block source on a Linux host: read the devices directly, compare and reconcile ext3 superblocks and inode/journal state, and perform controlled journal replay and metadata repairs to restore a consistent filesystem image. The absence of SSD caching simplifies this approach because no separate cache layer needs reconstruction.
Advanced NAS Recovery Workflow for 2-Disk Systems
When a 2-disk NAS fails — whether due to RAID degradation, accidental deletion, corrupted partitions or an unexpected power loss — you can still recover your files using a structured, technician-level workflow. Follow this detailed procedure to safely rebuild the RAID and extract your data.
-
Step 1 Power down the NAS and remove both drives.
Shut the unit down completely, disconnect all cables and carefully slide out the disks. Label them “Disk 1” and “Disk 2” to preserve the original RAID ordering, which is crucial for accurate reconstruction.
-
Step 2 Attach the disks directly to a PC.
Use SATA ports whenever possible for stable I/O throughput. Both disks must be connected simultaneously — NAS RAID cannot be rebuilt using single-drive access.
-
Step 3 Launch RS Raid Retrieve and load the drives.
The software will read RAID metadata, internal partition tables and filesystem signatures (EXT4, XFS, Btrfs). It reconstructs the original RAID configuration automatically but allows manual correction for expert users.

Data recovery from damaged RAID arrays
Available for: Windows, macOS, Linux -
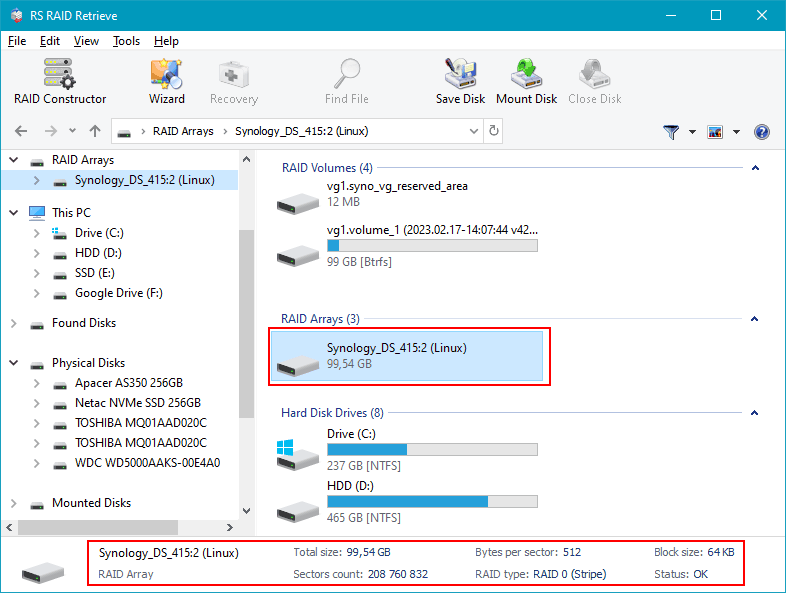
Step 4 Verify RAID parameters detected by the software.
Check strip size, disk order, parity rotation and block alignment. Incorrect parameters cause incomplete folder structures or unreadable files, so validate them carefully.
-
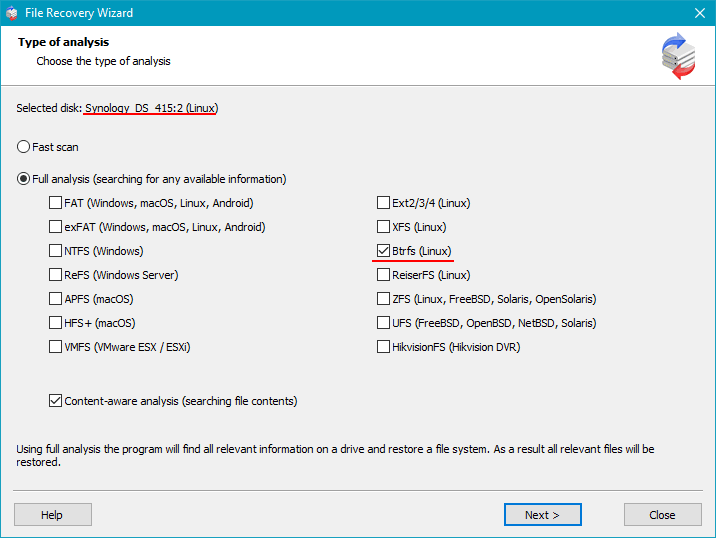
Step 5 Begin a full deep scan.
The program analyzes both disks sector-by-sector, reconstructs directory trees and identifies fragmented or deleted items. Deep analysis is recommended for damaged NAS volumes.
-
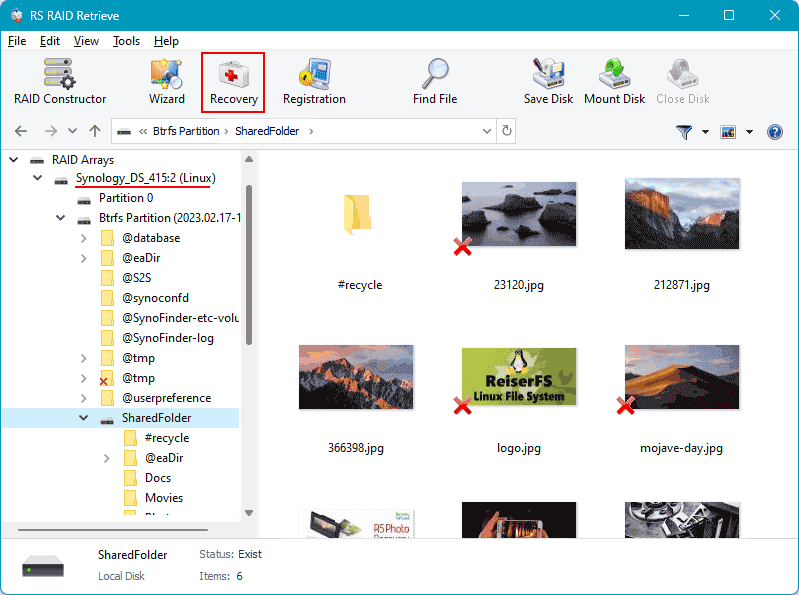
Step 6 Review detected files and validate recovered structures.
Open folders, preview thumbnails, and ensure key documents, virtual machine images, photos and multimedia content are present.
-
Step 7 Export your recovered data.
Always save files to a different drive — never to the original NAS disks — to prevent overwriting data remnants.
Tip: Avoid rebuilding the RAID inside the NAS until you’ve created a full backup of the recovered data.
Common Causes of Data Loss in NAS Devices
Data loss in NAS systems often occurs due to RAID failures, accidental deletion, firmware corruption, disk degradation, and power outages. Misconfigured RAID arrays or simultaneous disk failures also frequently lead to inaccessible volumes or damaged file structures.
Technician-Level Causes of RAID Failure in NAS D-Link DNS-326
In two-disk NAS systems such as NAS D-Link DNS-326, RAID degradation is typically the result of predictable mechanical, logical, or operational faults. From a technician’s perspective, each failure scenario presents a set of identifiable indicators, allowing structured diagnostics and controlled data-recovery workflow.
Drive desynchronization under continuous workload. Long-term operation causes sector reallocation, uneven read delays, and latency spikes. When one disk falls behind the RAID controller’s timing thresholds, the array marks it as out-of-sync, initiating a degraded state.
Unrecoverable Read Errors (URE) during resync. Two-bay systems using RAID 1 or RAID 0 are highly sensitive to URE. If a disk develops unreadable blocks during reconstruction, the process halts, resulting in a failed volume.
Thermal instability inside compact NAS chassis. Poor airflow, clogged vents, or aging cooling systems elevate temperature. Drives operating outside optimal thermal parameters demonstrate increased write errors and mechanical instability.
Controller-level inconsistencies. Firmware aging, interrupted writes, or voltage fluctuations lead to metadata corruption, causing RAID misalignment. Once the controller cannot match parity or mirror mapping, the array enters failure mode.
- Sector-level delays and SMART warnings accumulate unnoticed over weeks;
- Filesystem metadata desynchronizes after abrupt power loss or improper shutdown;
- Disks with different wear levels diverge in I/O throughput, accelerating RAID degradation.
This set of failure patterns is standard for NAS D-Link DNS-326 devices, and each requires targeted recovery actions, sector-by-sector imaging, and controlled RAID reconstruction.