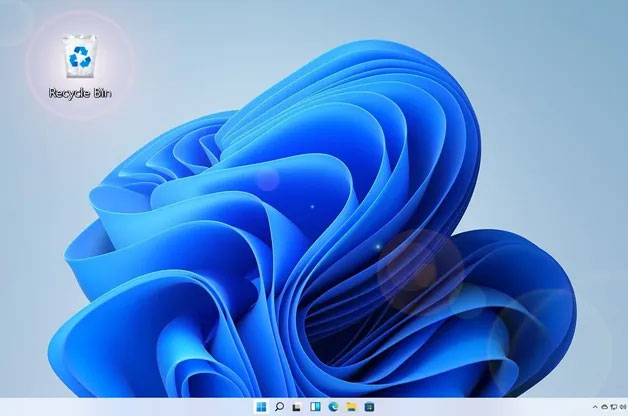
The new Windows 11 operating system brings some freshness through a new design and new features. All this has been discussed many times on the Internet. But we will talk about what to do if your important data disappear and how to correctly recover them in Windows 11.
Contents
- Using the File History feature
- Restoring files in Windows 11 via Windows File Recovery
- Recovering files in Windows 11 with RS Partition Recovery (the best solution)
Using the File History feature
The “File History” feature is also present in Windows 11, but the main drawback of this method is that you can recover only data stored on the desktop and in “My Documents“, “My Pictures“, “My Music“, “Favorites“, and “Contacts” folders. In the case of losing files on other local or removable disks, this method cannot be used.
Important: It is worth noting that “File History” does not always work correctly, and in some cases either refuses to work, or the data recovery process may not work correctly. So you should be prepared that this method may not work and you will lose important data.
Unlike Windows 10, you can’t run “File History” in Windows 11 through the system settings, as the developers removed it from this menu, focusing on laconic and usability. The settings display the basic settings only, which, according to the developers, will be used most often.
1.1 How to enable “File History” in Windows 11?
In Windows 11, you can launch the “File History” feature using the “Control Panel“. However, before you start using this function, get an external hard drive or flash drive. The larger the drive, the more information the function can save, and, thus, more data you will be able to recover in case of problems.
Let’s take a closer look at the enabling the File History feature:
Step 1: Connect your external hard drive or flash drive to your computer.
Step 2: Press the “Win + R” key combination, then in the opened window type “control” and press “OK“

Step 3: The “Control Panel” will open up in front of you. At the top right, near “View” section, select the “Small Icons” display mode.
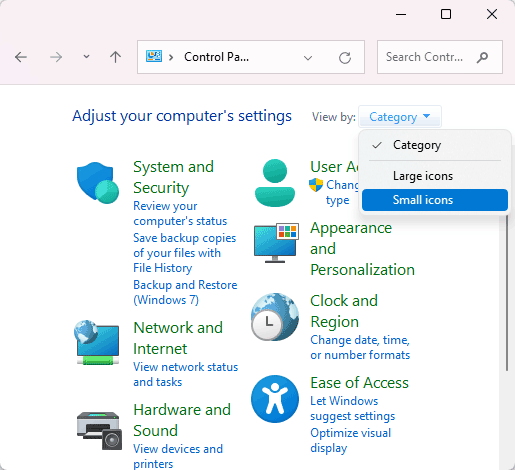
Step 4: On the menu that appears, locate “File History” and select it.
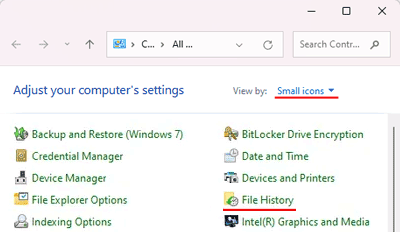
Step 5: The File History window appears. It will show the connected drive to which the data will be copied. Click the “Enable” button.
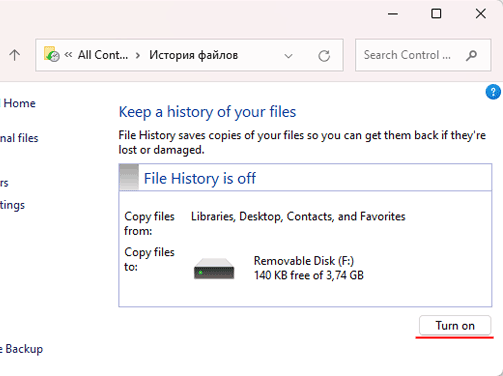
Tip: If you change your mind about using “File History” for any reason, just click the “Stop” button
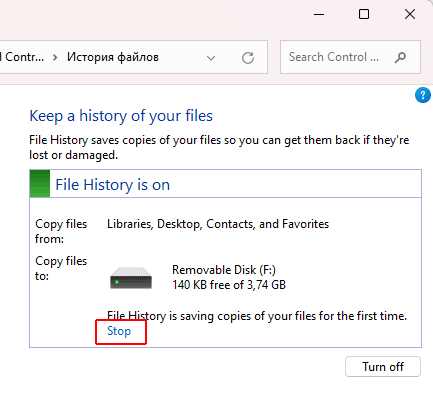
The date of the last copy will be shown when copying is complete.
Important: Your computer will periodically copy data as long as the drive is connected to your computer. But if you have more recent data that you want to keep, repeat these instructions.
1.2 How to disable the “File History” in Windows 11?
If you no longer need to use File History, you can easily disable it. To do this, open the “File History” window using the first four steps from the previous paragraph and click the “Turn Off” button to stop the data backup.
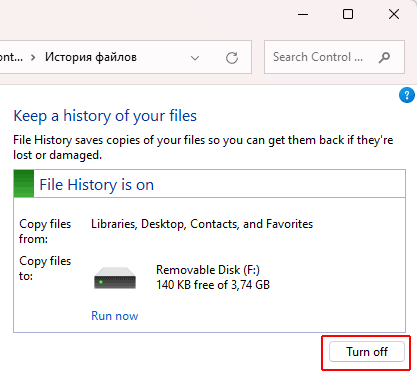
When you click the “Turn off” button, the File History function will be completely turned off, but the previously saved files will remain on the drive. Consequently, if you intend to lend someone the drive – delete the data manually.
1.3 How to recover data using File History
Using the File History feature you can recover the desired file from any of these folders: “My Documents“, “My Pictures“, “My Music“, “Favorites“, and “Contacts“. To do this, you should:
Step 1: Open the File History window using the steps in paragraph 1.1
Step 2: In the menu on the left click on “Restore personal files“
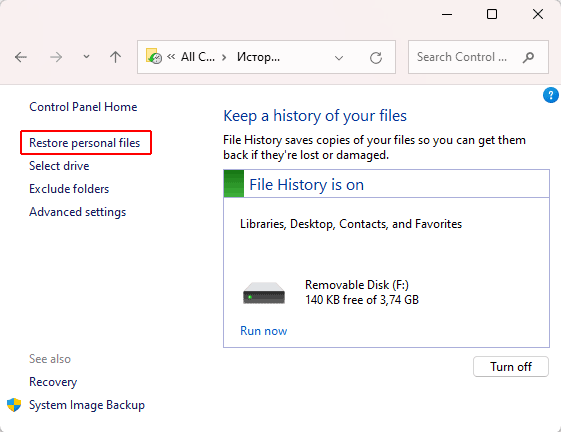
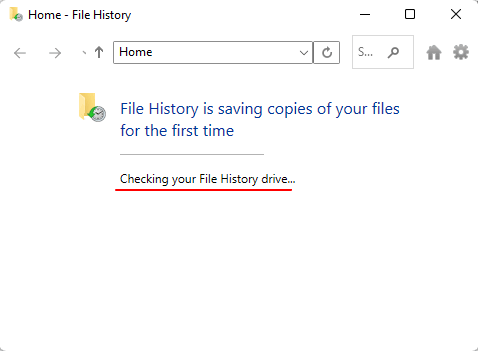
The system scans the drive for files to recover. It may take some time, depending on the size of the disk.
Step 3: Once the drive scan is complete, the disk will open in front of you and you can select the folder or file you want to recover. Just click on the green button in the bottom middle to start the recovery.
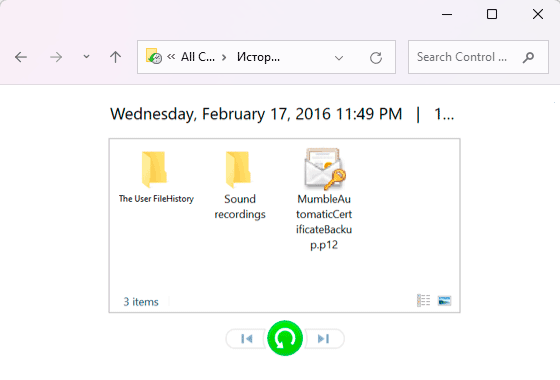
Tip: To open a folder and find the file you want, double-click on it. That is, all navigation through the backup looks like in regular Explorer.
By default, the File History feature restores files to where they were stored before. If you want to write the restored file to a different location – click on the gear icon at the top right and select “Restore to“
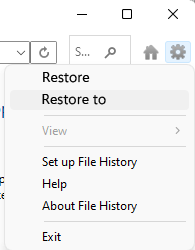
A window will open where you can select the folder where you want to restore your files
Restoring files in Windows 11 via Windows File Recovery
Recently, Microsoft released its own program for recovering lost data called Windows File Recovery. You can download it from the Microsoft Store, but before you do, it is recommended to consider several characteristics of the program. First, the program has no graphical interface, and all manipulations are performed by entering commands at the command prompt. Thus, you will need to memorize or write them down to be able to use Windows File Recovery.
The other specific characteristic of the program is that it supports the NTFS, FAT32, ExFAT, and ReFS file systems only. No file systems different from those supported by Windows.
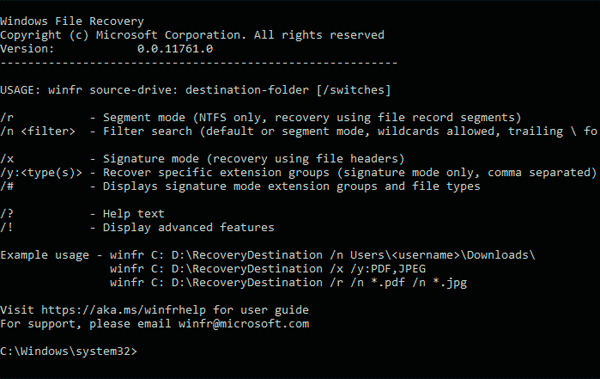
After launching the downloaded application, you will see the following window:
To start the recovery, use the command:
winfr F: D:\Recovered
This command will find and restore all files that are located on the F:\ drive, and save the recovered data to the D:\Recovered folder. Of course, you can specify your own drive letter and path to save the recovered files.
You can also specify additional keys. For example, /x will enable analysis based on file signatures. Accordingly, the command will look as follows:
winfr F: D:\Recovered /x
To search through the specified file types, you may use the /y parameter. For example, a command that will search for .jpeg images only will look like this:
winfr E: D:\Recovered /x /y:JPEG,PNG
It is worth noting that the /y key can only be used with /x key. Otherwise, the program will give an error.
The /n key is used to recover files with names containing certain characters. For example, if you add “rep”, the program will search only for files with these letters in their names. The command will look like this:
winfr F: D:\Recovered /x /n rep*
Important: If the /x switch is not specified, the program will only work with NTFS disks. The * sign means that the specified characters can occur in any part of the file name.
With the /n flag, you can also specify from which folder you want to recover files. The command will follow:
winfr F: D:\Recovered /x /n Users\username\Desktop\
…where Users\username\Desktop\ is the folder from which the files will be recovered.
Note: The disk name is already specified at the beginning of the command, so there is no need to specify the disk name more than once.
As you may have noticed, Windows File Recovery is not very convenient for a new user. But if you are a command prompt aficionado, you can use it.
Recovering files in Windows 11 with RS Partition Recovery (the best solution)
The previous two methods have several significant drawbacks. In the case of using the File History feature, the problem lies in the ability to recover the files from certain system folders only. But what if the data is lost from a different disk or memory card?
The use of Windows File Recovery also cannot be considered as a successful decision as the recovery process starting is complicated (to begin recovery it is necessary to enter a bunch of commands, etc.). What about inexperienced users? Many professions do not require deep PC knowledge and use the computer at a basic level.
But a much bigger disadvantage of Windows File Recovery is the lack of support for any file systems other than NTFS or FAT. So what to do if the disk was previously used in Linux and uses the ext4 file system?
Fortunately, there is a solution that allows recovering lost data regardless of the level of computer knowledge or type of file system.
We are talking about RS Partition Recovery, the best solution on the market today.
The program has an intuitive interface, thanks to which even inexperienced users can recover the data.
But the most important advantage of RS Partition Recovery is the support of ALL modern file systems. Thus, you can recover lost data from any disk regardless of the type of computer (PC, Mac, server, NAS) or file system. You can also recover the data from local drives as well as from any other external drives, flash drives, or memory cards.
The data recovery process is performed in a few clicks and looks as follows:
Step 1. Install and launch the RS Partition Recovery.

All-in-one data recovery software
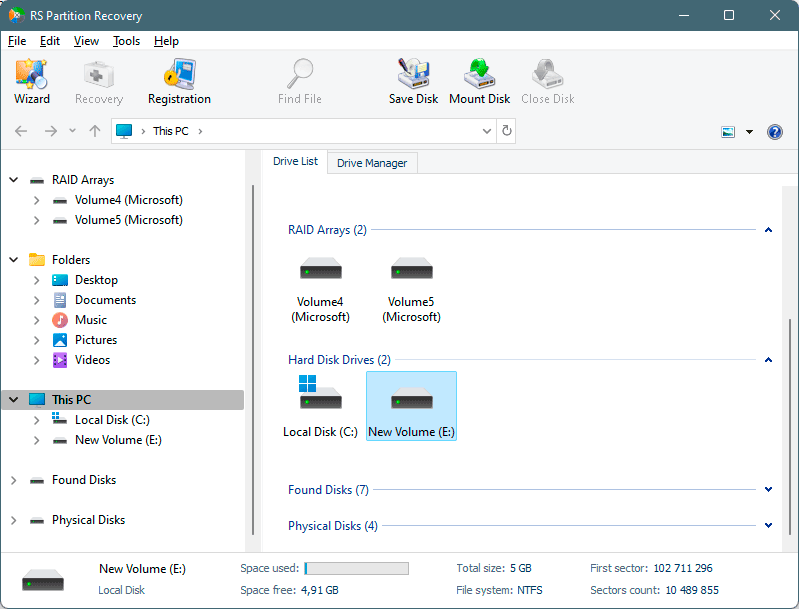
Step 2. Select the drive or partition from which you want to recover data.
Step 3. Choose the type of analysis.
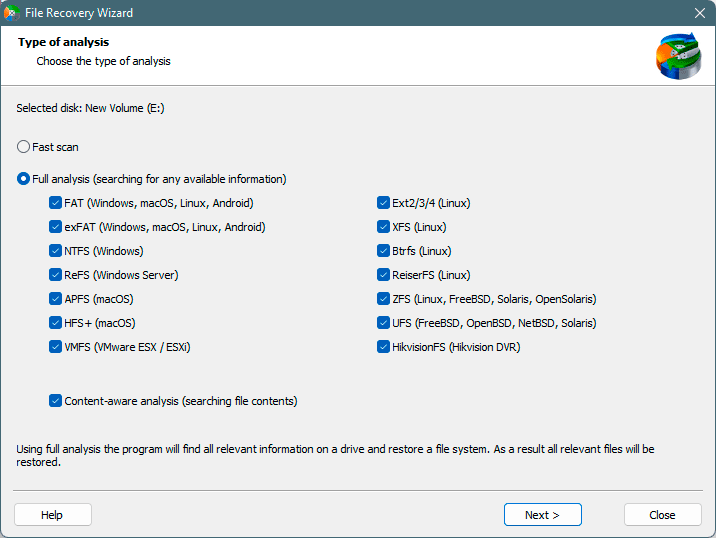
Fast scan you should use in case the file was lost recently. The program will scan the drive quickly and show the files available for recovery.
The Full analysis function allows you to find lost data, after formatting, disc resizing, or file structure corruption (RAW).
Step 4. Preview and select the files to recover it.
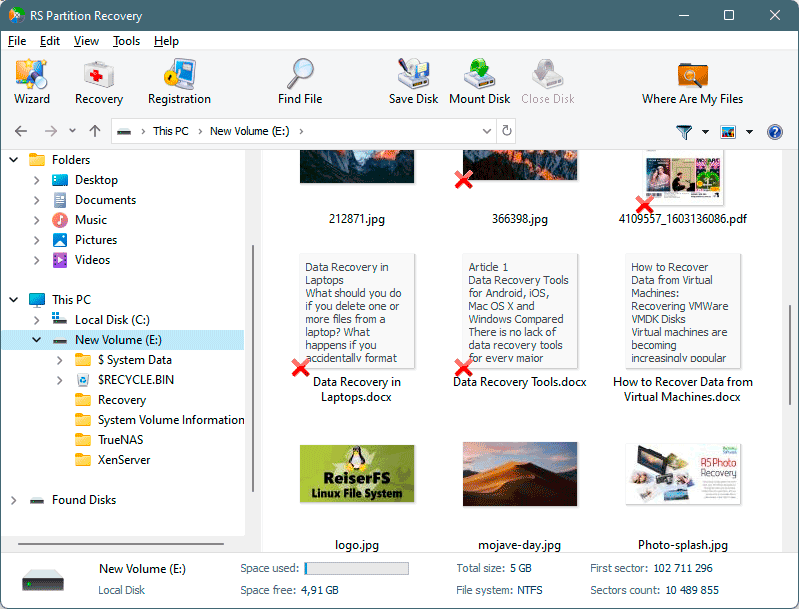
Step 5. Add the files you want to save to the "Restore list" or select the entire partition and click Recovery.
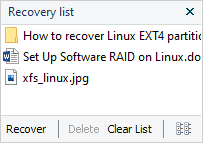
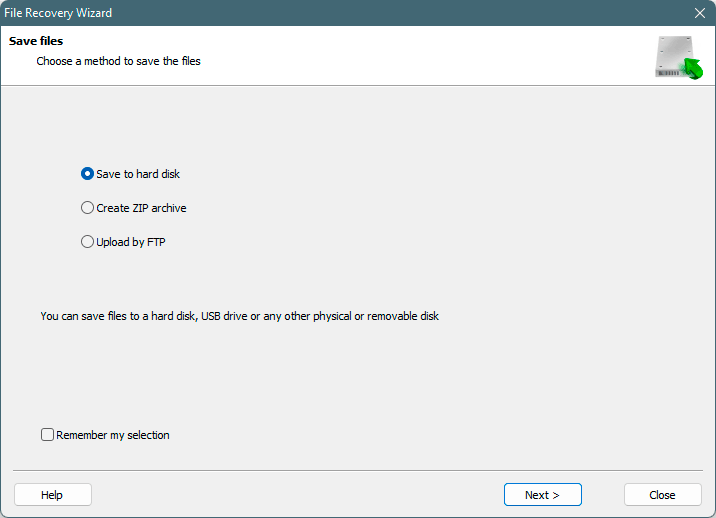
It should be noted that it is best to save the recovered file to an external hard drive or USB flash drive.
As you can see, the user-friendly interface and built-in file recovery wizard, as well as support for all file systems make RS Partition Recovery a must-have tool for every computer owner.


