TrueNAS is one of the most optimized operating system for NAS, which was known before as FreeNAS. It is a free operating system, that can be used on the NAS assembled by yourself. The main advantage of the TrueNAS operating system is the ability to work with the modern and productive ZFS file system. In addition, the True NAS can realize the unique RAID configurations like RAID-Z and RAID-Z2. But how to install the TrueNAS? How to setup it to your basic requirements? How to connect NAS on Windows PC?

Contents
- TrueNAS system requirements
- TrueNAS distributive
- TrueNAS installing
- TrueNas setting up
- Connecting NAS in Windows
- The data recovery from TrueNAS
TrueNAS system requirements
So TrueNAS is an operating system for self-made NAS.
What you need to do to build your NAS.
System requirements for the TrueNAS operating system:
- 64-bit Intel or AMD processor;
- 8 GB of RAM;
- a separate SSD or HDD of at least 16 GB for the installation and functioning of TrueNAS itself;
- hard drives directly for the storage;
For storage, it is best to use at least 2 HDD to be able to create the fail-safe RAID 1 array. It is also good to use the similar disks. It should be the same size, and even better — the same model.
You can connect any number of disks to the NAS. But do not forget that in BIOS Legacy mode, the visibility of each of the disks is limited to its maximum size of 2.2 TB. But you can bypass this restriction by enabling the UEFI mode in BIOS.
TrueNAS distributive
The TrueNAS is supplied as a regular ISO installation image. You can download it on the official website of the operating system.
Next, the ISO image must be written to the bootable flash drive. There are many programs and utilities to do this. One of them is simple, free and convenient is the program, called Rufus. When creating a bootable flash drive with TrueNAS do not forget about the BIOS mode – Legacy or UEFI. The flash drive must be adapted to BIOS mode.
TrueNAS installing
Connect the monitor and keyboard to the NAS temporarily. Then boot the device from the TrueNAS installation flash drive. The installation process is primitive – you can use the keyboard only. You have to use the arrows keys on keyboard to navigate in the menu. To confirm the selection, ie press “Ok” – use the “Enter” key.
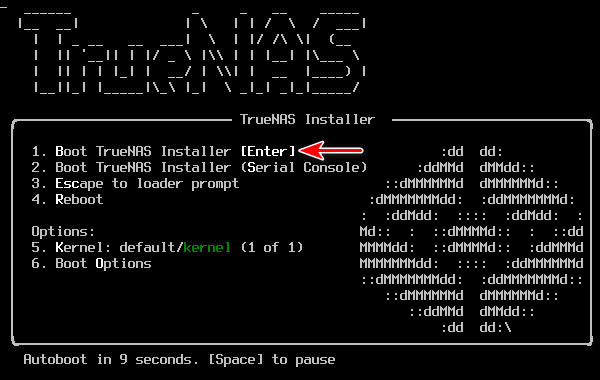
At the initial stage, press “Enter” to launch the first menu item “Boot TrueNAS Installer“. It is the first step to the installation of the operating system.
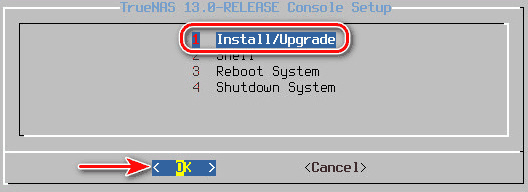
Then choose the first item called “Install/Upgrade” and press ”Enter”
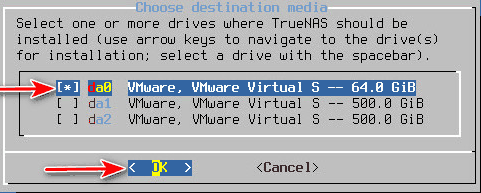
You will see the list of hard drives, connected to the NAS. Choose the one, to which the system will be installed and check it by pressing “Spacebar”. Then press “Enter” to confirm this action and go to the next step.
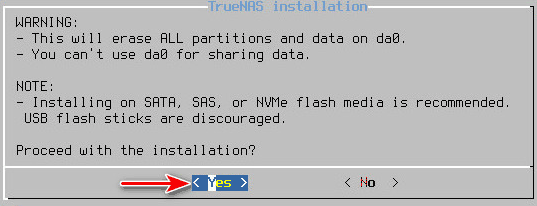
You will see the warning about the data eracing. Choose “Yes”
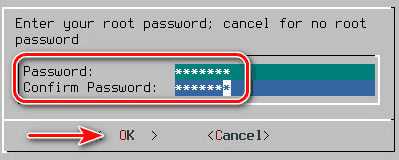
You should set a password when creating a NAS administrator account. The system will give us the default name: root. It is unchangeable. Enter the password, confirm it, press “Enter”.
Select the BIOS mode to which TrueNAS will be adjusted. “Boot via UEFI” is the UEFI mode, and “Boot via BI0S” is the Legacy mode. UEFI mode is better to use if the NAS is based on a processor and a motherboard that is less than 10 years old. If you have the older hardware — UEFI mode may be not supported. In this case, choose, of course, the “Legacy” mode and press “Enter“.

At the stage of creating a paging file of 16 GB choose “Create swap“

Then the TrueNAS will be installed. Press “Enter”

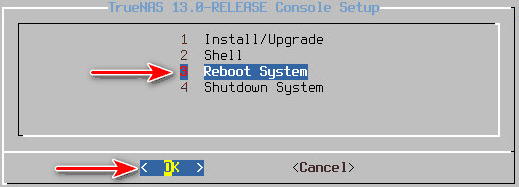
Reboot your device. To do this choose the “Reboot System” and press “Enter”
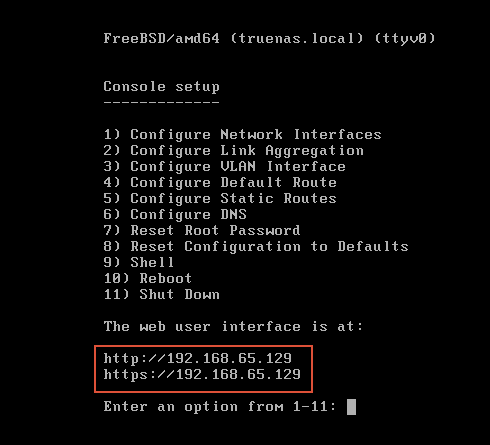
Remove the bootable flash drive. Once TrueNAS is loaded completely, we will see the internal local IP address of the NAS device. With this address we will connect remotely to control the device.
You can pay attention to the network settings of the device above. But they will need it very rarely. For example, we will need it if the NAS is not visible on the network. In most cases, when the local network is provided by a router, the NAS will receive all the necessary network settings by default.
That is all. Now you don’t need the monitor and a keyboard.
TrueNas setting up
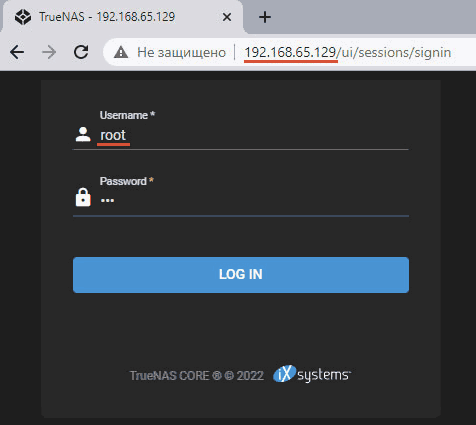
Next, you need to configure the TrueNAS on your computer and configure the NAS storage accordingly. It is remotely controlled via a web interface. All we need for this task is a browser. Enter the NAS IP address in the browser’s address bar and press “Enter”
The TrueNAS Remote Connection form appears. Log in – enter the “root” login and the password that we set when creating a NAS administrator account. Click “Login“
Creating the pool
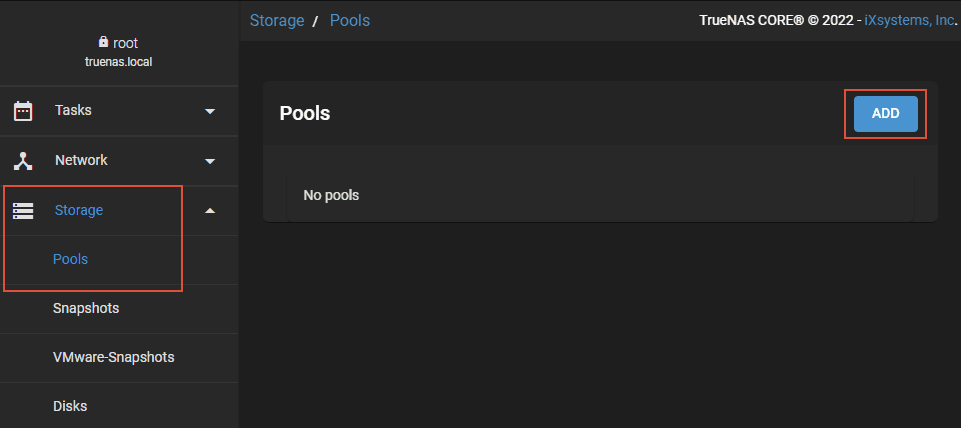
The second step is to create a NAS pool from the disks assigned to it. In the “Storage → Pools” section, click “Add“
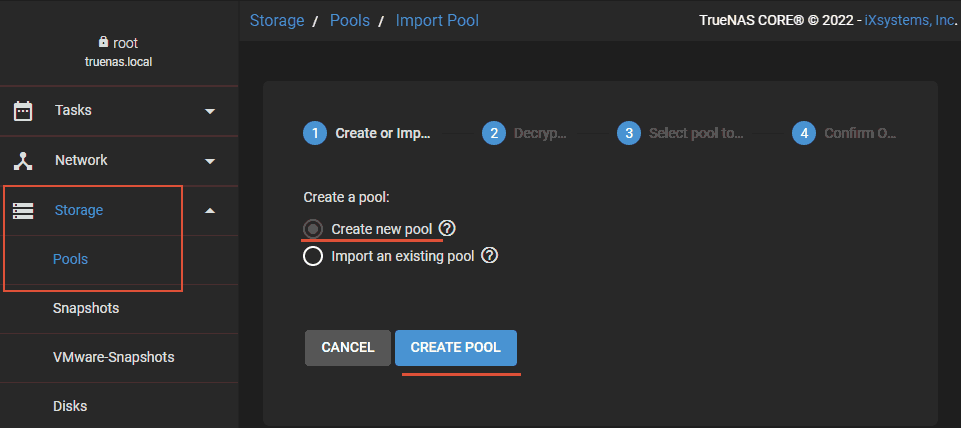
Let’s create a disk pool. The item for creating the pool is set by default. Just click “Create pool“
Give the pool name. Check the “Show disks with non-unique serial numbers” option. In the “Available disks” section mark the disks that we want to add to the pool. In our case it is 2 identical disks which will create software fail-safe RAID 1 array. Then press an “Right arrow” on your keyboard.
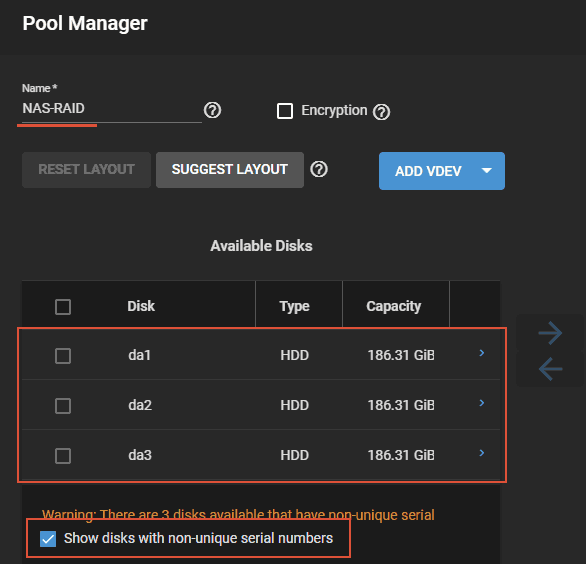
It will move the disks to the block on the right (to the “VDev data“, ie to the pool). Here the tick the disks again. Then choose the storage type from the drop-down list below. In fact, you will choose the disk array type.
TrueNAS offers the following options:
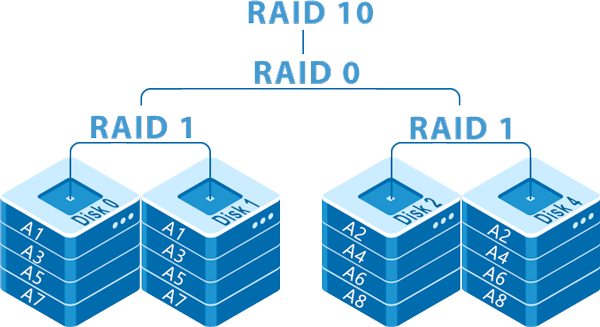
- Stripe is the RAID 0 array without redundancy and fault tolerance, but it will twice the data processing speed;
- Mirror is RAID 1 array — basic fail-safe array with data cloning to the second disk;
- RAID-Z is a fail-safe RAID array, inherent in the ZFS file system. It is an improved analogue of RAID 5;
- RAID-Z2 is a fail-safe RAID array, inherent in the ZFS file system. It is an improved analogue of RAID 6
About RAID and what configuration is better to choose, we analyze in the article What is a raid.
In our case there are only 2 disks. So, we can choose the alternations, or a mirroring. We choose a fail-safe mirror. Click “Create“
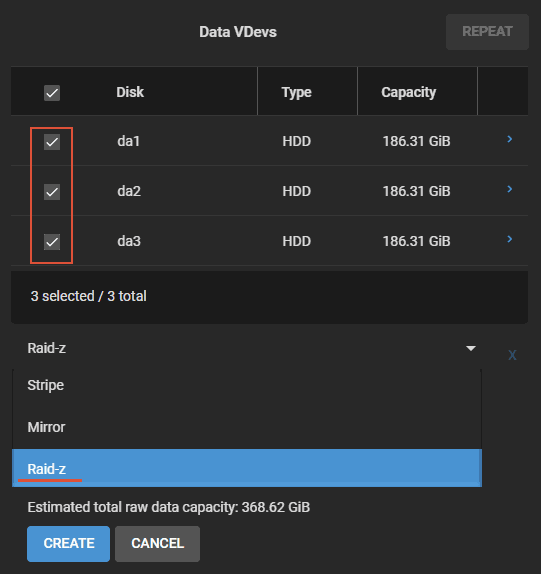
Then the system will warn us that all data on the disks will be erased. Confirm the decision and create the pool. Next, we will see our pool and RAID in the properties table.
Add a shared NAS folder
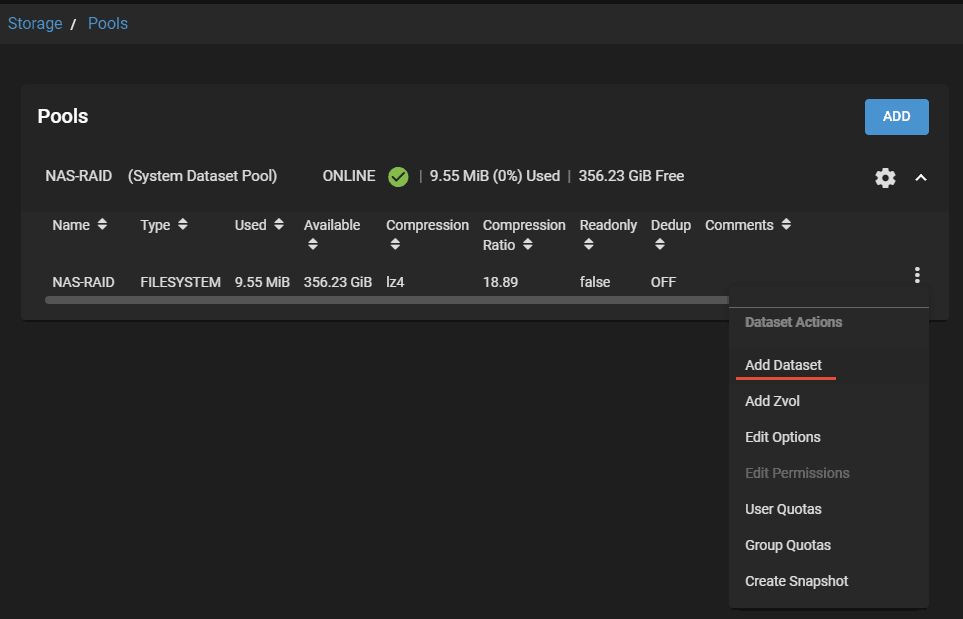
Now we can organize the NAS Shares – a shared folder available for PC and mobile devices in a local network. At the end of the pool table, you will find a menu. click it and choose the “Add data set“
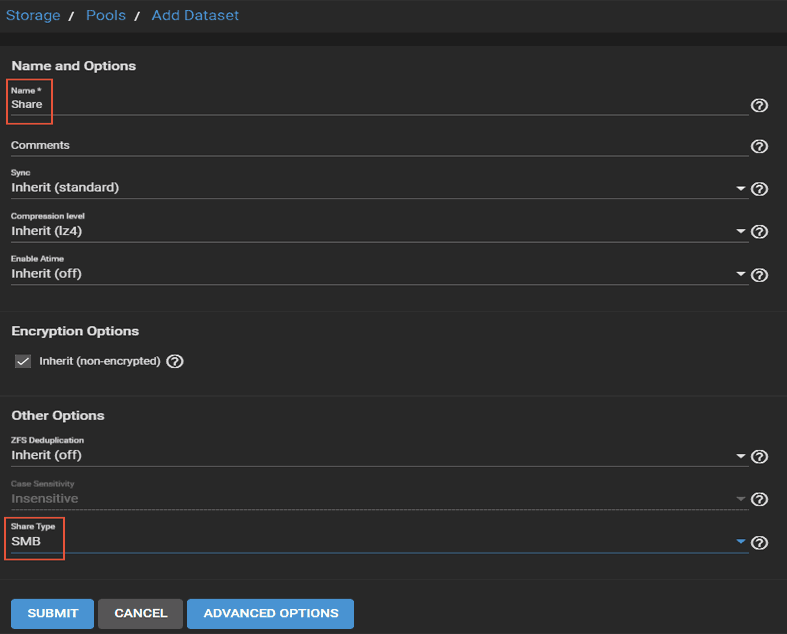
Give the folder a name and the type of resource specify to “SMB”. Then click “Send“
Creating a NAS user
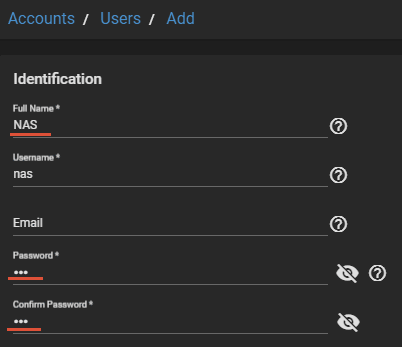
We have a NAS administrator account to manage the root device. But we also need a NAS user account – the one which we will connect to a shared folder (or other resources in the future). Go to the section “Accounts – Users” and click “Add“
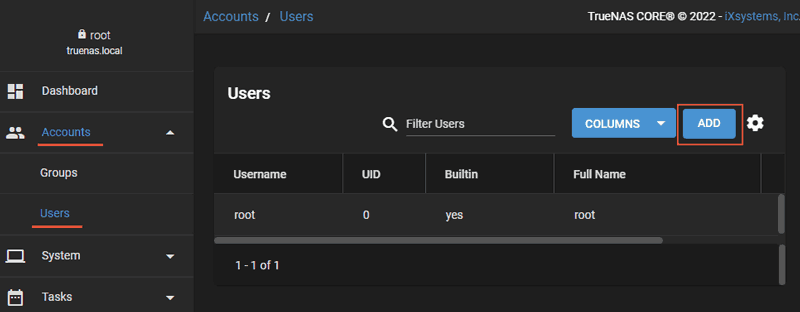
Enter the username, password and confirm it.
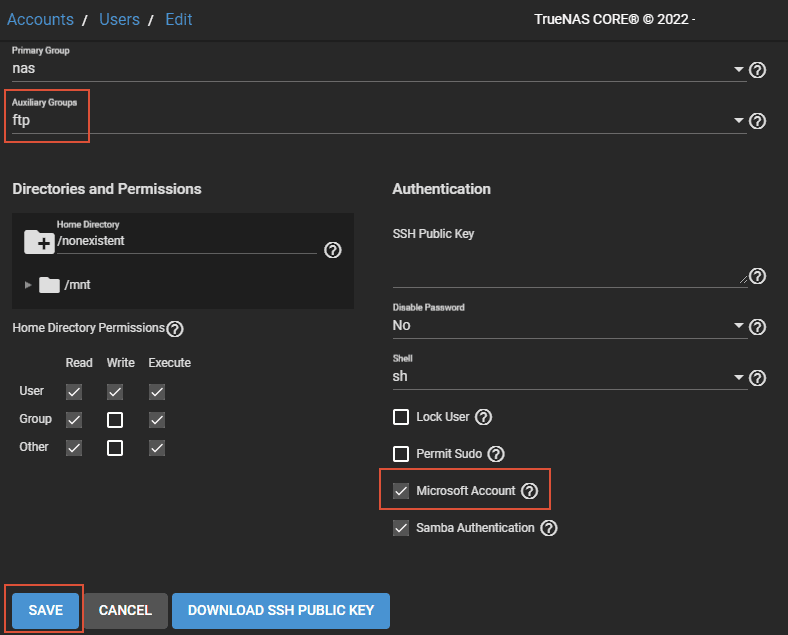
Below we can set up support groups for this user in the future. FTP for example. Tick the Microsoft account, as this is required for Windows, and click “Send“
You have to create such accounts for each NAS user. So that everyone can use storage resources individually from their computer or other device.
NAS sharing
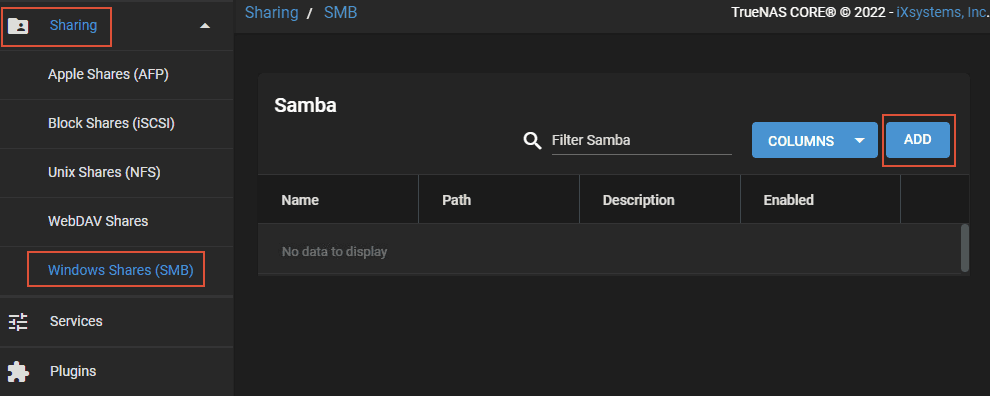
And the last step in the basic TrueNAS setup is to share the Windows shared folder with Samba (SMB). This is software for between Windows and Unix systems interaction, as the TrueNAS is based on the last one. To do this click “Add” in the “Sharing → Windows Resources (SMB)” section.
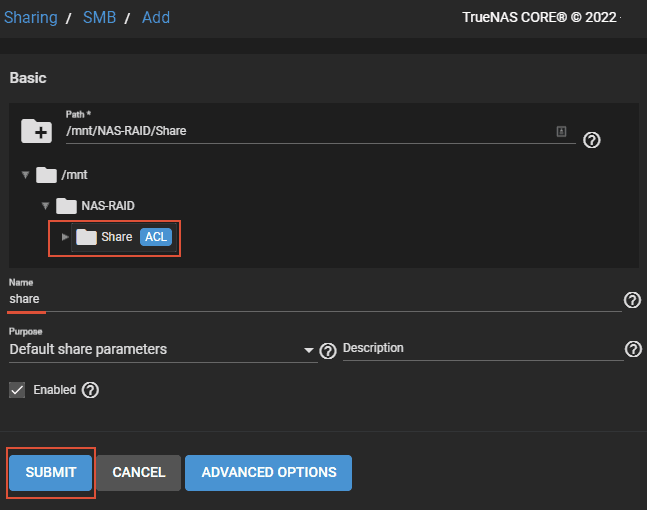
Open the path to our common folder and click on it. Then click on “Send“
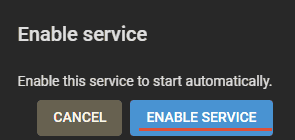
The system will ask you to turn on the SMB service. Click “Enable service“
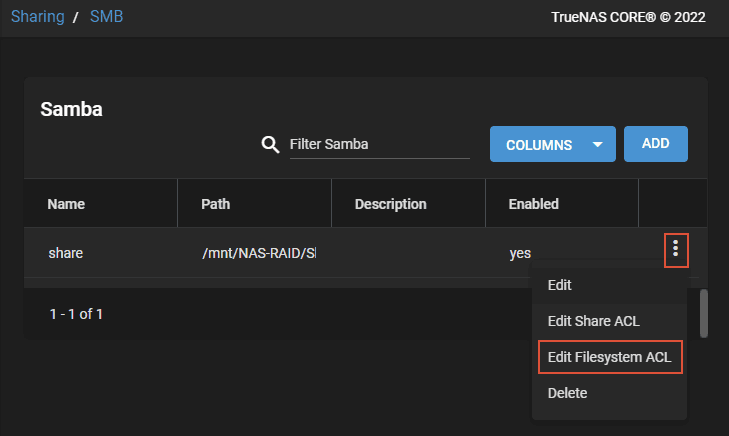
And your folder will appear among the Samba resources. Configure ACL access control for this folder. Click the “Edit Filesystem ACL” in its menu.
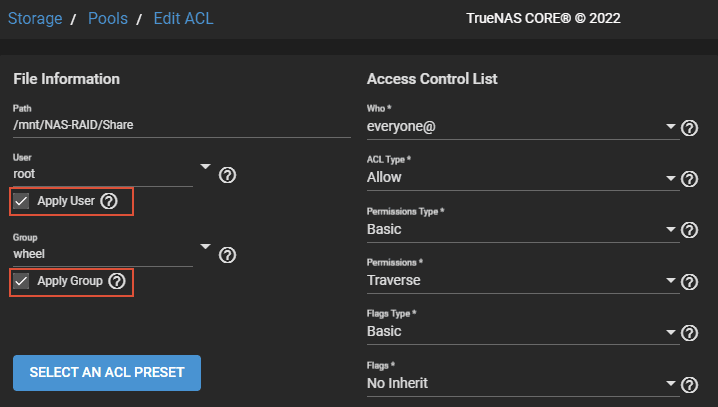
For the NAS root user-administrator give all the rights for all groups (rights to read and write data). To do this click “Select an acl preset“
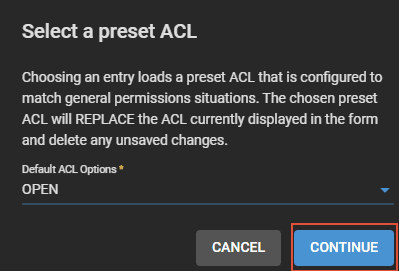
Next, specify the ACL parameter “Open”, and click “Continue“
That is all.
Connecting NAS in Windows
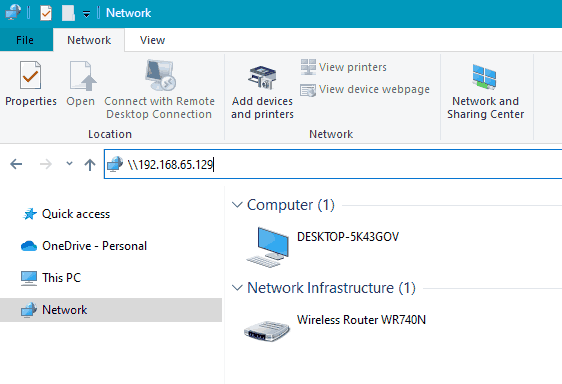
To work with NAS in Windows environment, you have to connect your pool. Enter the NAS IP address in the address bar of the Explorer with a double slash.
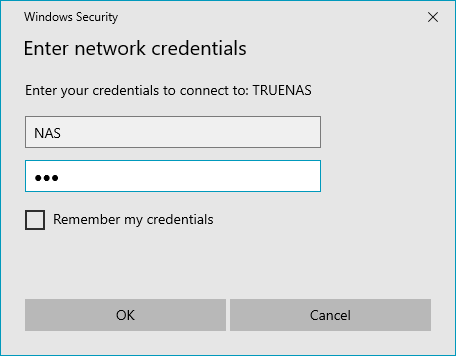
Authorize using the NAS user’s account. You can also tick the checkbox near “remember the user”. Click “OK“
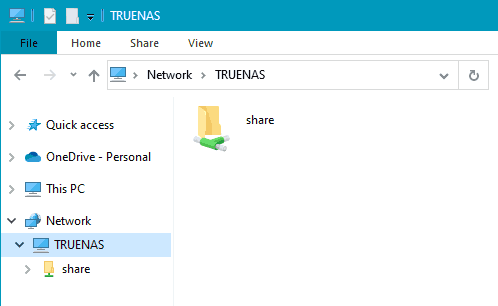
Now the NAS and its shared resources will then be available in the Network block in the Explorer.
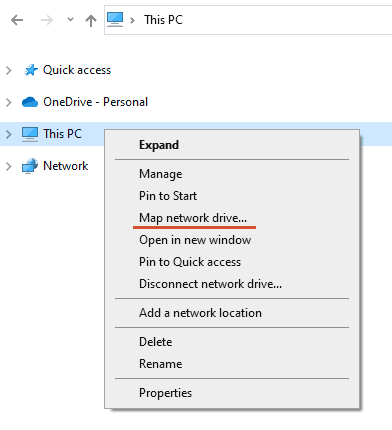
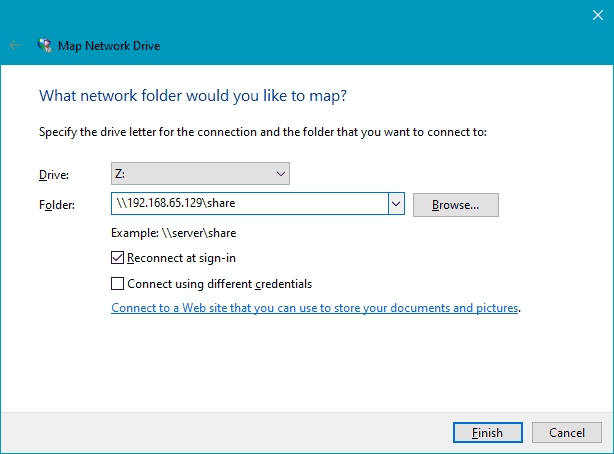
We can also connect each NAS folder as a separate drive with its own letter. To do this, right-click in “This PC” window, and choose “Connect network drive“. In Windows 11, you must first select “Show advanced settings“
Select the drive letter for the NAS. Use the “browse” button to select the path to the folder. Then press “Done“
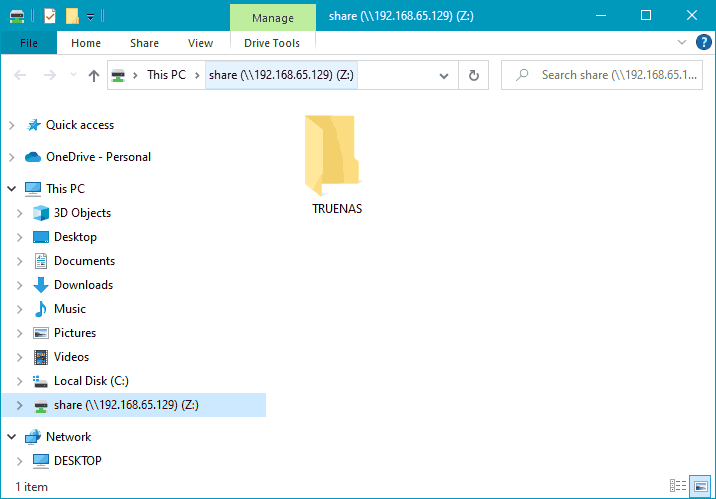
After that, the folder will then be available in Explorer as a separate drive and as a network location.
The data recovery from TrueNAS
An important point in the NAS work is the ability to recover the data lost due to accidental deletion or storage disks failures.

