The Windows operating system offers the use of a login password as the first of many security measures. However, if the computer is used by a single user only, or there is complete trust between the users – using a password is not necessary. In this article, we will look at a few ways to disable the Windows sign-in password.

Contents
- How to disable the Windows sign-in password in the account settings?
- How to disable Windows sign-in password using the registry?
- How to completely remove the password in Windows 10?
- How to setup the blank password in Windows 10?
- How to set a blank password using "Computer Management" in Windows 10?
- How to change the Windows sign-in password to blank using the system settings?
- How to disable the password when the system wakes up?
- How to disable the password when the system wakes up using the Windows registry?
- How to disable the password when the system wakes up using the local group policies?
- How to set a PIN instead of a Windows sign-in password?
- Using third-party software to disable the Windows sign-in password
- What to do if important data has been lost due to manipulations with the password disabling?
The user’s privacy is of the utmost importance. That is why the Windows operating system prompts you right after installation to create a password for your user account, in order to prevent unauthorized access to personal data. At the same time, you do not always have to use a password, and if you think you do not need one, you can just skip this step during the installation.
If a password was created during the installation, but after a while, you decide that you do not need it, you can easily disable it in several ways. You can use either the system’s built-in functions or third-party software.
Alternatively, you can use a PIN instead of a password. Its main advantage is the length (4 digits) – therefore it is easier to remember and requires less time to enter.
It is also worth noting that disabling the Windows sign-in password decreases the OS boot speed by a few seconds.
If you are sure you want to disable the Windows sign-in password, use any of the methods described below.
How to disable the Windows sign-in password in the account settings?
This method is one of the easiest and does not require the installation of additional software or deep knowledge of PC. To disable the Windows sign-in password, follow a few simple steps:
Step 1: Right-click on the “Start” button and select “Run“. The same action can be performed using the “Win + R” key combination

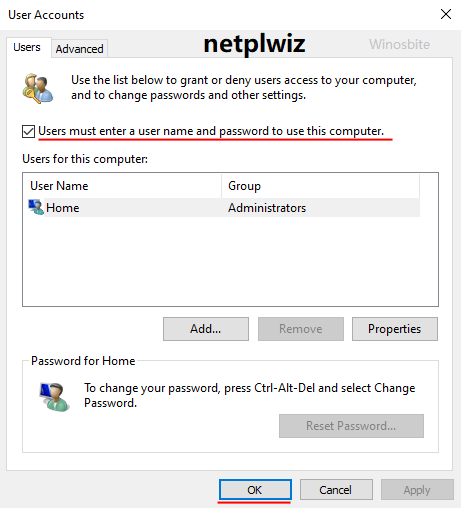
Step 2: In the window that appears, enter the command “netplwiz” and press “OK” to perform it. (You can also enter “control userpasswords2” and confirm by pressing “Enter“)

Step 3: You will see a local user account menu. To disable the password when signing in to Windows, select the user for whom you want to disable the password, then uncheck the “Users must enter a username and password to use this computer” box and click “OK” to confirm.
Step 4: The system asks you to enter a username and password. Type in the appropriate information, then press “OK” to confirm the password is disabled.
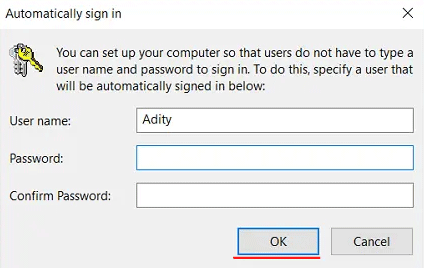
As soon as you click on “OK”, the user login settings will be changed and after the next Windows boot, you will no longer have to enter your password.
How to disable Windows sign-in password using the registry?
The previous method will not have the desired effect if your computer is domain-joined. In such a situation, it is best to use the registry to disable the Windows sign-in password.
It is worth noting that this method, although less convenient than the previous one, but works on almost any PC or laptop running Windows 10.
So, to disable the Windows sign-in password, you should:
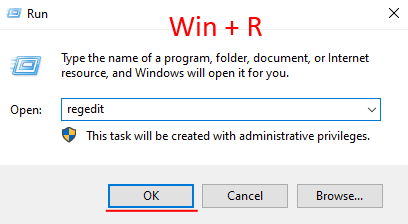
Step 1: Press the “Win + R” key shortcut and type “regedit” in the window that opens, then click “OK” to confirm.
Step 2: You will see the Windows Registry Editor. Go to the following address “ComputerHKEY_LOCAL_MACHINESOFTWAREMicrosoftWindows NTCurrentVersionWinlogon” (you can copy it without the quotes, paste it into the address bar and press “Enter“)
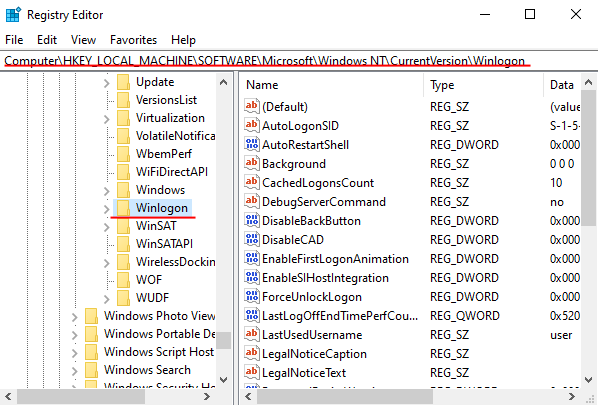
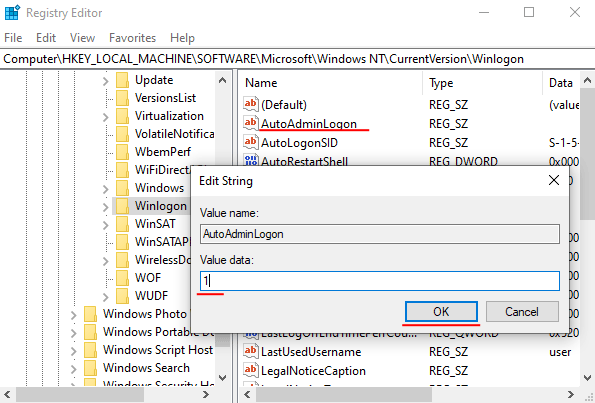
Step 3: Find the “AutoAdminLogon” key, double-click on it, and change the value to “1” in the window that appears
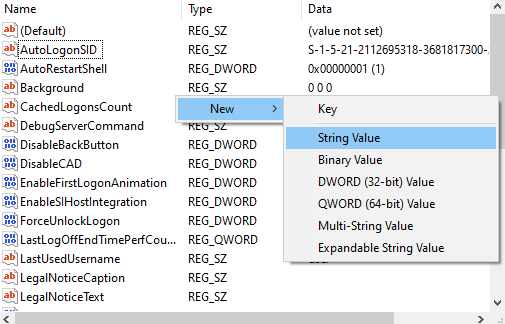
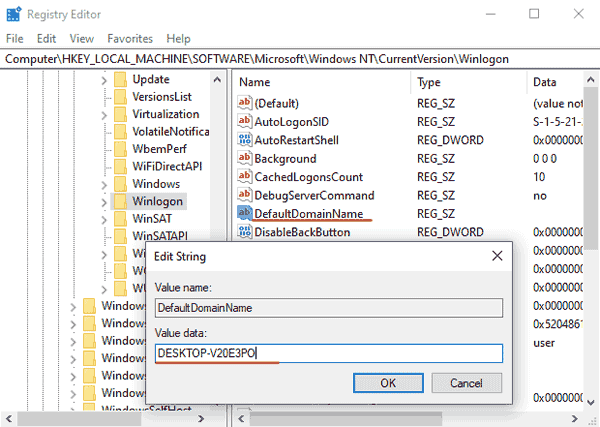
Step 4: Right-click, select “Create” and then choose “String Value“. Call it “DefaultDomainName“. Double-click on it and specify the domain name or local computer name as the value for this parameter. Click “OK” to confirm.
If you do not know the name of your computer, then you should:
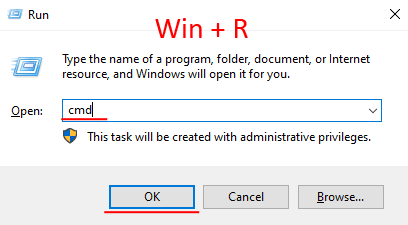
Step 1: Press the “Win + R” key shortcut, type “cmd” and press “OK” button.
Step 2: In the command prompt window, type the string “hostname” and press “Enter” to perform it. The result will be your domain name or the name of your computer.
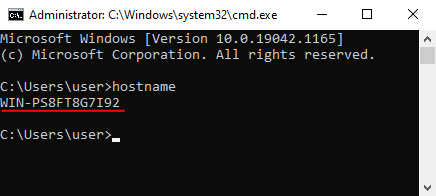
This value should be specified in the “DefaultDomainName” key
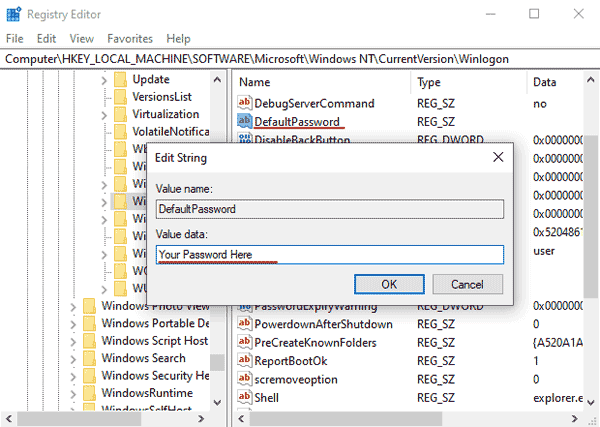
If you have several accounts and you want to indicate which one should be automatically loaded, then instead of “DefaultDomainName” create the “DefaultUserName” key and write the name of the account which should be loaded automatically with the value. Then create a string value, call it “DefaultPassword” and specify the password for the account you need as the value. Press “OK” to confirm and restart the computer. The sign-in password will be disabled.
How to completely remove the password in Windows 10?
This method assumes complete removal of the Windows sign-in password, i.e. you will not have to enter the password either at system boot, or when waking up, or when waking up from screen saver mode.
To get rid of the password completely, follow these steps:
Step 1: Right-click on “Start” and select “Search“

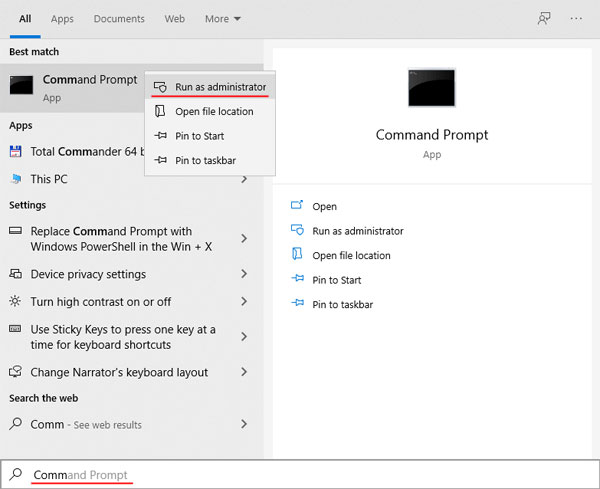
Step 2: A search window will open in front of you. Type “Command Prompt“, right-click on the search result and select “Run as administrator“
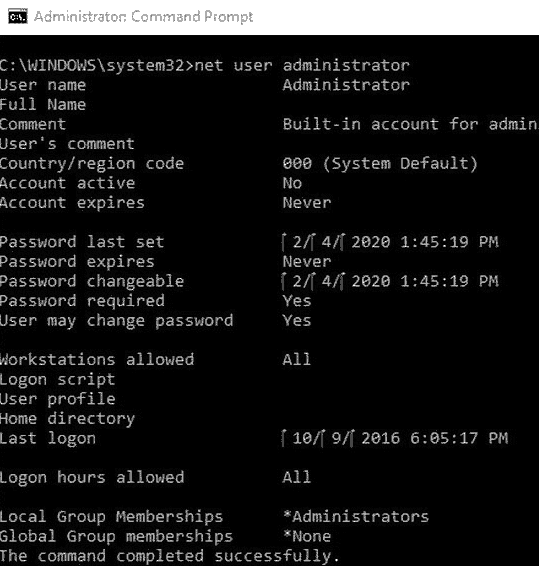
Step 3: In the window that opens, type the command “net user username” (where username is the name of the account you want to remove the password for) and press “Enter” to perform it.
Restart your computer. You will not have to enter your password again.
How to setup the blank password in Windows 10?
One more interesting way to disable the Windows sign-in password is to replace it with a blank one. The effect will be the same as if there were no password at all, i.e. the login will be automatic.
It is done in a few steps:
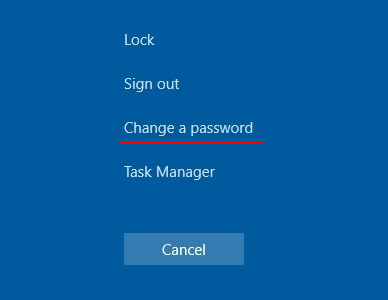
Step 1: Press the “Ctrl + Alt + Delete” key combination, and then click “Change Password“
Step 2: The change password window opens in front of you. Type your current password in the first field, leave the second and third fields blank and click on the right arrow next to the second field.
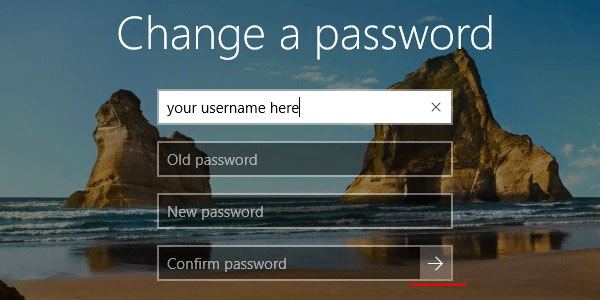
After this, you will see a message that the password has been successfully changed. Now you don’t have to enter it after the operating system has booted.
How to set a blank password using “Computer Management” in Windows 10?
Just like the previous method, this one involves setting a blank password for your account, but in this case, we will use the system utility called “Computer Management” instead of the command prompt.
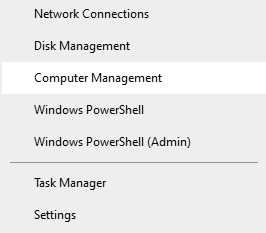
Step 1: Right-click on the “Start” button and select “Computer Management“
Step 2: Click “Local Users and Groups” on the left, and then double-click the “Users” folder. A list of your computer’s users will open in front of you. Right-click on the desired account and select “Set Password“
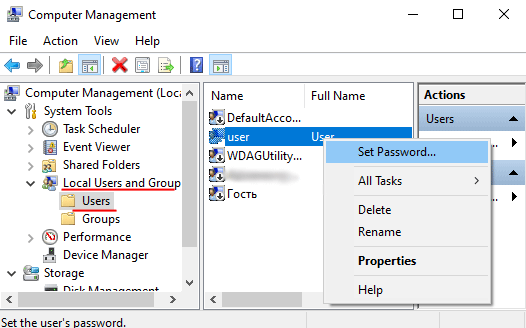
Step 3: You will see the message, alerting you to change your password. Click “Proceed“, then, in the change password window, leave all fields blank and click “OK“
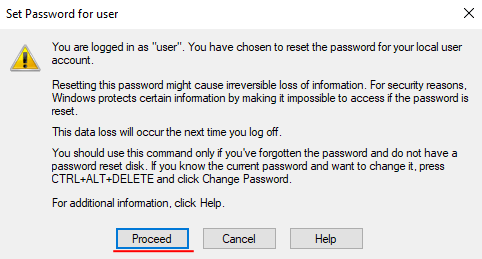
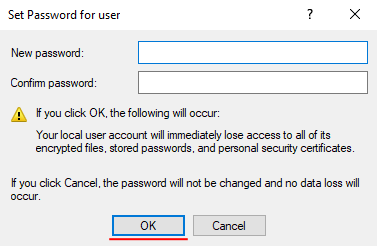
You will now be logged in to your account automatically.
How to change the Windows sign-in password to blank using the system settings?
You can also disable the Windows sign-in password in the system settings. This method is quite simple and convenient, as it does not require unnecessary manipulations with the registry, command prompt, etc. Basic knowledge of the Windows operating system is all you need to use. To disable the login password, follow these steps:
Step 1: Right-click on “Start” and select “Settings” In the system settings, find the “Accounts” item and click on it.

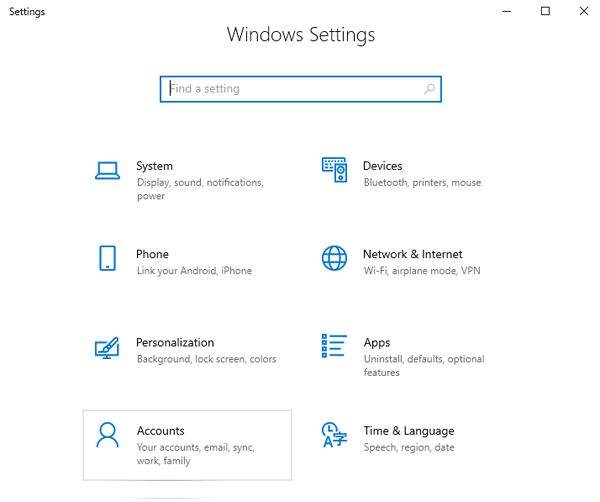
Step 2: Find “Sign-in options” on the left, click on “Password” and press the “Change” button
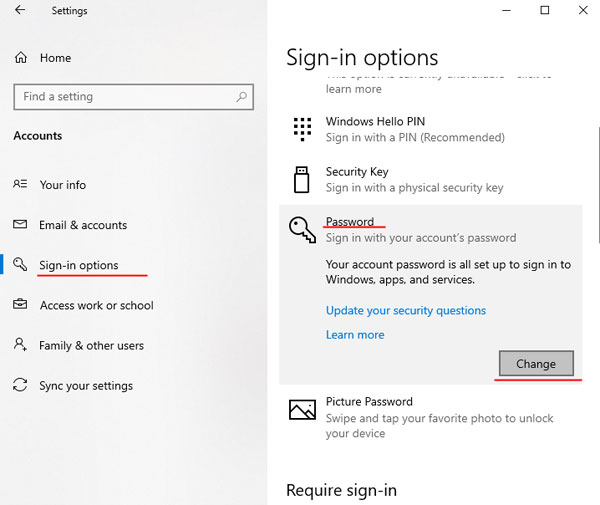
Step 3: Enter your current password and click “Next”, then in the next window leave all fields blank and click “Next” again


After performing these manipulations, you will see a message that the password has been changed and you can use the new password during the next system boot. Click the “Finish” button

Now, the next time you log in, you no longer have to enter your password, since it has been changed to blank.
How to disable the password when the system wakes up?
If the Windows operating system uses the default settings – the user will be forced to enter the password when the system wakes up. However, this can be easily fixed. Just follow the steps below:
Step 1: Enter the system settings by repeating the first step from the previous paragraph of this article.
Step 2: On the left side of the window, find the “Sign-in Options” item, and next to the “Require sign-in” line, set the value to “Never” (this option is responsible for when you have to enter the password)
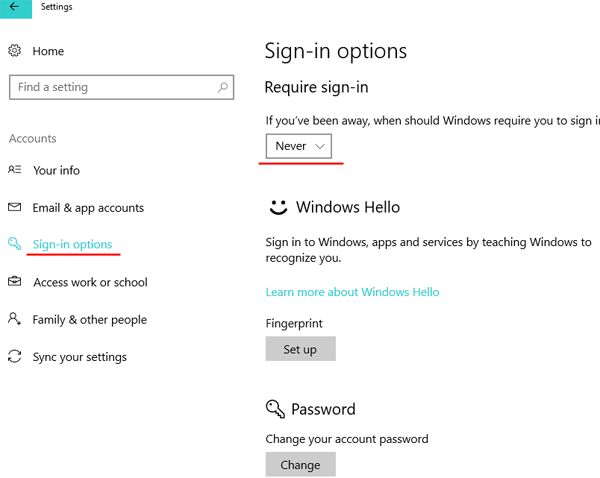
Now you don’t have to enter your password again when the system wakes up.
How to disable the password when the system wakes up using the Windows registry?
You can also disable the password input when Windows wakes up using the registry settings. To do this:
Step 1: Right-click on “Start“, select “Run“, enter the command “regedit” in the window that opens, and press “Enter” to confirm.

Step 2: You will see the Windows Registry Editor. Go to “HKEY_LOCAL_MACHINE – SOFTWARE – Controls – Microsoft – Software – Software – PowerSettings – 0e796bdb-100d-47d6-a2d5-f7d2daa51f510” Inside you will see two DWORD keys: ACSettingIndex and PowerSettings

Step 3: The value of each of these key must be set to zero. To do this, double-click on the first one, set the value to “0” and click “OK” to confirm.
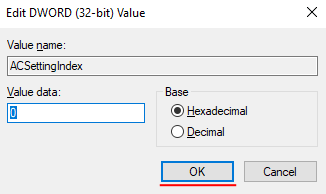
Perform the same steps for the PowerSettings parameter. After that, restart the computer. You will no longer need to enter the password.
If your system does not have the folder “0e796bdb-100d-47d6-a2d5-f7d2daa51f510” and the keys you need, create them manually with the desired values.
How to disable the password when the system wakes up using the local group policies?
You can disable the password when the system wakes up not only by using the system settings or the Windows registry, but you can also use the Group Policies method. To use it you should:
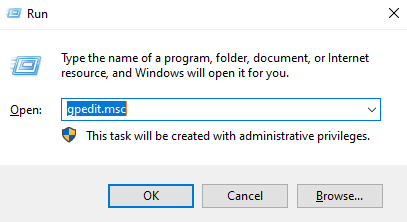
Step 1: Press the “Win + R” key combination, type the command “gpedit.msc” and press the “OK” button
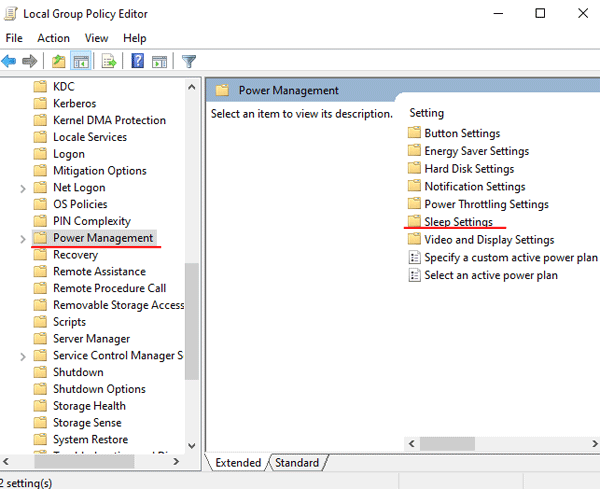
Step 2: Go to “Computer Configuration – Administrative Templates – System – Power Management” and open the “Sleep Settings” folder (located to the right)
Step 3: Many options will open in front of you. Find the “Require password when a computer wakes (plugged in)” option and double-click on it. Then, check the “Disabled” checkbox in the window that appears, and click “OK” to confirm the changes.
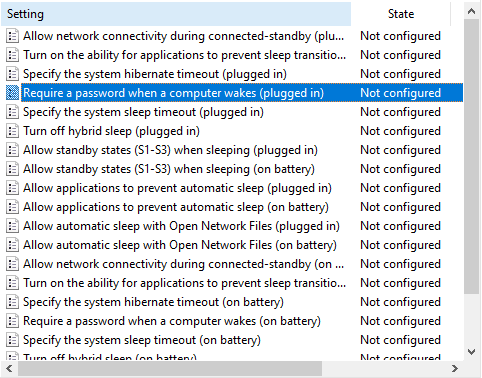
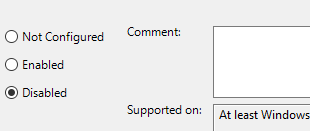
Repeat these steps for the “Require password when a computer wakes (on battery)” option
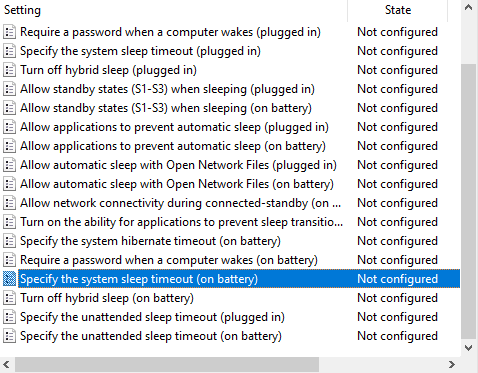
For all changes to take effect, restart your computer.
How to set a PIN instead of a Windows sign-in password?
At the beginning of this article, it was said that instead of a password you can use a PIN to sign in to your Windows account since it’s shorter and therefore easier to remember, and requires less time to enter. To use a PIN instead of a password, you should:
Step 1: Right-click on “Start” and select “Settings“

Step 2: Find “Accounts” and open it.

Step 3: Click on “Sign-in options“, then choose “Windows Hello PIN” and click on the “Add” button

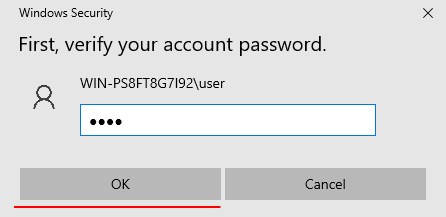
Step 2: The system will ask you to enter your password to confirm your identity – do it.
Step 3: Create a new PIN, enter it in the first field, then in the second field to confirm, and press “OK“
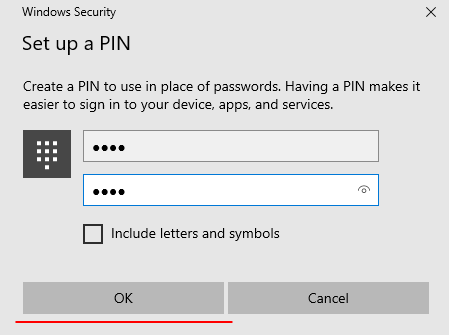
Note: you can also use letters and symbols. To do this, check the box next to “Include letters and symbols“
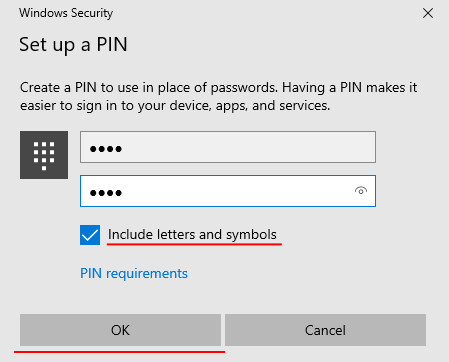
After these steps, the PIN code will be used instead of the password.
Using third-party software to disable the Windows sign-in password
If the above options seem too complicated to you, or if you don’t want to spend time manipulating the operating system, you can use Autologon to disable your Windows sign-in password. This free solution from Microsoft allows you to set up automatic login in a few clicks:
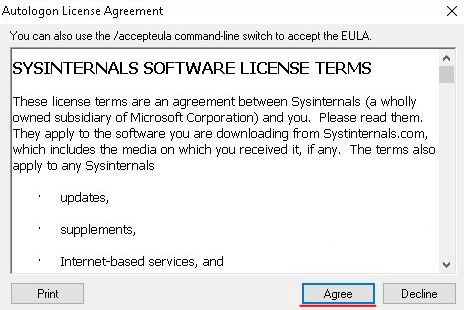
Step 1: Install and run the program on your computer. A license agreement will open in front of you. Click “Agree“
Step 2: In the window that appears, enter your account credentials and click “Enable”
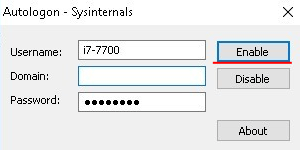
The program will automatically make the necessary changes to the system, and then report the successful creation of the automatic login configuration.
What to do if important data has been lost due to manipulations with the password disabling?
Often inexperienced users in an attempt to disable the Windows sign-in password perform actions that cause the account or the entire operating system to stop working. It is especially common when changes have been made to the Windows registry.
In both cases, users lose valuable information. In the first case all the data on the desktop and in the user’s folders (“My Documents”, “My Pictures” etc.) are lost and in the second case all the information on the C drive is be lost.
Whatever the cause of data loss, the most important thing is to know what to do to ensure successful data recovery. Therefore, as soon as you notice system crashes or data loss – use RS Partition Recovery – professional software for lost file recovery.
The main advantage of RS Partition Recovery over its competitors is a powerful modern algorithm for scanning your drive which allows you to virtually guarantee the successful recovery of lost information.
In addition, the program supports ALL modern file systems, and the deep scan mode allows you to recover even those data that were lost several months ago.
To recover lost information perform the following actions:
Step 1. Install and launch the RS Partition Recovery.

All-in-one data recovery software
Step 2. Select the drive or partition from which you want to recover data.
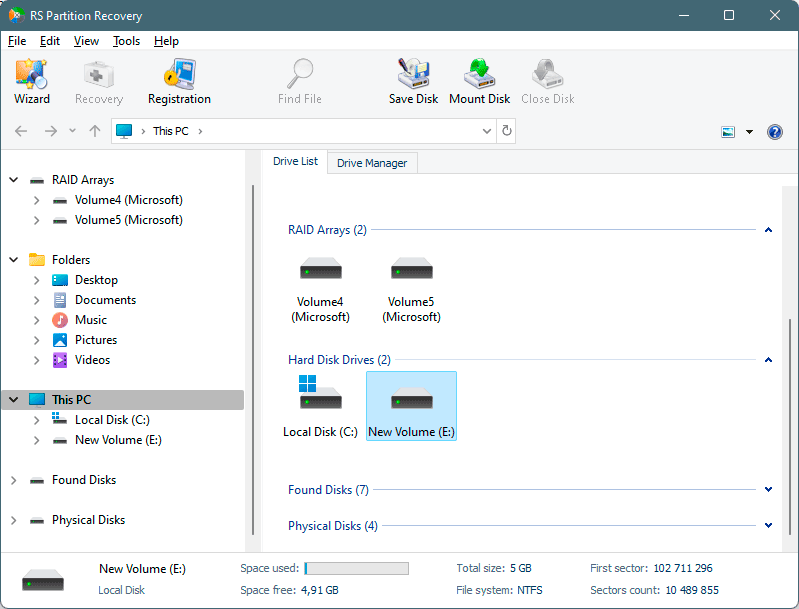
Step 3. Choose the type of analysis.
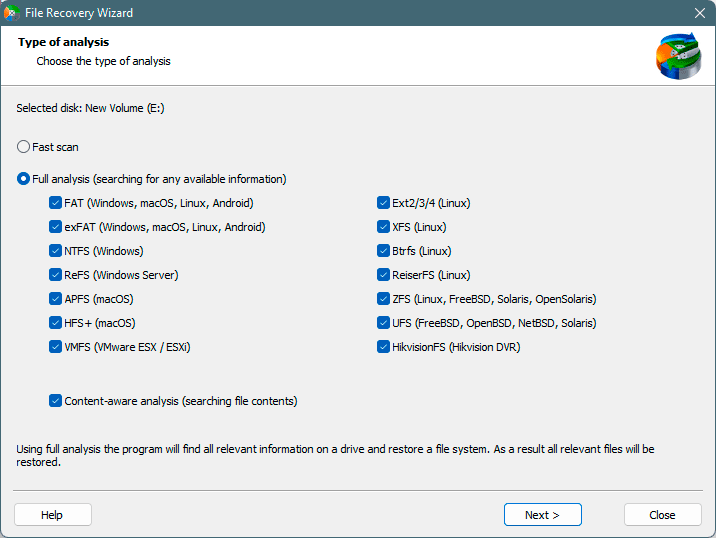
Fast scan you should use in case the file was lost recently. The program will scan the drive quickly and show the files available for recovery.
The Full analysis function allows you to find lost data, after formatting, disc resizing, or file structure corruption (RAW).
Step 4. Preview and select the files to recover it.

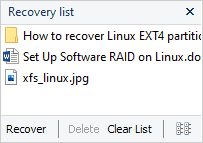
Step 5. Add the files you want to save to the "Restore list" or select the entire partition and click Recovery.
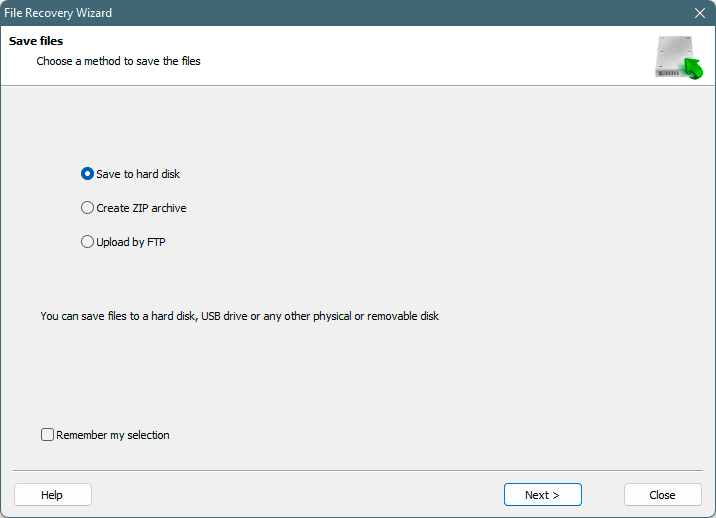
It should be noted that it is best to save the recovered file to an external hard drive or USB flash drive.


