Many users have come across the fact that their Windows 10 account name is displayed on the system boot screen. It is because the OS assigns identifiers in the form to almost everything. The name of a user, computer, or workgroup, all have a certain unique name for quick identification. Thus, during the launch, the name is displayed, which was given during the OS installing on the computer.

Contents
- First method. Creating a new account
- Change account name in the control panel
- Change user name with Account Manager
- How to change a user in Windows
There are many reasons why an owner wants to change the account name in Windows 10. For example, the account name may have been given incorrectly or with a mistake, and sometimes users want to hide their real data if they have more than one computer. This article will show you a few quick ways to change the Windows 10 account name displayed in the system and when the OS boots up.
First method. Creating a new account
The first way to change the name is to create a new account. Briefly, the process can be described as follows: creating a new account, assigning it as an administrator, switching to a new account, deleting an old account with an incorrect name.
To change the name using this method, follow the steps described below:
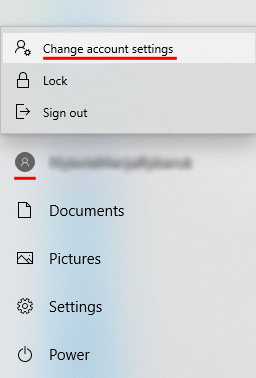
Step 1: Open the “Start” and left-click on a small picture with a person’s silhouette. Then select “Change account settings” as shown in the screenshot below:
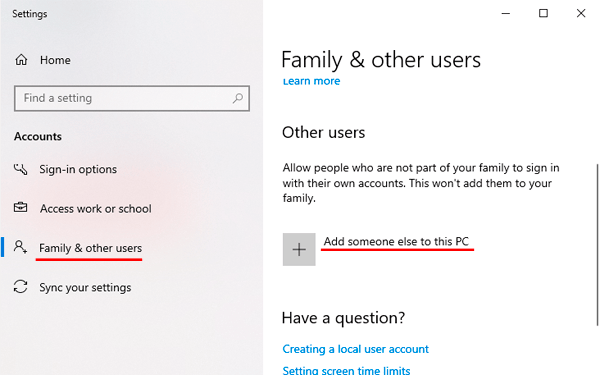
Step 2: In the window that opens in the left column, click on the “Family and other users” row and then choose the add user option.
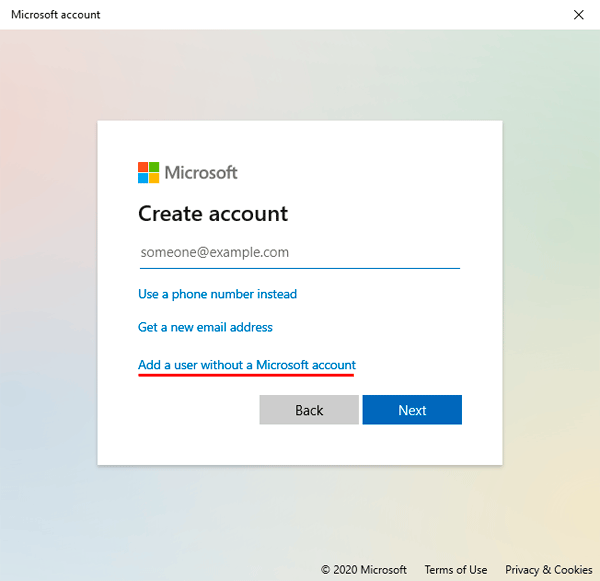
Step 3: After that, fill in data in the fields and bind the Microsoft account. If the user wishes not to show information about himself, you need to select the item “I don’t have login data for this person”, then select the next item “Add a user without a Microsoft account”
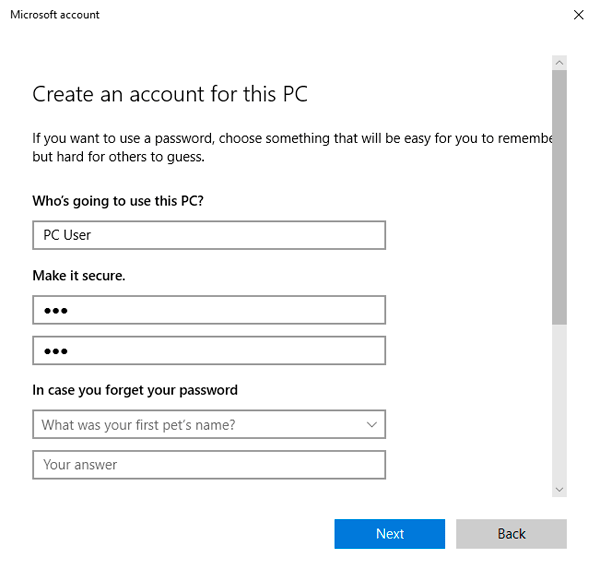
Step 4: After performing the above steps, proceed to the standard window where you need to fill in the information for the new user, as well as the password and other information. Fill in all fields with the necessary data and remember the password.
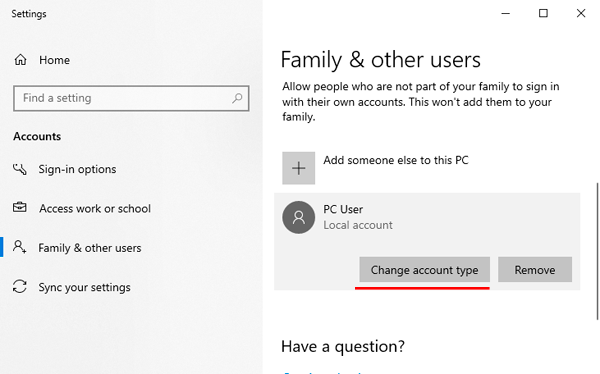
Step 5: The new account is created. Now it must be given administrator rights on the computer. After completing step 4, we will automatically redirect to the settings window. In the “Family and other users” tab, you should find a new account and click the “Change account type” button.
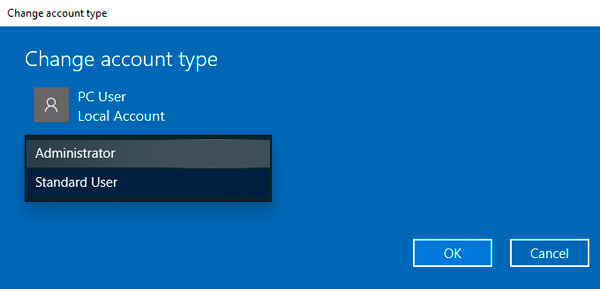
Step 6: In the window that opens, just open “Account Type” and replace it with “Administrator”
Step 7: The new account now has administrator rights. It is enough to delete the old account and use the new one.
This way, to change the account name will change the name itself and change the name of the user folder, which is automatically created by the system.
Change account name in the control panel
Important: this method will allow to change the name of the account but will not change the name of the system’s folder.
Step 1: Open the control panel and select “Change account type”
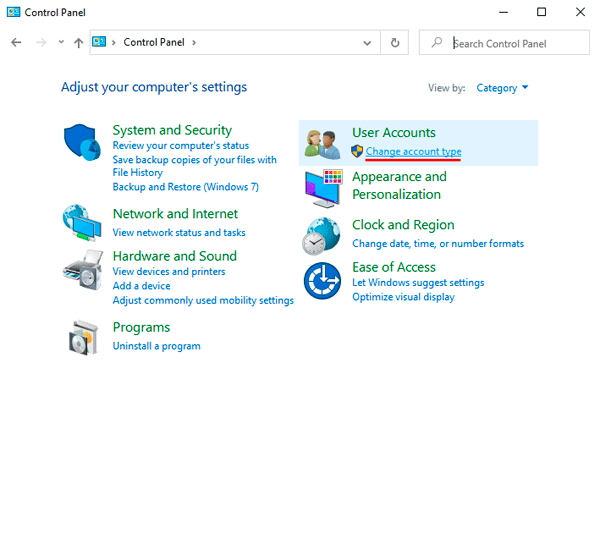
Step 2: Choose the account you want to change.
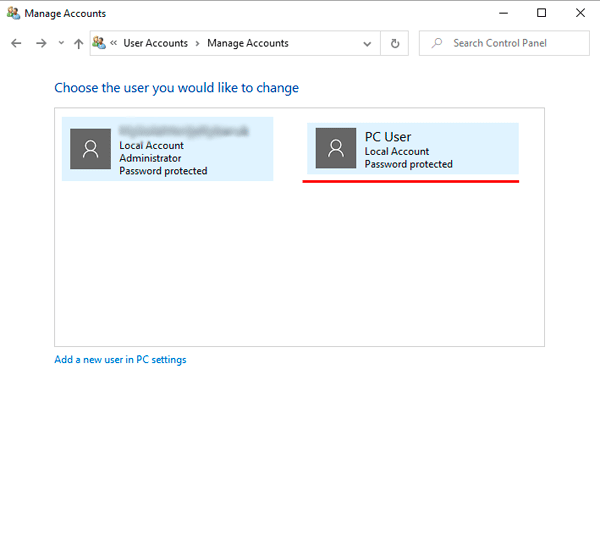
Step 3: Select the “Change account name” item and enter a new name in the window that opens.
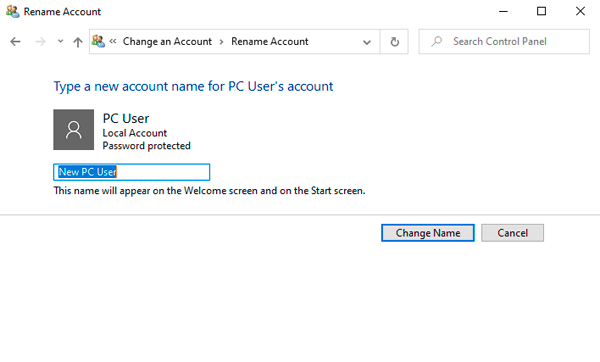
After clicking the “Change name” button, the account name will be changed.
Change user name with Account Manager
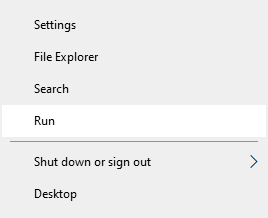
Step 1: Click the Start button and select the “Run” function.
Step 2: In the window that appears, enter netplwiz command. Click the OK button.

Step 3: In the window that appears, select the desired user, whose name you want to change, and then click the “Properties” button.
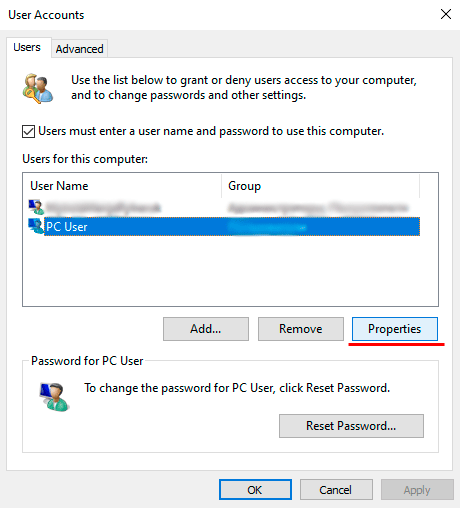
Step 4: The window that opens will contain fields for changing the account name. Fill in the fields and click the OK button.
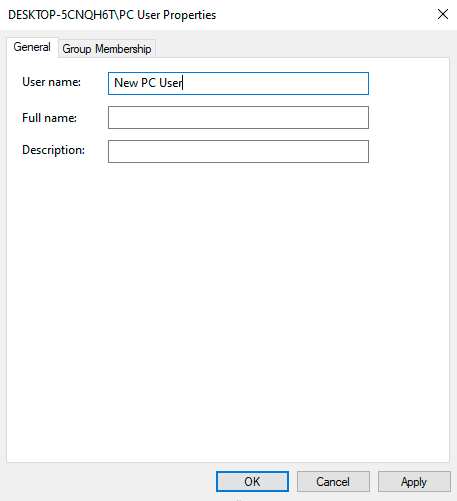
The account name was changed successfully.
How to change a user in Windows
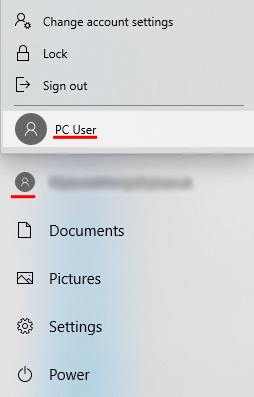
Method #1. Changing the user from a running operating system.
Click the “Start” button, in the opened window, click on the current user’s avatar, and in the drop-down menu, select the required account.
Method #2. Changing the user using hotkeys.
While on the desktop, press the Alt+F4 key combination, and then a special window will open, where you can select the “Switch user” item in the drop-down tab.
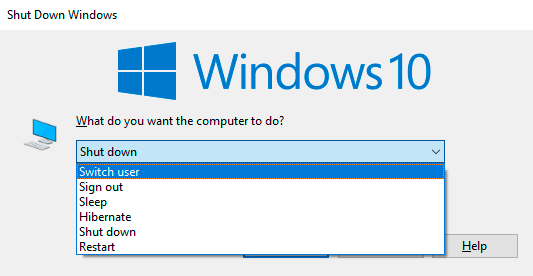
After clicking the “OK” button, the user will be taken to the login screen, where you can select an account, just like when you start Windows.

Besides, the input screen can be accessed using the Win+L key combination.
This method allows you to skip the window “What do you want the computer to do?”.


