A failing RAID array on NAS TerraMaster F2-212 can instantly make the entire storage pool inaccessible. RAID 1 mirror inconsistencies, metadata corruption, failed resync operations, or unexpected disk dropouts are common triggers for data loss. In this article, we outline the most frequent RAID-related issues affecting the NAS TerraMaster F2-212 and explain how to recover data safely without risking overwriting or additional damage.
NAS Technical Basics: What’s Inside Your Storage Device
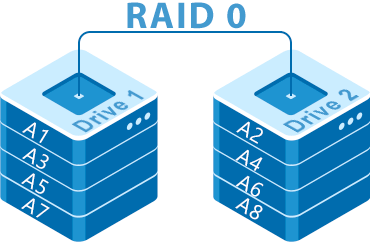
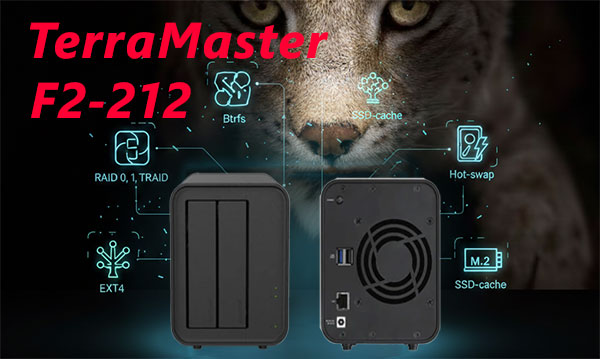
The NAS TerraMaster F2-212 is built to give home users and beginners a simple way to store and protect their files. With 2 drive bays, it supports RAID 0 and RAID 1 — two basic modes that either boost speed or keep a safe backup copy of your data. The device uses EXT4 or Btrfs file systems, which help the system stay stable and recover quickly after minor errors.
If a disk stops working or files are removed accidentally, data recovery software can scan the NAS and rebuild lost information based on the remaining RAID structure.
Key Points of Recovering Data from TerraMaster F2-212
A two-disk NAS like TerraMaster F2-212 usually works in RAID 0 or RAID 1. If you used RAID 0, both disks are needed; if RAID 1, one disk may be enough. When the NAS stops working, the drives must be removed and scanned on a computer. Specialized tools rebuild the array and extract the files.
Main Features of the TerraMaster F2-212 NAS
| Drive Bays | Supported Drives | Hot Swappable | Supported RAID | File Systems | Maximum volume |
| 2 | 2.5" or 3.5" SATA | ✓ | RAID 0, RAID 1, JBOD, TRAID | EXT4, BTRFS | 44 Tb |
In this system the dominant storage architecture is a RAID 1 mirror operating under TOS 5.1 with on-disk formats of BTRFS or EXT4. Given the listed platform components—Realtek RTD1619B and 1GB of RAM—and the explicit absence of an SSD cache, the single most probable model-specific failure point is corruption of filesystem metadata on one or both mirror members during on-device management. Limited memory on the appliance increases the risk that complex metadata updates will be left incomplete, yielding inconsistent on-disk state between the two mirrored devices.
When metadata describing file layout or mirror membership is inconsistent, the volume can present as logically inaccessible even though the physical sectors remain readable. Outside the NAS the recovery principle is to image the raw mirror members, attach those images or disks to a workstation that recognizes the listed filesystems, and perform non-destructive metadata reconstruction or filesystem repair against the BTRFS or EXT4 structures found on the drives rather than relying on the appliance firmware to restore access.
Step-by-Step NAS Data Recovery Guide for 2-Disk Systems
When a 2-disk NAS stops responding, shows a “RAID degraded” warning, or refuses to mount shared folders, recovering your data is still possible by performing a structured diagnostic workflow. This method mirrors the approach used by professional data recovery labs and helps protect every sector of your disks during the process.
-
Step 1 Shut down the NAS and remove both drives.
Power off the device completely and wait until all LEDs stop blinking. Carefully extract the disks and label them by slot number. Maintaining the correct sequence is essential for RAID logic reconstruction.
-
Step 2 Connect the drives to a workstation.
Use direct SATA connections for the most accurate readout. If you must use USB adapters, choose models with stable controllers. Both disks must be attached simultaneously so the software can parse metadata blocks and RAID superblocks correctly.
-
Step 3 Launch RS RAID Retrieve.
The software analyzes disk signatures, RAID headers and file system markers (EXT4, Btrfs, XFS). It works in a non-destructive read-only mode, preserving original sectors.

Data recovery from damaged RAID arrays
Available for: Windows, macOS, Linux -
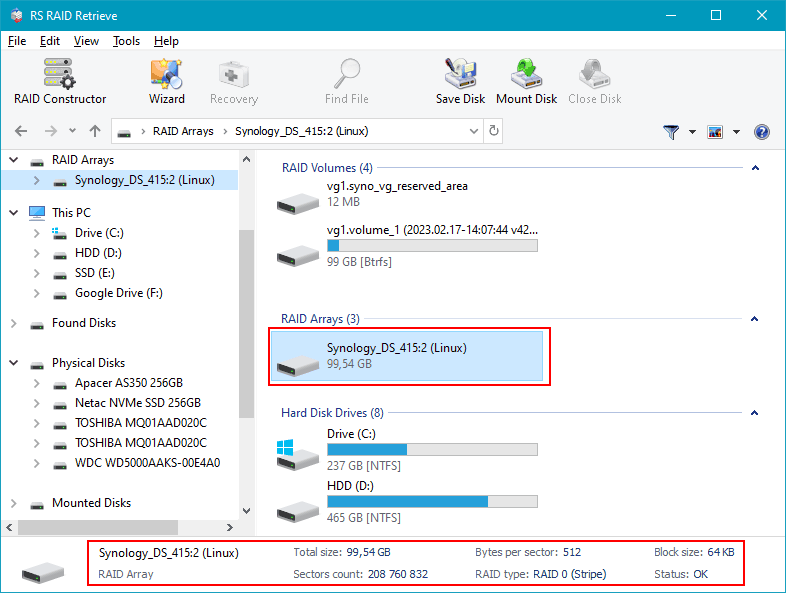
Step 4 Review the identified RAID configuration.
RS RAID Retrieve usually detects stripe size, RAID level, and disk order automatically. If the system previously suffered power loss or partial rebuild, verify parameters manually.
-
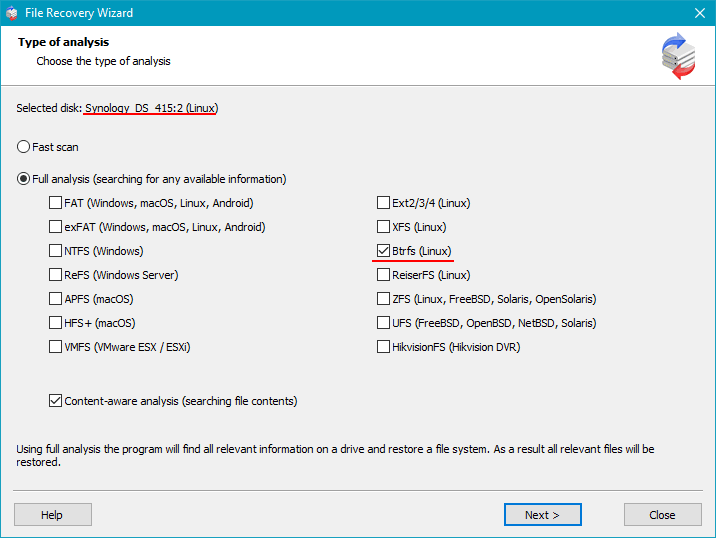
Step 5 Run a deep data scan.
The tool searches for lost inodes, directory trees, and fragmented data blocks, allowing recovery even when the partition table is corrupted or the file system is unreadable.
-
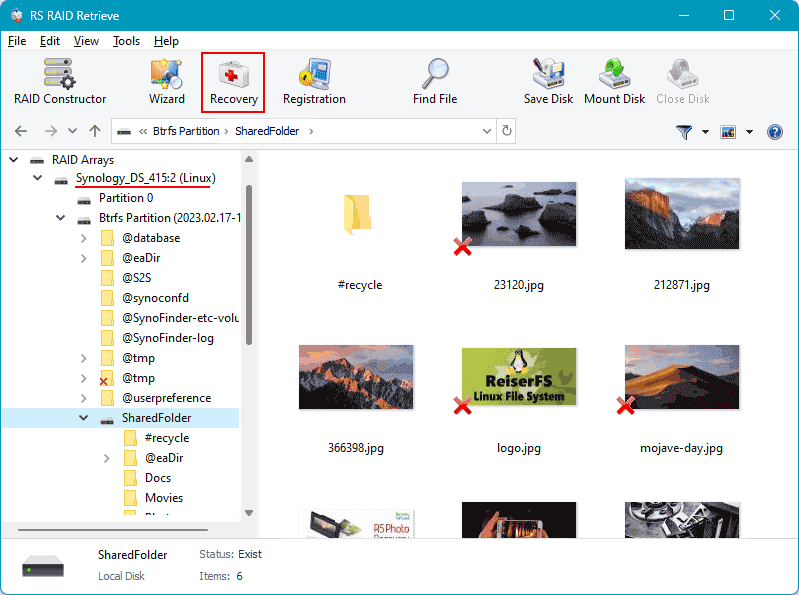
Step 6 Inspect the recovered structure.
Browse the reconstructed folder tree and preview documents, media files, archives and system data. Ensure that mission-critical files are intact before saving.
-
Step 7 Export the recovered data to another storage device.
Use a clean drive with sufficient capacity. Never save the recovered files back to the original NAS disks.
Tip: Avoid attempting RAID rebuild on the NAS before recovery — it can overwrite critical metadata and make the process harder.
Why RAID Fails in a 2-Disk NAS TerraMaster F2-212 — And How to Protect Your Data Before It’s Too Late
When a 2-disk NAS TerraMaster F2-212 experiences RAID failure, it rarely happens “all at once.” Instead, subtle warning signs appear long before the system collapses — and ignoring them often leads to total data loss. Understanding these signals can save not just files, but years of memories, business records, and irreplaceable digital assets.
Early warnings you shouldn’t ignore. Most RAID failures begin quietly: a disk slows down, the NAS takes longer to respond, or your usual fast file access suddenly becomes sluggish. These signs are emotional red flags — your NAS is trying to “tell you” something is wrong.
Why does RAID in a 2-disk NAS fail? Even reliable TerraMaster F2-212 units depend on perfectly synchronized drives. When one disk behaves even slightly out of rhythm — increased SMART errors, unstable sectors, overheating — the entire array becomes vulnerable. In RAID 0, a single failing disk destroys everything instantly. In RAID 1, users often discover the truth only after both disks degrade in sequence.
Typical triggers that lead to RAID collapse include:
- Silent disk degradation masked by automatic NAS error correction;
- Power interruptions that desynchronize RAID metadata;
- Wear-and-tear on consumer-grade drives used 24/7;
- Firmware glitches causing a RAID rebuild loop that never finishes.
And here’s the emotional reality: the moment files stop opening, or the NAS shows “Degraded / Crashed Volume,” panic kicks in. But this is exactly when calm, correct actions matter most. Every minute of blind troubleshooting risks overwriting the only remaining good data blocks.
Your best move? Power down the NAS, avoid rebuild attempts, and start professional data recovery immediately. For 2-disk NAS TerraMaster F2-212 systems, timely intervention is the difference between full recovery and permanent loss.
Common Causes of Data Loss in NAS Devices
Data loss in NAS systems often occurs due to RAID failures, accidental deletion, firmware corruption, disk degradation, and power outages. Misconfigured RAID arrays or simultaneous disk failures also frequently lead to inaccessible volumes or damaged file structures.