If your NAS D-Link DNS-322L suddenly stopped working or your files disappeared, you’re not alone. NAS devices are reliable, but disk failures, RAID errors, or accidental deletion can still cause data loss. In this article, we explain in simple terms why the NAS D-Link DNS-322L may lose data and what you can do to recover your files safely.
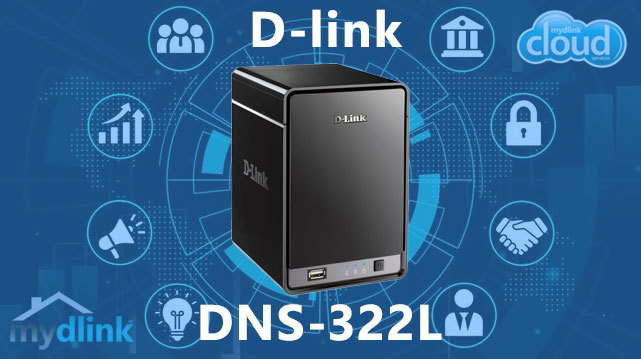
Core Technical Specifications of the NAS System
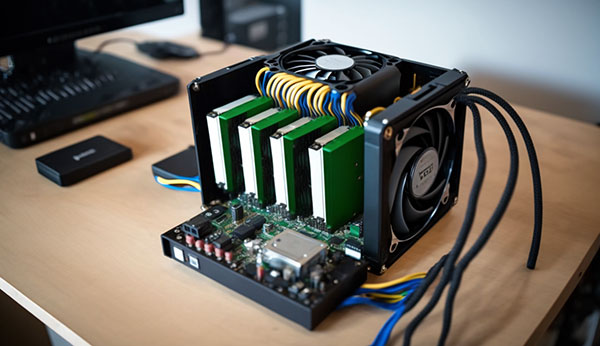
The D-Link DNS-322L NAS includes 2 drive bays with RAID 0/1 support, allowing either performance boosting or mirrored data protection. It operates on EXT4 or Btrfs, offering stable file-system architecture with improved data consistency. Network connectivity is optimized for multi-device access and fast file operations.
Essential Tips for Successful Data Recovery on D-Link DNS-322L
Recovering data from the D-Link DNS-322L becomes much easier when you understand how its two-bay structure and RAID configuration affect the recovery process. Since the device stores information in either RAID 0 (striping) or RAID 1 (mirroring), the restoration workflow depends on how the data was distributed across the drives.
The filesystem used — typically EXT4 or Btrfs — also influences what can be restored. For example, Btrfs snapshots help preserve structure, while EXT4 journaling may overwrite deleted entries.
Recommended steps:
- Create sector-by-sector images of both drives to avoid additional data loss.
- Identify RAID parameters (chunk size, order, layout).
- Use NAS-oriented recovery software capable of automatic RAID detection and reconstruction.
- Export recovered files to a separate external storage to avoid overwriting original media.
These simple principles significantly increase the success rate of data restoration on D-Link DNS-322L.
Main Features of the D-Link DNS-322L NAS
| Drive Bays | Supported Drives | Hot Swappable | Supported RAID | File Systems | Maximum volume |
| 2 | 2.5" or 3.5" SATA | ✗ | RAID 0, RAID 1, JBOD | EXT3 | 8 Tb |
The unit presents a mirrored block layout: RAID 1 is the dominant storage architecture implied by the specifications, implemented on a platform identified as Marvell 88F6282 running Linux (NVR Edition) with 256 MB of volatile memory. In that configuration the device relies on the SoC and the Linux RAID layer to keep mirror state and on‑disk metadata consistent between two drives. Given only the provided parameters, the single most probable model‑specific failure point is the interaction between the constrained 256 MB memory footprint and the Marvell SoC’s handling of mirror metadata: insufficient buffering or interrupted metadata updates at the RAID layer can produce mismatched or corrupted on‑disk RAID state on one or both members.
When mirror metadata or block‑level bookkeeping diverges the array cannot be assembled in place and the logical namespace becomes inaccessible even though raw blocks remain on the platters. Recovery outside the NAS therefore follows a block‑centric forensic principle: treat each bay as an independent block device, acquire bit‑for‑bit images of both members, and perform a controlled reconstruction of the mirror on an external system by comparing images and restoring consistent blocks to a rebuilt mirror. The absence of an SSD cache simplifies this workflow because no additional caching layer must be decoded or reconciled when rebuilding logical accessibility. Filesystem specifics and on‑disk layout are UNKNOWN and must be determined from the images during reconstruction.
Step-by-Step Guide to Recover Data from NAS D-Link DNS-322L
Recovering data from a two-bay NAS D-Link DNS-322L is possible even after RAID corruption, disk failure, or file-system issues (EXT4/Btrfs). Follow this step-by-step procedure to safely restore your files:
-
Step 1 Power off the NAS and remove both drives.
Shut down the device completely and carefully extract the disks. Note their exact order — it is essential for RAID reconstruction.
-
Step 2 Connect the drives to your PC.
Use SATA ports or USB-to-SATA adapters. Both drives must be detected at the same time for correct RAID assembly.
-
Step 3 Launch the NAS recovery software.
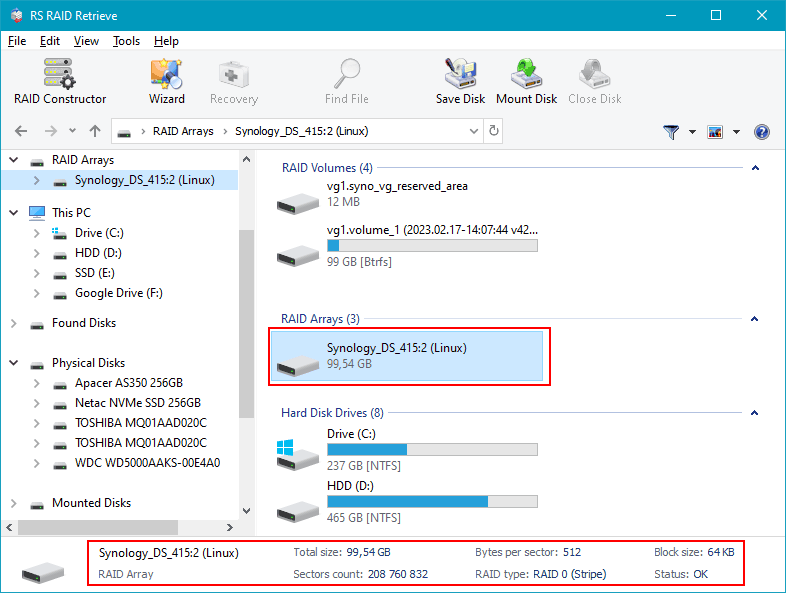
Open RS RAID Retrieve. The program will scan both disks and automatically detect the original RAID layout. Verify the parameters displayed at the bottom of the screen.

Data recovery from damaged RAID arrays
Available for: Windows, macOS, Linux -
Step 4 Confirm or adjust RAID configuration.
If automatic detection fails, manually set RAID 0 or RAID 1 parameters.
-
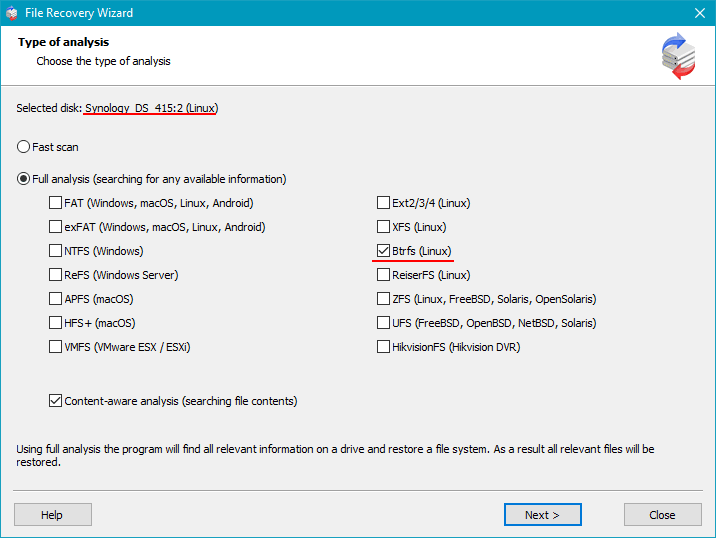
Step 5 Run a full scan.
The software rebuilds the file system structure and searches for deleted or corrupted files.
-
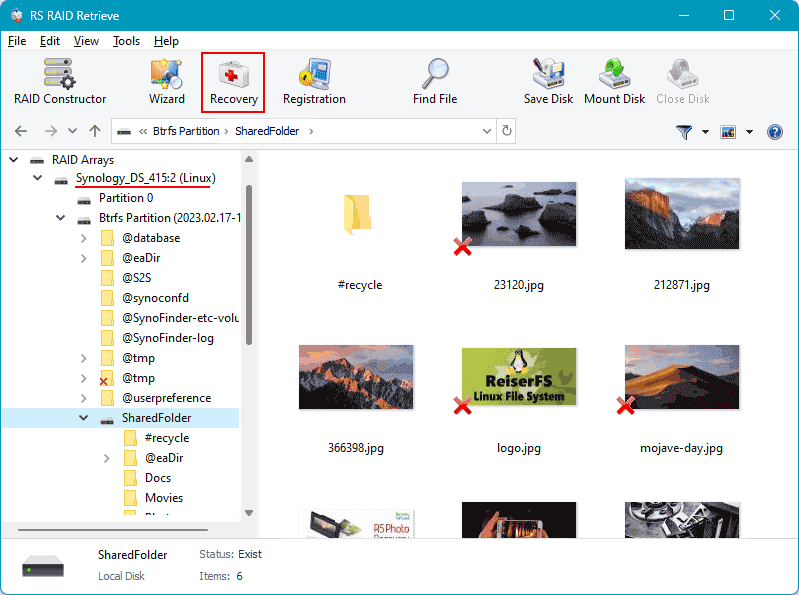
Step 6 Review the recovered folders.
Browse photos, videos, documents, and check integrity before exporting.
-
Step 7 Save your recovered data.
Select a different drive or partition to avoid overwriting original disks.
Tip: Never write new data to the original NAS drives during recovery.
The main causes of data loss in NAS devices
Disk failure. Physical malfunction of HDD or SSD is a common reason for data loss, especially in 2-disk NAS systems affecting RAID0 and important for RAID1.
Human errors (deletion, formatting). Accidental deletion or incorrect formatting can result in inaccessible files, requiring prompt recovery actions.
Firmware or DSM update errors. Improper system updates may corrupt partition tables or file metadata, causing data loss.
Power problems and sudden shutdowns. Unexpected power interruptions during write operations can damage file systems and compromise RAID integrity.
Technical causes and diagnostic steps for 2-disk NAS RAID failures
The failure of a RAID array in a 2-disk NAS D-Link DNS-322L typically occurs due to several low-level processes breaking down simultaneously. RAID metadata corruption, disk desynchronization, sector-level degradation, and controller instability together contribute to the gradual or sudden loss of redundancy. Below is a structured technical breakdown of how RAID failure usually develops and why data recovery becomes necessary.
Step 1: Initial disk instability detected through SMART anomalies. Early RAID degradation is often reflected in rising reallocated sector counts, unstable read times, or intermittent I/O delays. Even if the NAS does not yet show an error, delays in block access can cause the RAID engine to fail parity or mirror synchronization.
Step 2: The NAS D-Link DNS-322L controller marks one drive as “Abnormal.” When the controller repeatedly encounters unreadable sectors or timeout events, it isolates the disk. At this stage the drive may still appear “online,” but internal mechanisms already prevent accurate parity calculations.
Step 3: The drive becomes undetectable or is automatically removed from the array. Firmware lock-ups, voltage fluctuations, or head-positioning errors often cause the drive to disconnect completely. Once this happens, the RAID enters a degraded state where redundancy no longer exists.
Step 4: RAID metadata becomes inconsistent. With missing writes, corrupted parity blocks, or incomplete mirror updates, the RAID superblock may lose alignment. As a result, the NAS may fail to mount the array or show the volume as “Crashed.”
Step 5: File access issues escalate. Users typically begin noticing corrupted files, disappearing folders, or long delays opening large directories. In RAID 0 configurations, even a single disk failure leads to immediate data loss across the entire array.
- SMART degradation and growing sector instability
- Array desynchronization due to timeout errors
- Controller-level RAID metadata corruption
- Low-level file system damage on degraded volumes