Since 1983, the Master Boot Record (MBR) has been used in most personal and industrial computers. The MBR itself is the code and set of boot information required to run Windows. Due to the archaic structure of the master boot record, it had many limitations that negatively affected modern and productive computers equipped with large amounts of memory. To resolve this problem, a new standard for placing tables on HDD was developed around 2010 and was called GPT. The new format eliminated the disadvantages of the old one. It also opened up the potential of more powerful components, so modern motherboards from the factory are equipped with the UEFI BIOS mode, which is a prerequisite for working with discs converted to the GPT format. The general introduction of GPT and UEFI BIOS created some confusion, so users began to face problems with different formats and the inability of new hardware to work correctly on the old formats.
Contents
- Why convert MBR to GPT?
- Basic ways to convert MBR to GPT
- Converting MBR to GPT when installing the operating system
- Converting MBR to GPT using the command prompt (Diskpart)
- Change the format using the built-in "Disk Management utility"
- Convert MBR to GPT without data loss
- What if the data is lost?
Why convert MBR to GPT?
GPT is a modern format for placing tables on large capacity hard drives. The key advantages of this format are: increased efficiency, improved performance, and the ability to work with hard disks larger than two terabytes. Besides, the GPT format is a lighter and clearer format for programs recovering lost or accidentally deleted data.
It should be noted that the MBR format supported work with a limited number of HDDs smaller than two terabytes. This feature deprived users of the opportunity to work with such hard drives, making the free space of the drive unavailable. In this article, we will talk about how to convert MBR to GPT, provide several convenient ways to do this, and make the conversion easy, fast, and secure.
Basic ways to convert MBR to GPT
At the moment, there are several basic ways to convert an MBR disc to GPT. It should be noted that this conversion can often lead to data corruption or loss, so we recommend that you follow all the instructions below.
Converting MBR to GPT when installing the operating system
This method is one of the easiest and simplest ways to change the format of the master boot record.
Unfortunately, this method completely erases all data, so it is profitable to use it for those users who do a clean installation of the operating system on a clean disk.
During the installation of Windows 10 from a flash drive, some users may have encountered an error that was caused by a conflict between the MBR and GPT formats. This problem looks like an error window, which indicates that the system cannot be installed on an MBR disk. To solve this situation, the user only needs to delete all hard disc partitions in the installer and then re-partition them and install them to the desired partition. During installation, the disc will be automatically converted from MBR to GPT format, but all data will be lost.
Converting MBR to GPT using the command prompt (Diskpart)
Windows 10 has built-in software that allows you to convert non-partitioned discs to MBR and GPT or back. To change the format using the command prompt, please follow the following steps:
Step 1: Right-click on the start button and find the “Run” item..

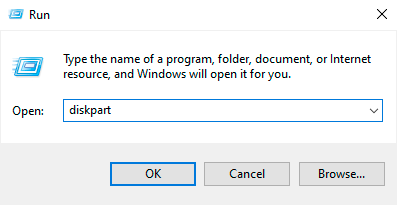
Step 2: In the window that opens, enter the “diskpart” command and click “OK”
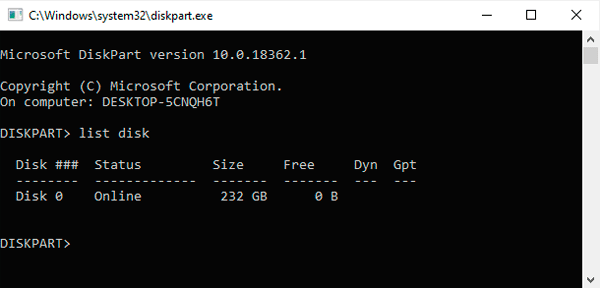
Step 3: The program that opens is a useful tool for converting discs and working with them. To continue the work, enter the command “list disk”
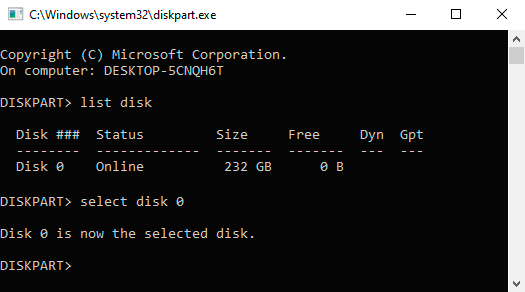
Step 4. After that, the window will show all hard drives. Each of them will be assigned its own number. Find the desired disk number and enter “select disk 0” (in our case, there is one drive installed, so it is assigned the number 0).
Step 5: Now you can enter the command “clean”, which will delete all partitions on the disk, and then the command “convert mbr”. Confirm the action by pressing the “Enter” key.
It should be noted that this method is also incredibly insecure, as the user has a high chance of losing data without recover capability. By performing this procedure, we strongly recommend you to move all the important information to another drive.
Change the format using the built-in “Disk Management utility”
Disk Management tool, is also a built-in Windows 10 way, to change the format of disks. To convert MBR to GPT with it, you need to follow these steps:
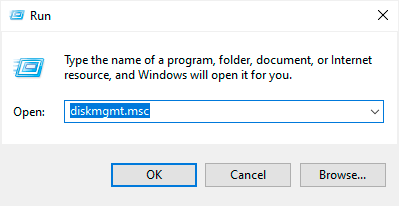
Step 1: Right-click on the “Start” button and select “Disk Management”. You can also open the tool for working with discs by pressing Win+R key combination, entering “diskmgmt.msc” command and pressing “Enter”
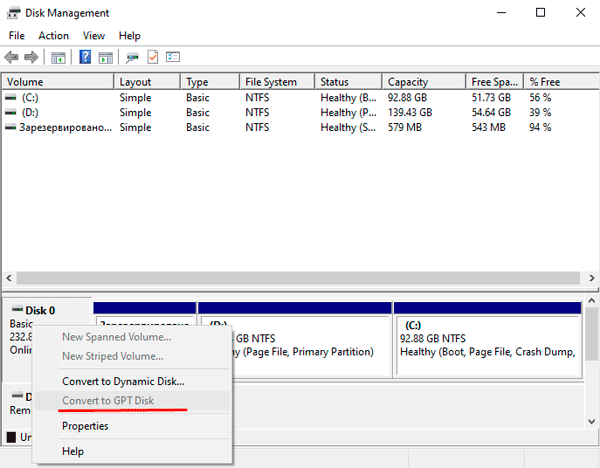
Step 2: In the window that opens, select the desired disc and right-click on it, then you can choose the function of converting to GPT disc.
It should be noted that this function may be inactive, as the utility can only be used if the disk has deleted partitions.
Convert MBR to GPT without data loss
At the moment, to convert a disc format from MBR to GPT without losing any information, you need third-party software such as EaseUS Partition Master, AOMEI Partition Assistant (now the free version of the program does not allow to convert discs without purchasing a license) and others. These programs can change the format, but at the same time, save the data. It should be understood that third-party software can not guarantee 100% storage of all data. Due to technical characteristics of the conversion itself, we strongly recommend making backup copies of important information.
Let’s analyze MBR’s process to GPT conversion with the help of EaseUS Partition Master program, the free version of which can be downloaded from the official website. All programs of this type have approximately the same operating principle and a similar menu. Knowing how to convert into one program, absolutely any user can use any other program. After downloading and installing, you should run the program and follow the next steps:
Step 1: In the opened window of EaseUS Partition Master program, find the required disk, right-click on and select the parameter “convert MBR to GPT”
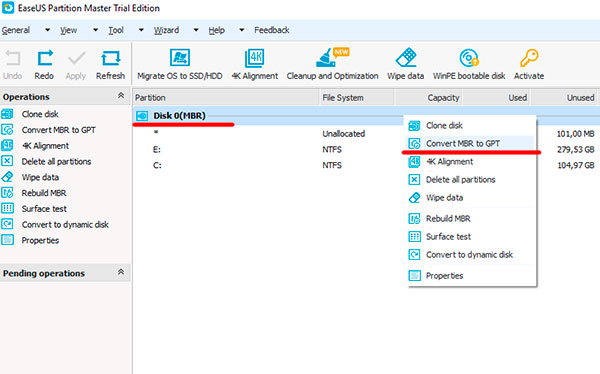
Step 2. Confirm the action by pressing the “Apply” button.
After that, the program will start the conversion process, which may take some time.
Important: any program of this type cannot perform the conversion of the disk on which it is installed.
What if the data is lost?
Unfortunately, the above methods do not fully guarantee that all files will be saved during conversion. If some important files have been deleted, don’t despair, as many utilities can recover all the lost data at the moment.
For fast and complete recovery of all files, our experts recommend to use RS Partition Recovery software, which can quickly recover lost files that disappeared during the conversion process. In addition, RS Partition Recovery is capable of recovering files after accidental deletion or formatting, which was performed even a few weeks ago.
Step 1. Install and launch the RS Partition Recovery.

All-in-one data recovery software
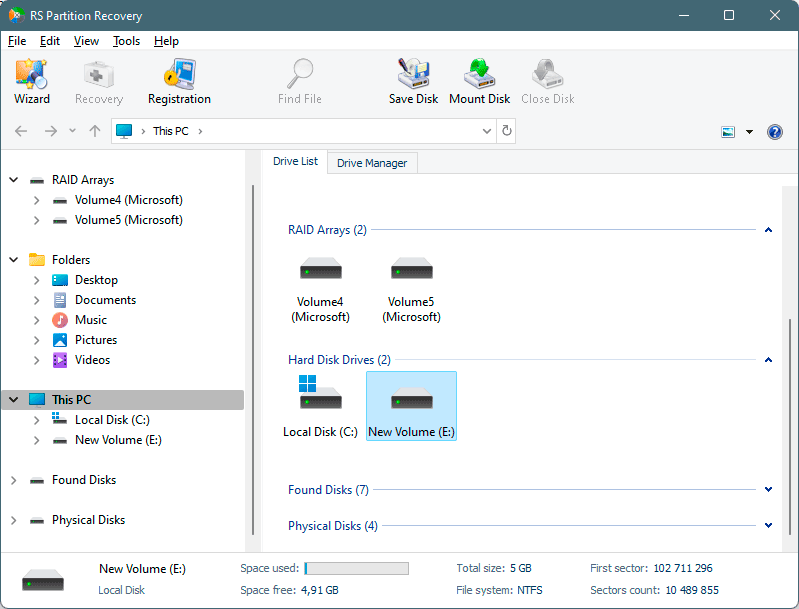
Step 2. Select the drive or partition from which you want to recover data.
Step 3. Choose the type of analysis.
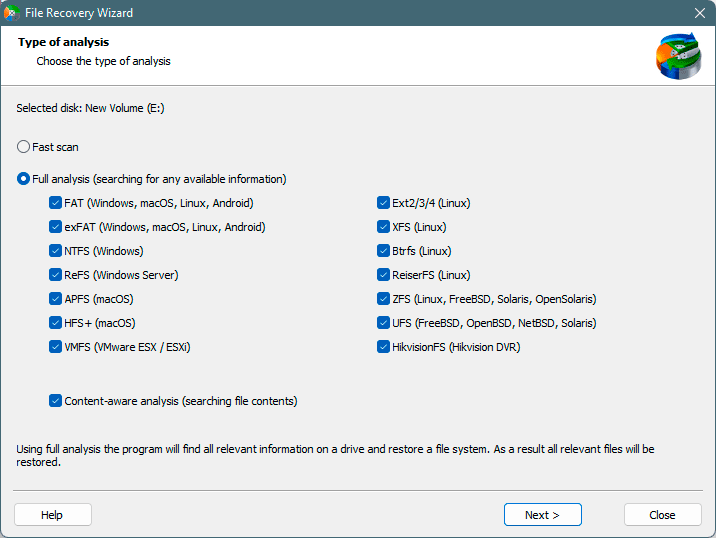
Fast scan you should use in case the file was lost recently. The program will scan the drive quickly and show the files available for recovery.
The Full analysis function allows you to find lost data, after formatting, disc resizing, or file structure corruption (RAW).
Step 4. Preview and select the files to recover it.
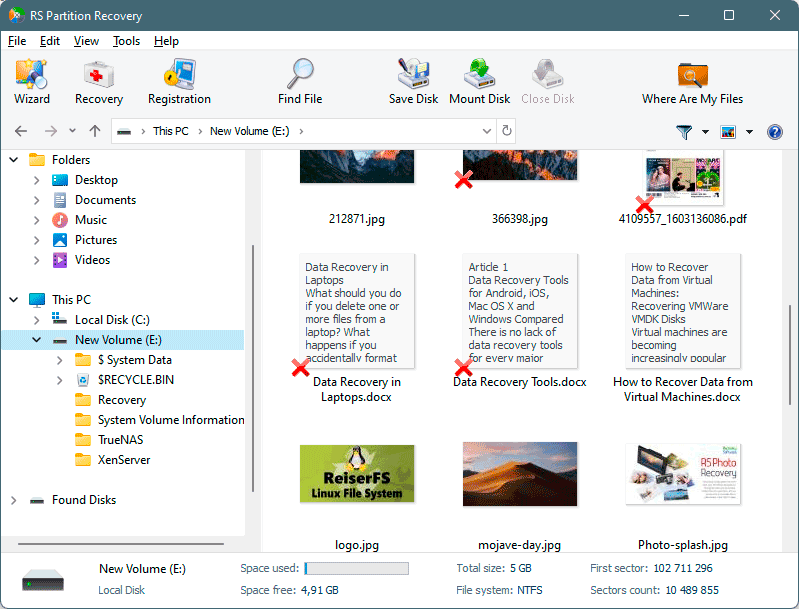
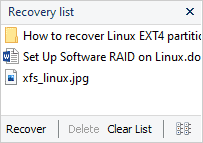
Step 5. Add the files you want to save to the "Restore list" or select the entire partition and click Recovery.
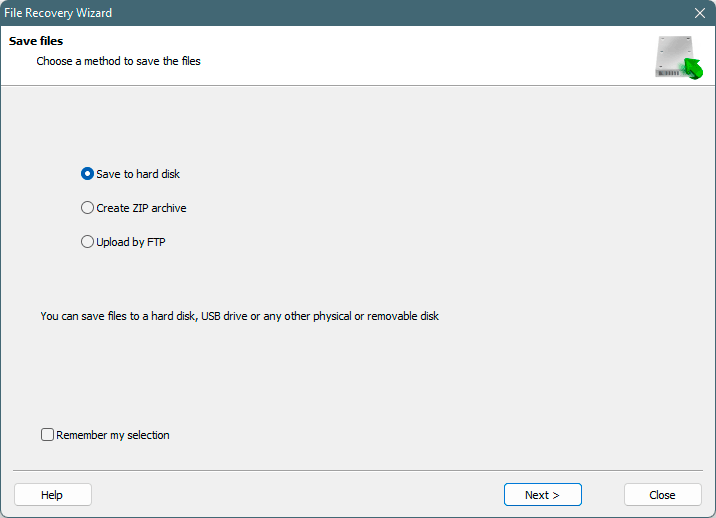
It should be noted that it is best to save the recovered file to an external hard drive or USB flash drive.


