How to Recover Data from Parallels Virtual Machines if the data is lost due to accidental deletion or software failure? How to transfer data from a Parallels virtual machine if it is damaged and cannot be restored? In the first case, data recovery software might be the only solution. In the second case, you can try to take some steps to revive the machine. If this proves impossible, the same data recovery programs with special functionality—support for virtual hard drives—can help.
Contents
- Parallels Virtual Machine Won't Start
- Where Parallels Stores Files
- Recreating a Parallels Virtual Machine
- How to Transfer Data from a Parallels Virtual Machine Using Parallels Tools
- How to Transfer Data from a Parallels Virtual Machine Using Data Recovery Software
- How to Recover Deleted Data from a Parallels Virtual Machine
Parallels Virtual Machine Won’t Start
The inability to start a Parallels virtual machine can be due to various reasons.
These could be incorrectly configured machine settings. In this case, the settings need to be reverted. If snapshots were previously created for the machine, you can roll back to an earlier state. Alternatively, you need to find a solution for the correct machine settings.
There could be issues with the Parallels hypervisor itself. There are known cases where Parallels stopped working correctly after a Mac update. In such cases, it is recommended to reinstall the hypervisor.
And there could be issues with the machine’s content itself—if its files are corrupted or deleted. This can happen:
- Due to a failure in Parallels or the Mac operating system (power failure, critical system failures, etc.);
- During the creation of snapshots;
- During unsuccessful transfer or copying of machine files;
- During machine export-import;
- Due to our own actions;
- And so on.
In such cases, you can also try to revert to snapshots if they exist. However, in the absence of file integrity for the Parallels virtual machine, success is unlikely. A more effective approach might be to recreate the machine based on its virtual hard drive.
If there are issues with Parallels itself, you can try to transfer the machine to another hypervisor. In the worst case, you may have to settle for rescuing only important data if such was stored inside the machine.
Let’s explore these solutions.
Where Parallels Stores Files
Whether it’s recovering data from Parallels virtual machines or recovering the machines themselves, we need the path on Mac where Parallels stores files. By default, this path is:
System > Users > Username > Parallels
Then follows the storage package for each individual machine. Right-click on the package and select “Show Package Contents.”
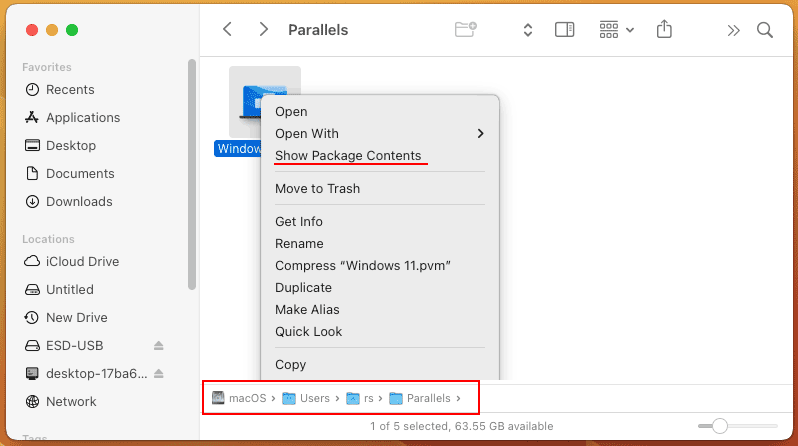
And you will see the files of the Parallels virtual machine. Among them will be files in HDD or HDS format. This is the most valuable content of the machine—the files of its virtual hard drives.
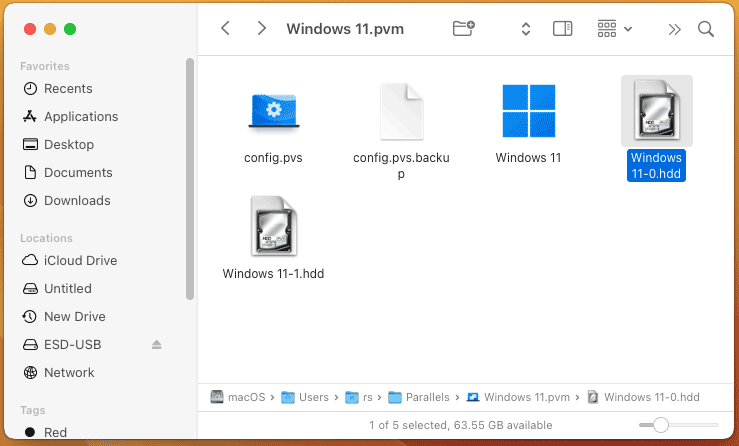
Recreating a Parallels Virtual Machine
A simple solution to recover a Parallels virtual machine is to recreate it using its virtual hard drive. This helps when some files of the machine are corrupted or deleted, but its virtual hard drive is intact.
In the Parallels window, start creating a new machine.
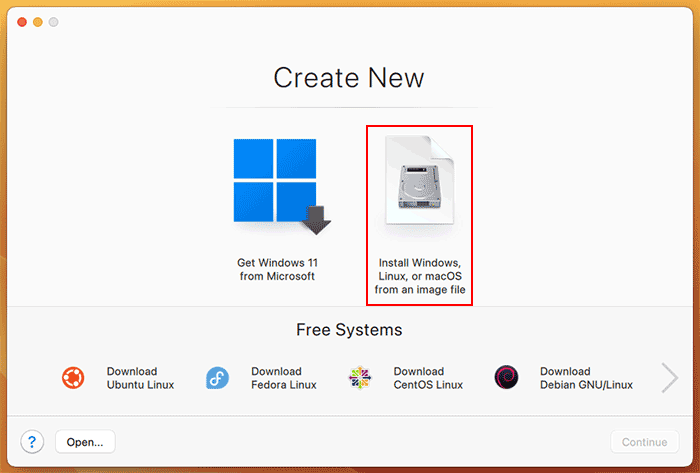
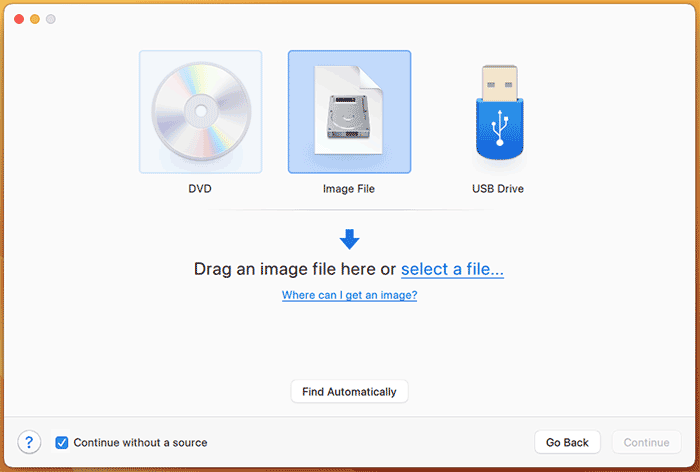
Check the box “Install operating system manually.”
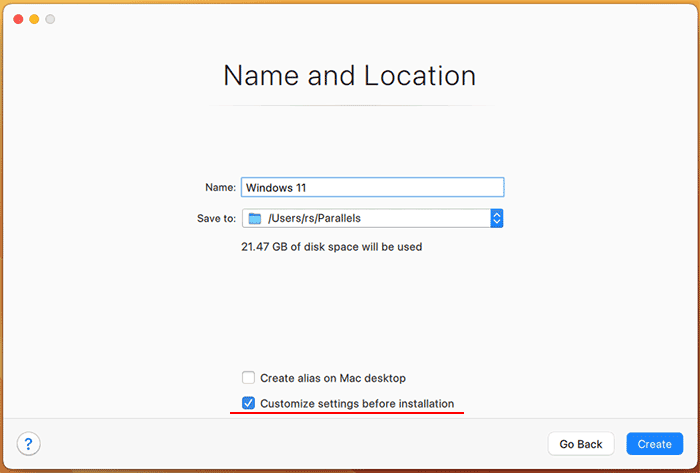
Specify a new name for the machine. Check the box “Configure settings before installation begins.” Click “Create.”
The Parallels virtual machine settings will open. In the “Hardware” section, click “Hard Disk.” Set the source to “Choose an image file.”
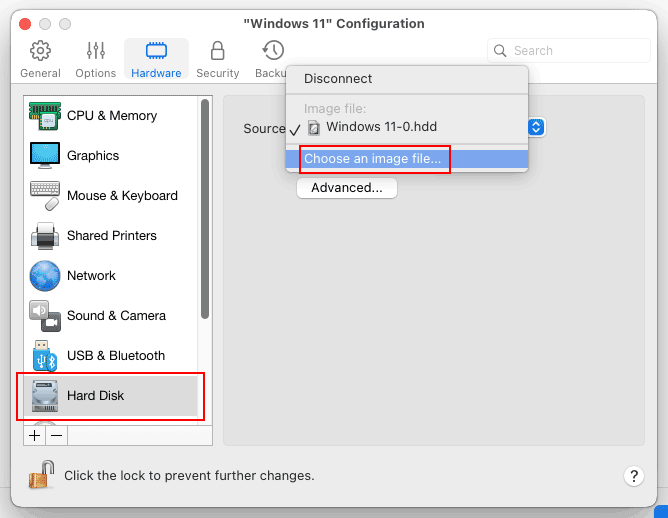
Specify the virtual hard drive file of the non-starting machine.
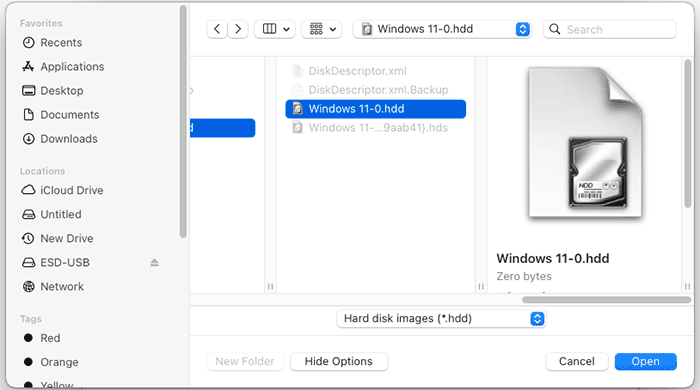
And try to start the new machine.
How to Transfer Data from a Parallels Virtual Machine Using Parallels Tools
If the two methods above do not help in recovering the Parallels virtual machine, it is likely that its virtual hard drive is damaged. The only option left is to try to transfer valuable data from it.
Data extraction is also the only option in situations where the guest operating system on the machine has suffered a serious failure and cannot be restored.
You can try to transfer data from the machine using Parallels itself. You need to connect the virtual hard drive of the non-starting machine to another working machine. For this purpose, you can even create a new machine specifically and start it with a recovery LiveDisk.
In the settings of the rescuing machine, in the “Hardware” section, click “Hard Disk.” Add a new hard disk.
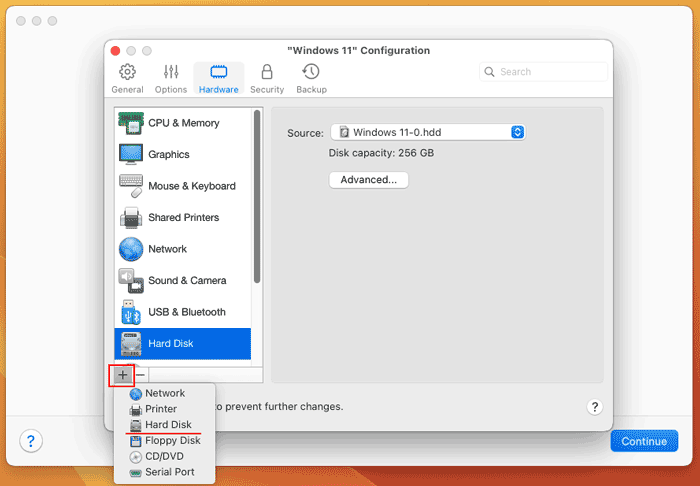
Specify the virtual hard drive of the non-starting machine.
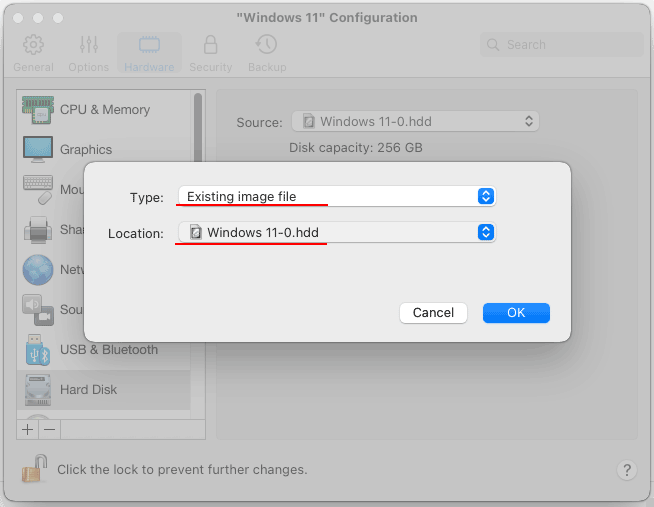
Start the rescuing machine and try to access the data on the problematic machine’s disk.
How to Transfer Data from a Parallels Virtual Machine Using Data Recovery Software
If none of the above methods help, then the only option left is data recovery software. To access the data of the virtual machine, we will use the program RS Partition Recovery.
This is a simple and effective solution to transfer data from a Parallels virtual machine if it is not working. RS Partition Recovery operates from the host system environment. It can connect virtual machine hard drives within its interface and provides access to their contents.
RS Partition Recovery supports, in particular, the formats Parallels works with—HDD and HDS. It can extract data from damaged virtual hard drives.
A notable feature of RS Partition Recovery is the recovery of data from Parallels virtual machine snapshots. The data we need may not be on the machine’s virtual hard drive. But they might be found in snapshots if such were previously created for the machine.
This program also serves as a solution for recovering deleted files on a Parallels virtual machine.
RS Partition Recovery is a Windows program and is not available for Mac. However, it can be run in a Windows environment using Boot Camp.
How to recover data from a Parallels virtual machine using RS Partition Recovery? Download the program and install it.

All-in-one data recovery software
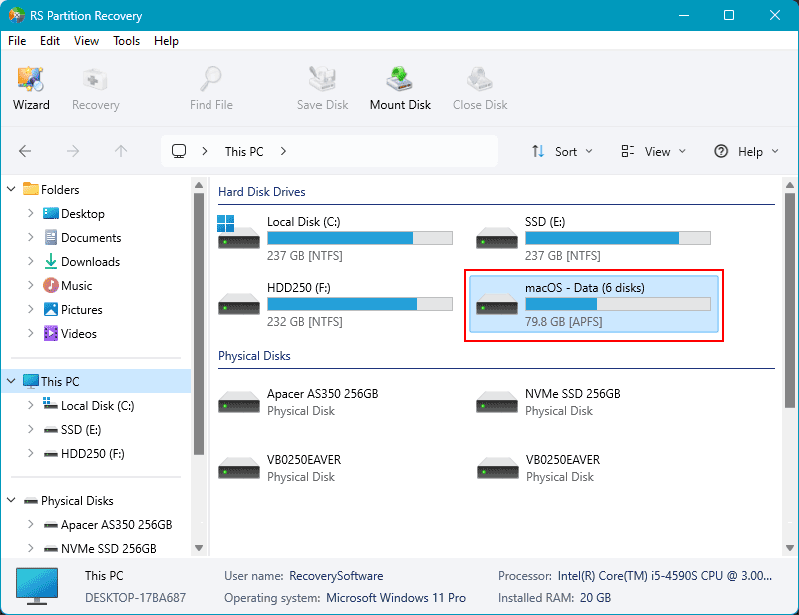
Upon launching it, you will see a step-by-step data recovery wizard. Close it. And work directly with the program itself. In its window, look for the Mac operating system partition. It will be marked as APFS container. Click on it.
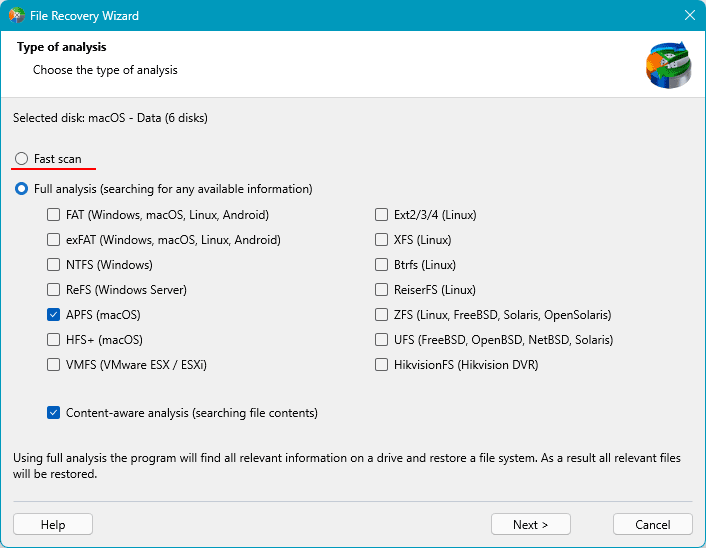
Use the default search type quick scan.
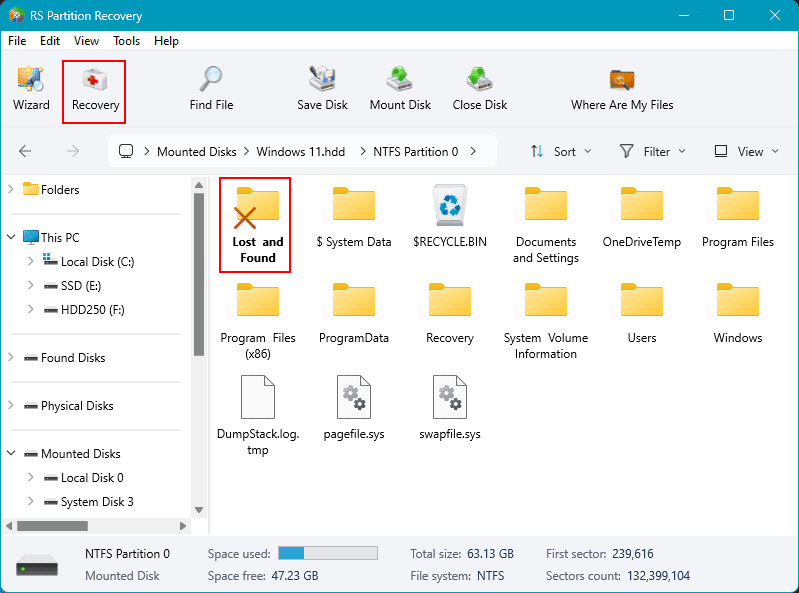
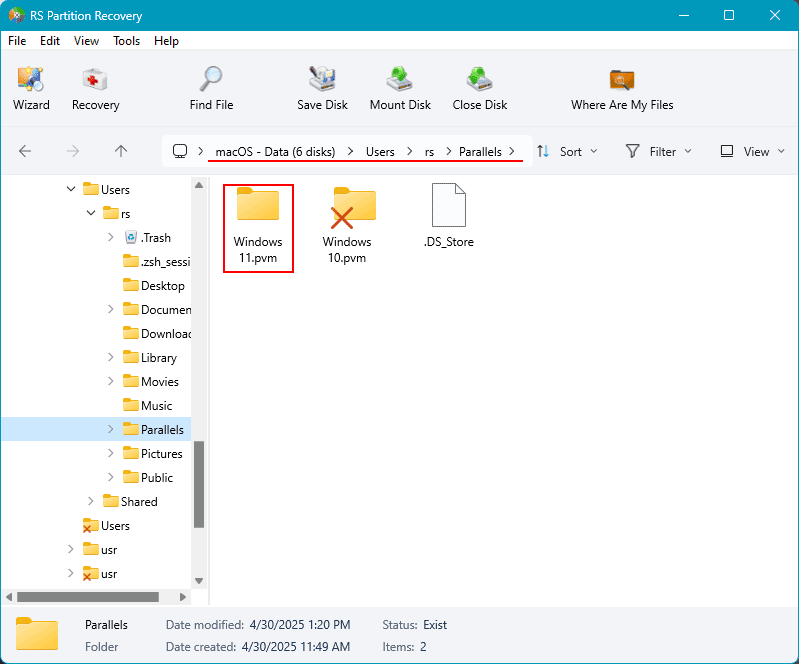
Wait for the program to present the partition data. Follow the path to the Parallels virtual machine storage in the Mac environment. Click its folder and press the “Recover” button.
Select “Save to hard disk”.
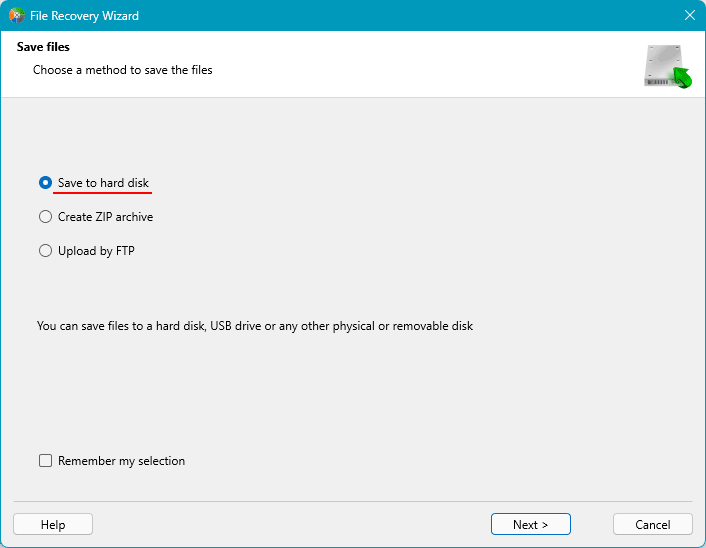
And save.
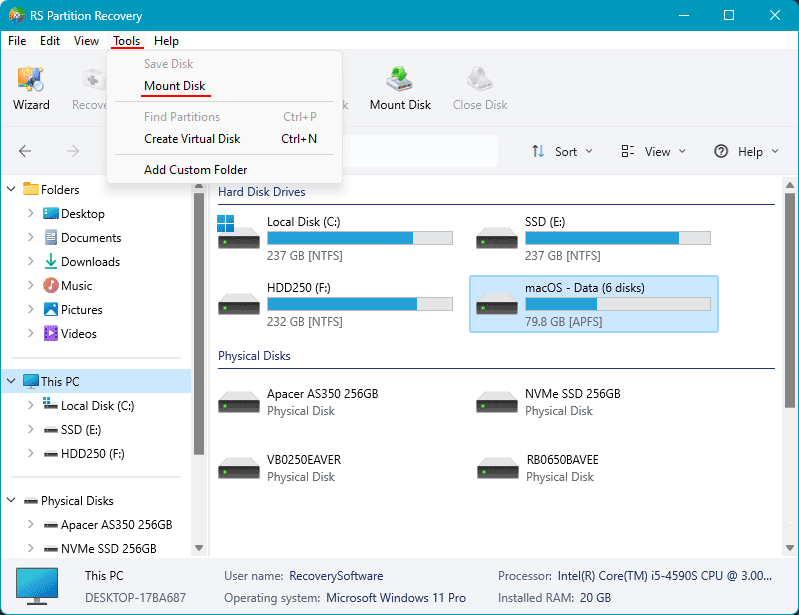
After saving the machine’s folder in the RS Partition Recovery window, click the “Service” menu. In it, select “Mount Disk”.
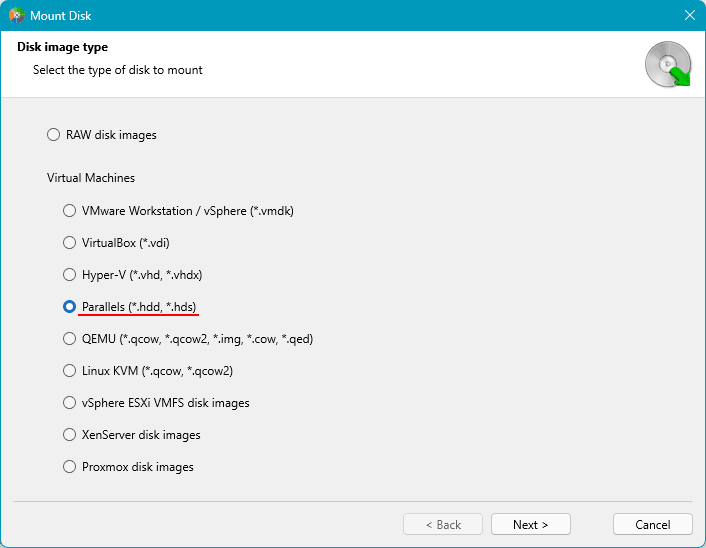
Select the type of disk to mount – “Parallels (*.hdd, *.hds)”.
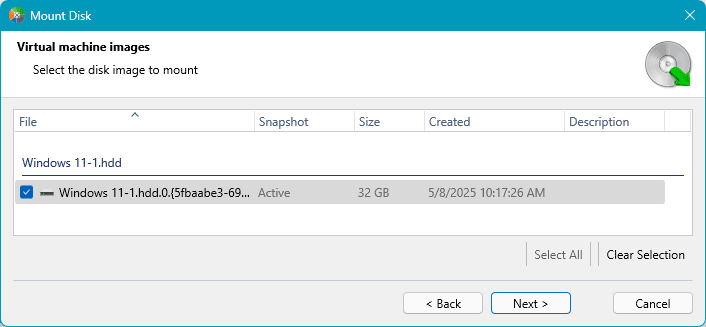
Specify the path to the folder with the Parallels virtual machine data that we just recovered. The program will then display all disks and snapshots of this machine. Select all or some of them.
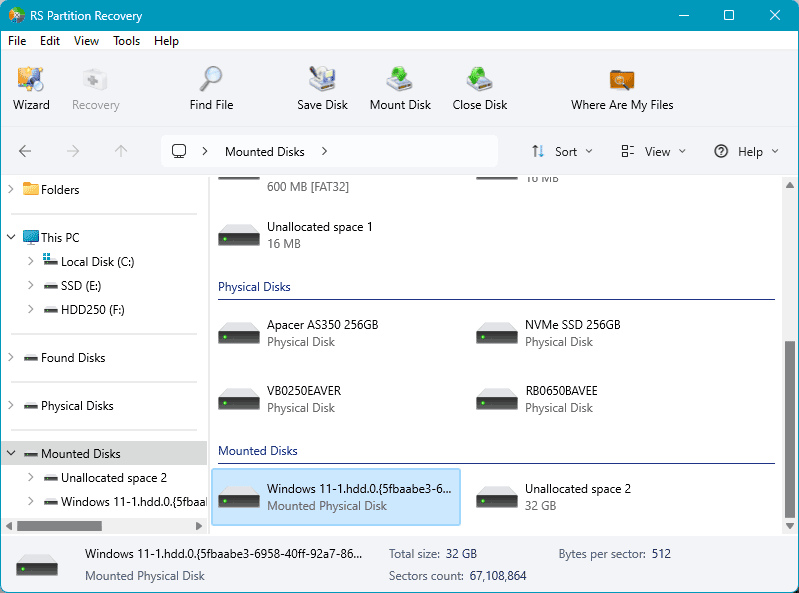
And you will see these disks and snapshots mounted in the RS Partition Recovery window. Now work with each mounted disk or snapshot in turn. Click on them.
And perform a data search. Use the default search type quick scan.
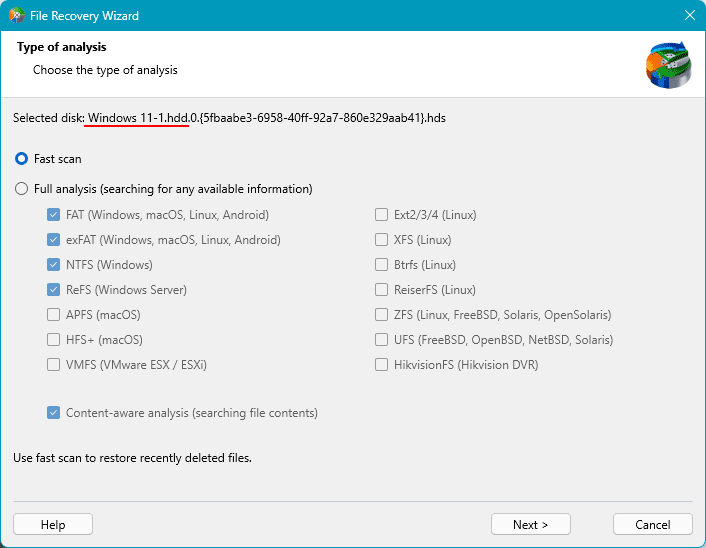
Select the data to recover. Click the “Recover” button for them.
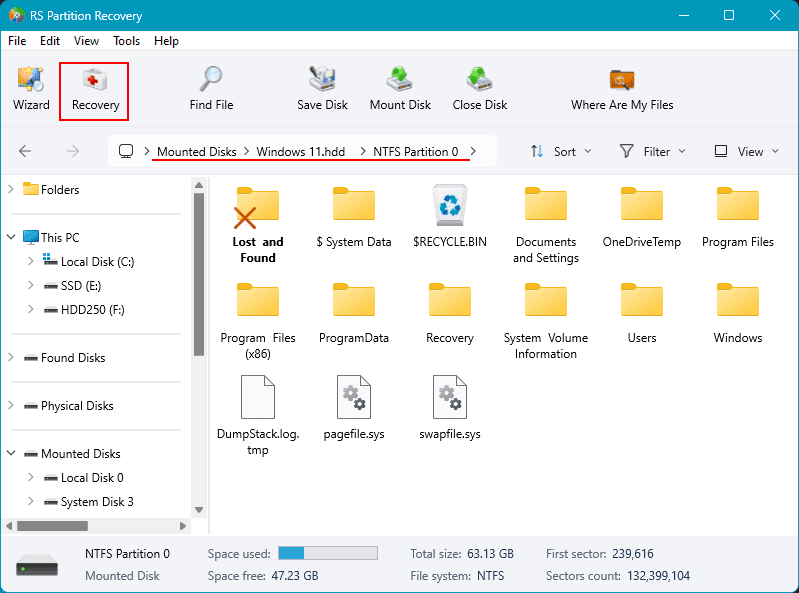
Save the files using any of the methods offered by the program. And get your data at the saved path.
How to Recover Deleted Data from a Parallels Virtual Machine
RS Partition Recovery is not only a way to access the data of virtual machine disks, but it is also an effective solution for recovering deleted data. Thanks to the ability to access the contents of virtual hard drives, this program in the Windows host system environment can be used as a unified tool for recovering deleted files on different virtual machines.
Moreover, recovering deleted data in the host system directly from the virtual hard drive file can, in some cases, be more effective than regular data recovery from the disk in the guest OS environment.
To recover deleted files on a Parallels virtual machine in the program, you need to follow the same steps as described above. The only difference is that if the necessary data is not found after a quick scan, you need to restart the data search and apply a full analysis.
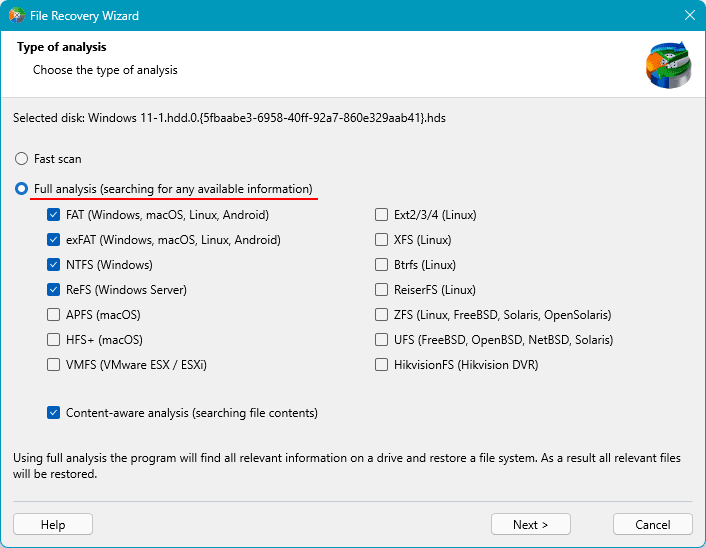
This is a deep data scan for recovery. It takes longer but is more effective than a quick scan.
Deleted data in the scan results window will be marked with a cross icon. Look for the needed data among these and recover them using the “Recover” button.
