A failing RAID array on NAS QNAP TS-262-4G can instantly make the entire storage pool inaccessible. RAID 1 mirror inconsistencies, metadata corruption, failed resync operations, or unexpected disk dropouts are common triggers for data loss. In this article, we outline the most frequent RAID-related issues affecting the NAS QNAP TS-262-4G and explain how to recover data safely without risking overwriting or additional damage.
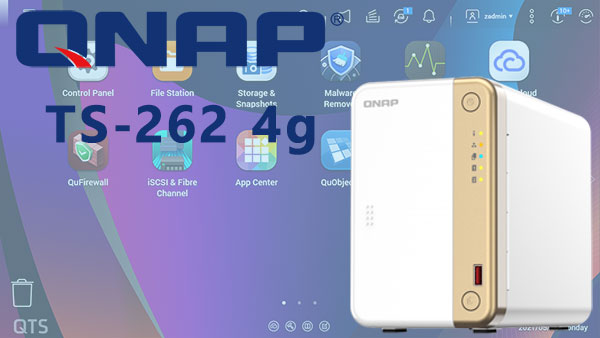
What’s Inside This NAS? Key Specs Explained Simply
The QNAP TS-262-4G is built with everyday users in mind. With its 2 drive bays, you get enough storage flexibility for photos, documents, media files, and backups. It supports RAID 0/1, giving you a choice between more speed or safer data mirroring. The NAS works with EXT4 or Btrfs, both proven file systems known for reliability and clean data structure.
Even if you’ve never used a NAS before, this model is easy to set up and maintain — and if something goes wrong, its clear RAID layout helps simplify the data recovery process.
Professional Data Recovery Workflow on QNAP TS-262-4G
For business environments, data recovery on the QNAP TS-262-4G must follow a structured workflow: preliminary diagnostics, disk imaging, RAID reconstruction, filesystem analysis, and controlled extraction of recovered data. This approach minimizes downtime and ensures integrity of business-critical archives.
Main Features of the QNAP TS-262-4G NAS
| Drive Bays | Supported Drives | Hot Swappable | Supported RAID | File Systems | Maximum volume |
| 2 | 2.5" or 3.5" SATA | ✓ | RAID 0, RAID 1, JBOD | EXT4, BTRFS, ZFS | 44 Tb |
As deployed in the QNAP TS-262-4G, the storage stack is a software RAID and filesystem model: two‑bay RAID 0/1 or JBOD implemented by mdadm for Linux volumes, or an alternative ZFS pool if the administrator selected ZFS storage, with filesystems of record being EXT4 or BTRFS. Above RAID sits the QTS volume management layer and then filesystem structures; an optional SSD cache layer can hold dirty or metadata pages. Model‑specific failure points for recovery are concrete: corrupted or mismatched mdadm superblocks, BTRFS metadata tree corruption, ZFS import failures tied to pool state or cachefile loss, stale SSD cache entries that hide the most recent writes, and OS/kernel changes under QTS 5 that change metadata handling. Hardware factors relevant to logical integrity include memory pressure on the appliance (the unit ships with 4 GB RAM) causing interrupted writes and metadata inconsistency, and abrupt OS/kernel panics that leave RAID or filesystem journals incomplete.
Logical inaccessibility typically arises from damaged or inconsistent metadata layers: RAID metadata that prevents assembly, filesystem journals or BTRFS trees that refuse to mount, ZFS pools that cannot import because of state discrepancies, or SSD cache loss that makes on‑disk data lag behind. Recovery outside the NAS follows a strict diagnostic principle: preserve originals, create full sector images, and avoid in‑place writes. In the lab we image drives with read‑only tools, reassemble arrays with mdadm using the original metadata parameters (or import ZFS pools with import options such as readonly), then mount filesystems read‑only to extract data. For EXT4 use fsck/extraction on images; for BTRFS prefer btrfs restore or metadata recovery tools rather than aggressive repair; for ZFS import readonly and use zpool export/import or zdb to recover datasets. Maintaining the original RAID layout, stripe size and mdadm metadata version and avoiding applying SSD cache writes are essential to prevent irreversible logical damage.
Step-by-Step NAS QNAP TS-262-4G Recovery Tutorial for Beginners
Recovering data from a 2-disk NAS QNAP TS-262-4G may seem complicated, but with the right guidance, anyone can do it safely. This educational walkthrough explains each step in a clear, structured format, helping you understand not only what to do, but why it matters. You’ll learn the basics of RAID reconstruction, safe handling of disks, and deep file system scanning.
Step 1 Power off the NAS and remove the disks.
Turning the NAS fully off prevents additional damage. Carefully slide out both drives and note their order — RAID relies on precise disk sequencing.
Step 2 Connect the NAS disks to your PC.
Attach both drives simultaneously via SATA or USB-to-SATA adapters. This is required for RAID assembly and correct metadata interpretation.
Step 3 Launch RS RAID Retrieve.
The software analyzes your disks in read-only mode, automatically detecting RAID level, block size, parity rotation and other technical parameters.

Data recovery from damaged RAID arrays
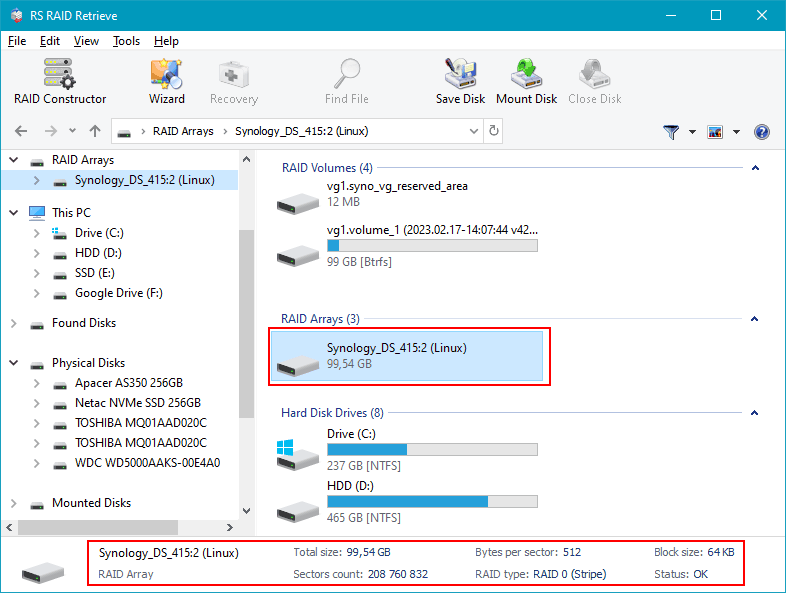
Available for: Windows, macOS, LinuxStep 4 Review the detected RAID configuration.
RAID settings may vary between NAS models. Verify that the parameters match your QNAP TS-262-4G system. Adjust manually only if needed.
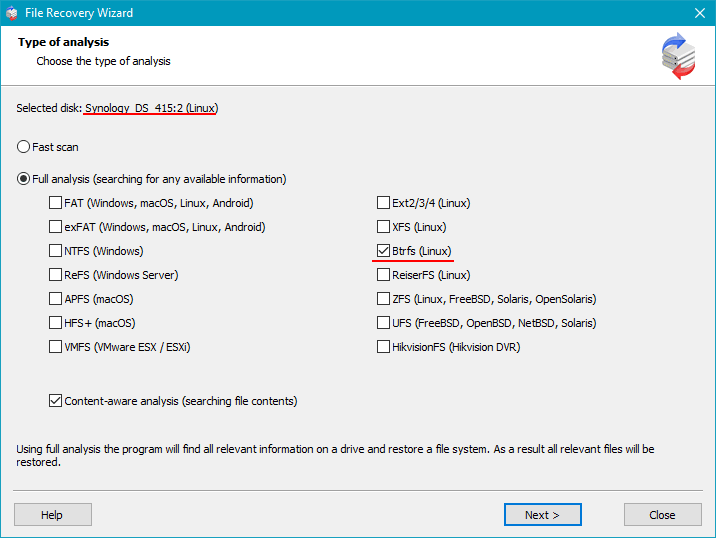
Step 5 Start a deep scan of the reconstructed RAID.
The tool rebuilds the file structure and searches for documents, photos, videos and other data — even if the partitions are damaged.
Step 6 Inspect the recovered folders.
Browse through the directory tree to confirm that your files are accessible. The preview helps you evaluate the recovery quality.
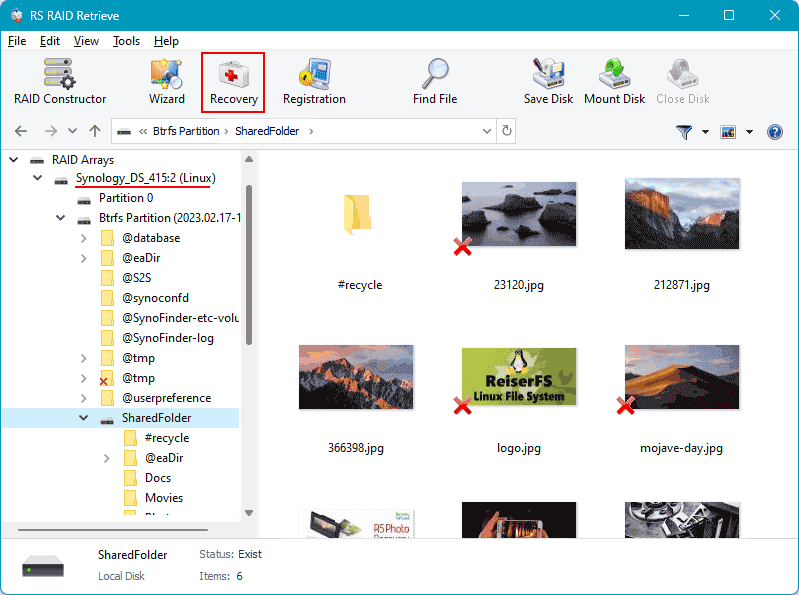
Step 7 Export the restored data to a safe location.
Save your files to another drive to avoid overwriting valuable data on the original NAS disks.
Tip: Never write to the original NAS disks during recovery.
Common Causes of Data Loss in NAS Devices
Data loss in NAS systems often occurs due to RAID failures, accidental deletion, firmware corruption, disk degradation, and power outages. Misconfigured RAID arrays or simultaneous disk failures also frequently lead to inaccessible volumes or damaged file structures.
Why RAID fails in 2-disk NAS QNAP TS-262-4G
The failure of a RAID array in a 2-disk NAS QNAP TS-262-4G is typically caused by a combination of hardware wear, unstable system conditions, and file-system-level inconsistencies. Since a two-bay NAS relies heavily on synchronized disk operation, even minor deviations in performance or SMART parameters may lead to a rapid degradation of the array. Below are the most common technical reasons why a RAID configuration may fail, making data recovery necessary.
1. One disk becomes undetectable. In many NAS QNAP TS-262-4G recovery cases, the RAID failure starts when one of the drives suddenly disappears from the system dashboard. The NAS controller stops seeing the HDD/SSD because of firmware issues, electrical problems, or mechanical wear.
2. Noticeable performance slowdown. A failing RAID in a 2-disk setup often results in slow file access, reduced read/write speed, and delays when opening folders. These symptoms indicate that disk synchronization is breaking down and that the system is struggling to rebuild parity or mirror data.
3. “Degraded” or “Crashed Volume” status. When the NAS marks the array as Degraded, it signals that redundancy has been lost and RAID integrity is compromised. If not addressed, the array may transition to a Crashed Volume state, requiring immediate professional recovery.
4. Files become inaccessible. In RAID 0 or in certain simultaneous failure scenarios involving both disks, the system may no longer open files or may generate errors such as “File Corrupted” or “Directory Unavailable.”
- Undetected disk events
- Parity or mirror synchronization errors
- Low-level sector degradation and SMART failures
- Unplanned shutdowns leading to RAID metadata corruption