In the first article called “How SSD Drives Permanently Erase Deleted Data” we described the reasons for SSD drives to erase your data permanently as soon as you erase a file, quick-format the disk or delete a partition. Sounds scary, doesn’t it? However, this is not always the case. More often than not, your files will still be there on the SSD drive, ready to be recovered. Let’s see when this happens.
Contents
TRIM: Not Always Working
TRIM is a great thing to optimize performance and longevity of an SSD drive. Without TRIM, you would get much slower write speeds and much faster wear of flash cells, which have a limited number of write cycles before failing.
However, in some situations TRIM does not engage. In particular, TRIM will not work if any of the following is true:
- You used an SSD drive in a USB enclosure. TRIM does not work over USB. (However, it does work over eSATA).
- You used one or more SSD drives in a NAS enclosure. (Most NAS units do not support TRIM, with the exception of some Synology units coupled with latest OS).
- You used two or more SSD drives in an internal RAID array. (Until recently, Windows did not support TRIM on RAID arrays. Even today, TRIM and RAID may not work together).
- You use Windows XP or Vista. (TRIM was added to Windows 7 and newer, including Windows 8 and 8.1) .
- Your SSD drive is formatted with FAT, FAT32 or exFAT. (In Windows, TRIM only works with NTFS).
- The disk or the file system is corrupted. (TRIM is only issued if you explicitly delete a file, format or repartition the disk. Otherwise, even if you don’t see any data and the disk appears empty or inaccessible, the TRIM command is not issued until you do the formatting or repartitioning).
- Non-Apple SSD on a Mac. (In Mac OS X, TRIM is only supported for Apple-supplied SSD drives).
If any of the following applies to you, go ahead and use a data recovery tool – the chance that your data is still there is as high as with a traditional hard drive!
How to recover the lost data from an SSD drive?
As of today, the best solution for recovering lost data on the market is RS Partition Recovery. The fact is that the program is not demanding to computer resources and is extra easy to use. It allows you to recover important data even for inexperienced users. The whole recovery process takes place in a few clicks of the mouse.
But the most important thing about RS Partition Recovery is the support for ALL modern file systems, which allows you to recover valuable data no matter what computer, server, or operating system the drive was used in.
Just connect your SSD drive to any working computer and follow a few simple steps:
Step 1. Install and launch the RS Partition Recovery.

All-in-one data recovery software
Step 2. Select the drive or partition from which you want to recover data.
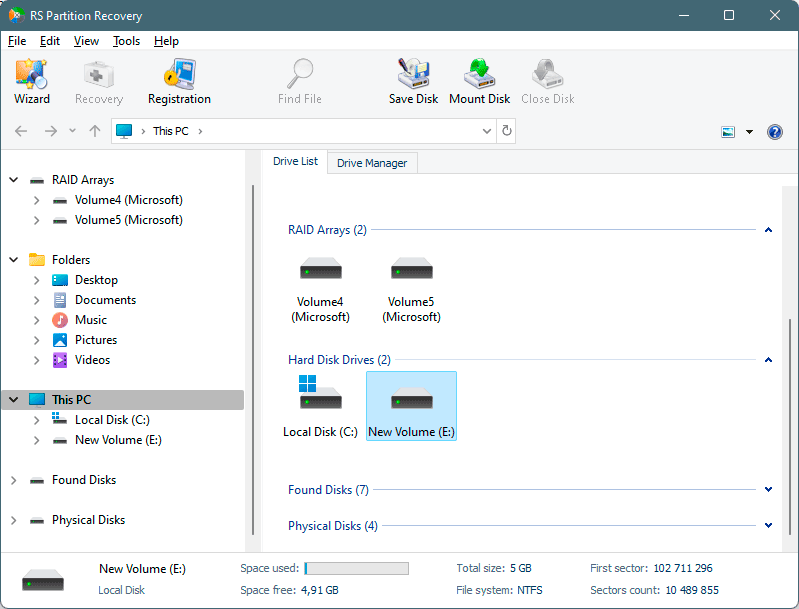
Step 3. Choose the type of analysis.
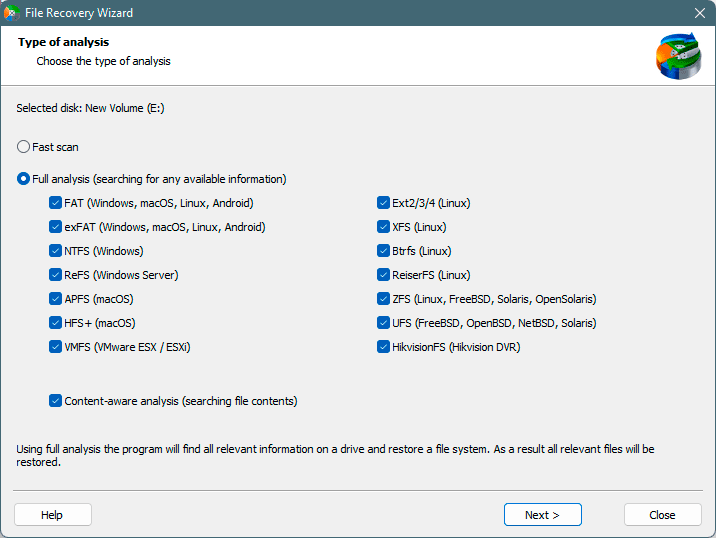
Fast scan you should use in case the file was lost recently. The program will scan the drive quickly and show the files available for recovery.
The Full analysis function allows you to find lost data, after formatting, disc resizing, or file structure corruption (RAW).
Step 4. Preview and select the files to recover it.
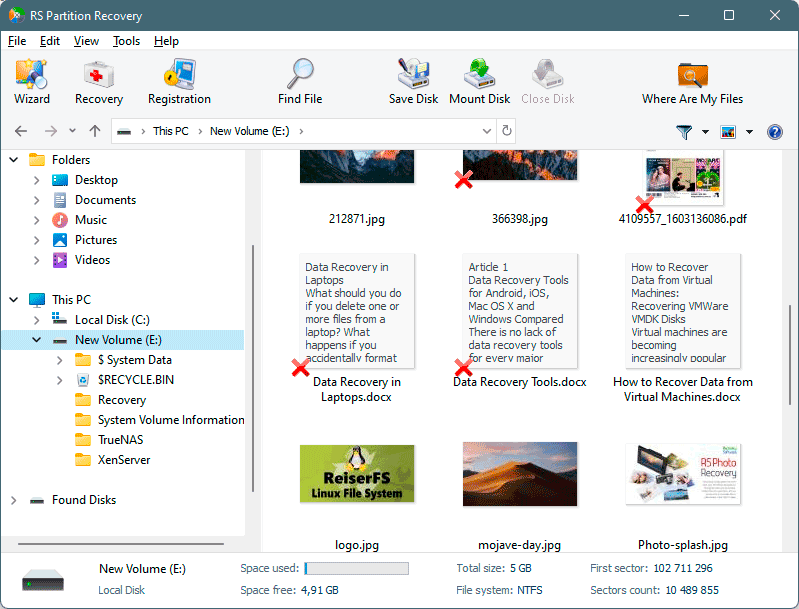
Step 5. Add the files you want to save to the "Restore list" or select the entire partition and click Recovery.
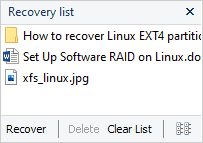
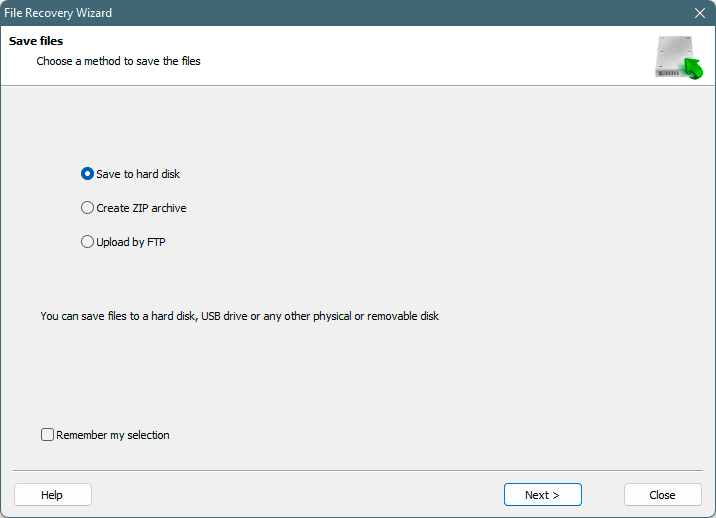
It should be noted that it is best to save the recovered file to an external hard drive or USB flash drive.
As you can see, the file recovery process for an SSD drive is no different from that for a regular hard disk drive. The main thing is to keep TRIM mode off.

