When the RAID array on NAS TerraMaster F2-423 becomes degraded or corrupted, access to your data may be lost instantly. RAID 1 mirror failure, disk desynchronization, or metadata corruption are among the most common issues. This guide explores typical RAID failures affecting the NAS TerraMaster F2-423 and how to recover data without rebuilding the array incorrectly.
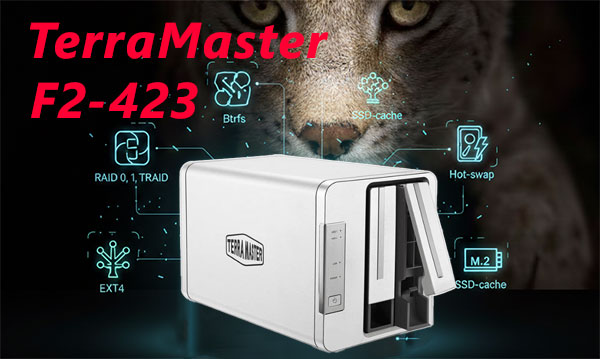
Hardware and Performance Characteristics of NAS TerraMaster F2-423
The NAS TerraMaster F2-423 is engineered for stable, high-performance storage, offering 2 drive bays that support multiple RAID configurations and optimized data throughput. With its efficient processor and memory architecture, the device ensures consistent performance during file transfers, backup operations, and multi-user access. Supported file systems, including EXT4 and Btrfs, feature advanced metadata handling and snapshot capabilities, which influence both everyday operation and the complexity of data recovery procedures.
When restoring data from the TerraMaster F2-423, attention must be paid to RAID parameters, chunk size, filesystem behavior, and potential inconsistencies caused by degraded volumes or abrupt shutdowns. This model’s hardware design directly affects how recovery tools reconstruct missing data blocks.
What Makes Data Recovery on TerraMaster F2-423 Unique
Two-bay NAS systems like TerraMaster F2-423 are compact yet powerful, and their RAID structure directly affects how the data is recovered. Whether your files were mirrored in RAID 1 or divided across disks in RAID 0, our tools reconstruct your storage step by step. Even if DSM stops responding or the NAS refuses to mount volumes, the content can still be restored by analyzing each disk independently. This approach ensures safe and effective recovery of photos, business documents, backups, and multimedia libraries.
Main Features of the TerraMaster F2-423 NAS
| Drive Bays | Supported Drives | Hot Swappable | Supported RAID | File Systems | Maximum volume |
| 2 | 2.5" or 3.5" SATA | ✓ | RAID 0, RAID 1, JBOD, TRAID | EXT4, BTRFS | 40 Tb |
In the selected TRAID architecture the controller aggregates physical devices under TOS 5.1 and presents a single volume formatted with BTRFS or EXT4, using an optional SSD cache tier to accelerate writes and reads. With an Intel Celeron N5095 and 4GB of memory the single most probable model-specific failure point is a coherency fault where the SSD cache layer and TRAID-managed primary devices fall out of sync: lost or inconsistent cache-to-volume mapping under TOS 5.1 causes the on-disk BTRFS metadata view held by the controller to diverge from the physical block state.
When that divergence occurs the filesystem namespace becomes logically inaccessible because BTRFS can no longer reconcile block mappings even though raw blocks remain on media. The recovery principle outside the NAS is to image each physical device and the SSD cache, reconstruct the TRAID layout metadata independently of TOS, and reconcile or restore the on-disk BTRFS metadata against the cached write set. Reassembly of the original mapping and targeted metadata restoration permits reconstruction of the logical namespace without relying on the NAS controller.
Easy Step-by-Step Guide: How to Recover Data from a 2-Disk NAS
If your 2-disk NAS has stopped working, don’t worry — most cases of data loss can be fixed even if the system won’t boot, the RAID has failed, or the NAS says the volume is “degraded.” This beginner-friendly walkthrough explains each step in clear language so you can recover your files safely and confidently.
-
Step 1 Turn off the NAS and carefully remove both drives.
Make sure the NAS is fully powered down before opening it. Gently slide out the disks and label them according to their original order. This helps the recovery software rebuild the RAID correctly.
-
Step 2 Connect the drives to your computer.
Use SATA ports if possible, or high-quality USB-to-SATA adapters. Both disks must be connected at the same time — this is essential for proper RAID reconstruction.
-
Step 3 Open RS RAID Retrieve — the recovery app for NAS drives.
The program automatically scans your disks and tries to detect how the RAID was originally configured. It works in safe read-only mode, so your data stays untouched.

Data recovery from damaged RAID arrays
Available for: Windows, macOS, Linux -
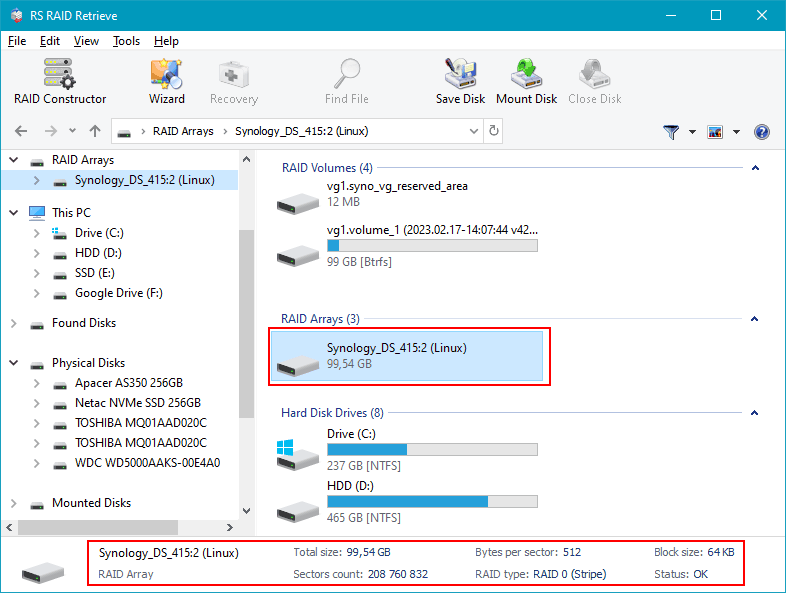
Step 4 Check the RAID configuration found by the software.
The tool usually determines everything on its own, but if something looks incorrect, you can adjust the parameters manually (RAID level, block size, disk order, etc.).
-
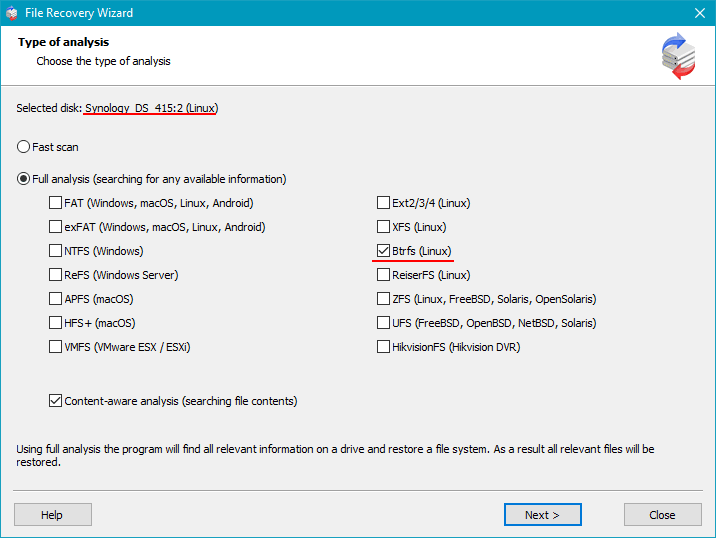
Step 5 Start scanning the reconstructed RAID.
The deep scan searches for lost folders, documents, photos, videos and other file types — even if the file system is damaged or the partition was lost.
-
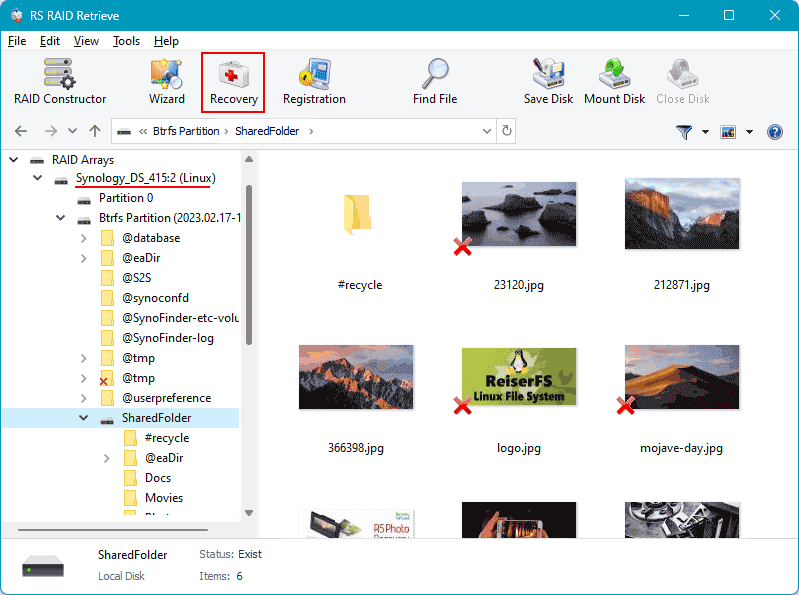
Step 6 Review the recovered folder tree.
Once the scan is complete, you’ll see all available files, including those that were previously inaccessible or accidentally deleted. Browse through the structure and verify that your important data is present.
-
Step 7 Save the recovered files to another disk.
Choose a safe location — for example, an external drive or a separate internal disk. Avoid writing anything to the original NAS drives.
Tip: Never save files back onto the original NAS disks. This prevents overwriting and keeps the recovery clean and safe.
Expert Overview of RAID Failures in NAS TerraMaster F2-423
In two-disk NAS platforms like the NAS TerraMaster F2-423, RAID failures rarely occur without prior warning. Although these systems are designed for continuous workload, the underlying mechanisms are sensitive to gradual degradation, environmental instability, and metadata inconsistencies. From an expert perspective, RAID breakdown is usually a layered process, where several small factors accumulate over time before the array finally enters a degraded or failed state.
Progressive desynchronization between drives. Even identical disks age differently. Subtle discrepancies in response time, sector remapping, and I/O throughput gradually widen. Eventually, one disk can no longer keep up with the RAID controller’s synchronization cycle, leading to predictable, though often unnoticed, degradation.
Unrecoverable sectors emerging during parity verification or rebuild. When the array attempts to resync—often after a power fluctuation or unexpected shutdown—latent bad sectors become a critical flaw. A single URE may compromise the entire rebuild process, especially in a two-disk configuration lacking redundancy.
Thermal drift affecting mechanical and electronic stability. Compact NAS units naturally accumulate heat. If ventilation weakens, temperature rises slowly but steadily, triggering more write errors, increased latency, and premature failure of aging hardware.
Subtle inconsistencies in RAID metadata. RAID relies on precise mapping definitions. If the NAS controller encounters incomplete writes, outdated firmware behaviour, or minor file system corruption, the entire configuration becomes unstable.
- SMART indicators show early warning signs long before RAID fails;
- Filesystem inconsistencies accumulate after irregular shutdowns;
- Mismatch in disk wear levels accelerates RAID divergence.
Understanding these factors helps predict the failure pattern and significantly improves the success rate of data recovery procedures for NAS TerraMaster F2-423 RAID arrays.
The main causes of data loss in NAS devices
Disk failure. Physical malfunction of HDD or SSD is a common reason for data loss, especially in 2-disk NAS systems affecting RAID0 and important for RAID1.
Human errors (deletion, formatting). Accidental deletion or incorrect formatting can result in inaccessible files, requiring prompt recovery actions.
Firmware or DSM update errors. Improper system updates may corrupt partition tables or file metadata, causing data loss.
Power problems and sudden shutdowns. Unexpected power interruptions during write operations can damage file systems and compromise RAID integrity.