Safe mode in Windows 10, as in any other version of the OS, is a convenient way to solve problems with the operating system. By running in safe mode, the user can get a clean Windows boot, avoiding the automatic launch various software, such as drivers, autoload, utilities, and malicious viruses. In this state, the operating system will be ready to fix and diagnose all kinds of problems. Besides, the Safe Mode significantly improves the efficiency of virus removal.

Contents
- Launch Windows Safe Mode using the Restart button
- Launch safe mode via the msconfig command
- Switch to safe mode using the command line (Command Prompt)
- Loading safe mode through the "Recovery and Safety" menu
Unfortunately, in Windows 10, the ability to quickly log into Safe Mode using the F8 key has been removed, and the path to running Safe Mode has changed slightly, so many new and old OS users can’t find a way to do it. In this article we will learn about the most convenient ways to run Safe Mode in Windows 10.
Launch Windows Safe Mode using the Restart button
This method is one of the most uncomplicated and straightforward, so it should be told about it in the first place:
Step 1: Click on the “Start” button, left-click on the “Shutdown” icon, and a window with two points will open. Press the “Shift” button and select the “Restart” item.

Step 2: After these actions, the computer operating system will switch to the diagnostics mode, where you should select the middle item “Troubleshoot“.
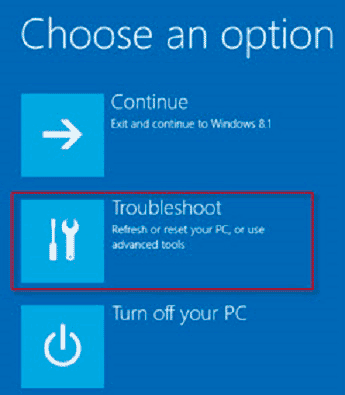
Step 3: Now, you need to select “Advanced options“.

Step 4: In the next window there will be many items from which you should select “Start-up options“.
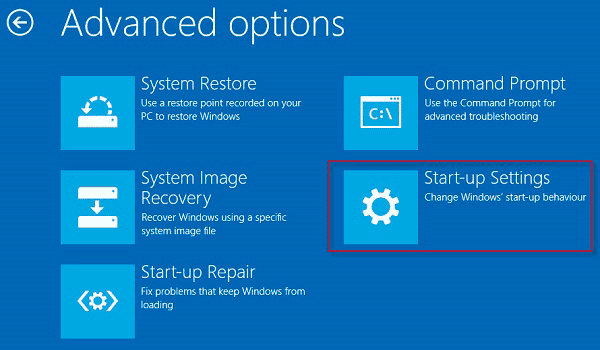
Step 5: Next, you need to confirm the reboot by pressing the appropriate button.
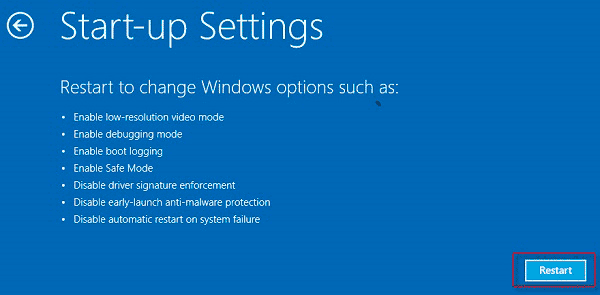
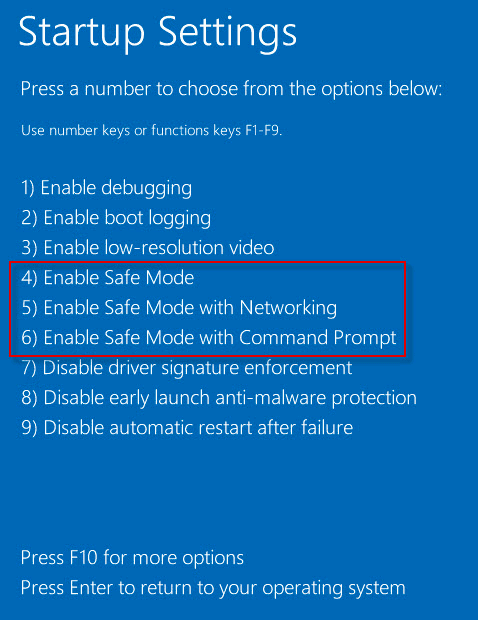
Step 6: After rebooting is complete, a window will appear to select the OS boot mode. Different variations of the safe mode are presented in points 4-6. Select the desired item and proceed to safe mode.
Launch safe mode via the msconfig command
Another way to start safe mode is with the msconfig command. To start it, you need to follow the next steps:
Step 1: Right-click on the “Start” button and select “Run“.

Step 2: In the opened window, enter the msconfig command and confirm the action by pressing the “Ok” key.

Step 3: In the window that opens, select the “Boot tab”, then select the desired OS (if there are more than one), and check the “Safe Mode” box.
It should be noted that this item has several additional modes from which you need to select the necessary one.
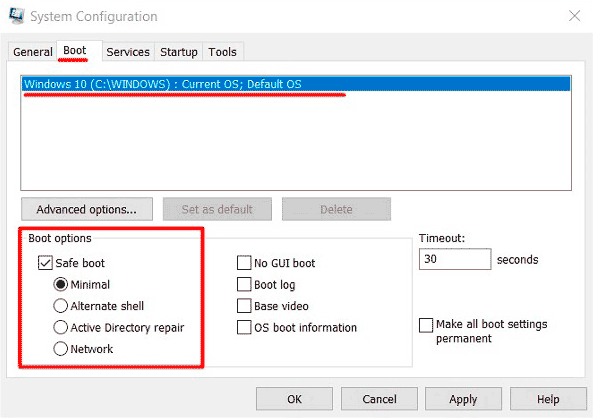
By pressing the “OK” key, we confirm the action.
The next time the operating system boots up, it will automatically enter safe mode.
Switch to safe mode using the command line (Command Prompt)
The third way to run secure mode in Windows 10 is to use the command line.
Step 1: Open the command line by right-clicking on the “Start” button and selecting “Command Prompt (Admin)“.

Step 2: In the window that opens, enter bcdedit /copy {current} /d “Safe mode” and confirm the command by pressing the Enter key.
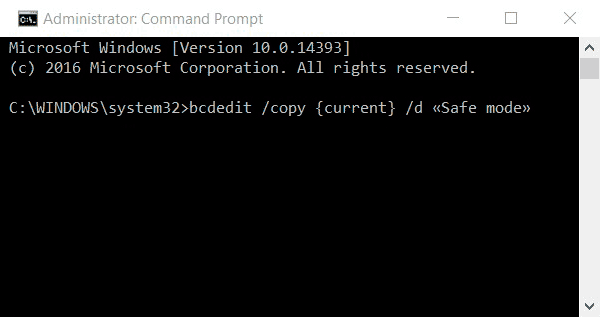
Step 3: Close the command line and go to the msconfig menu, as it was done in the previous method.
Now in this menu, there is a new item “Safe mode”, for which you should set the parameters specified in the screenshot.
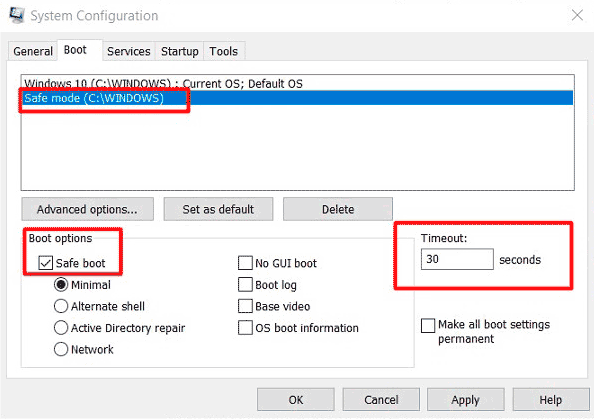
The next OS boot will be done in safe mode.
Loading safe mode through the “Recovery and Safety” menu
There is another convenient way to run Safe Mode in Windows 10. To use it, you must follow these simple steps:
Step 1: Open “Windows Settings”.
Step 2: In the window that opens, choose “Update and security”.
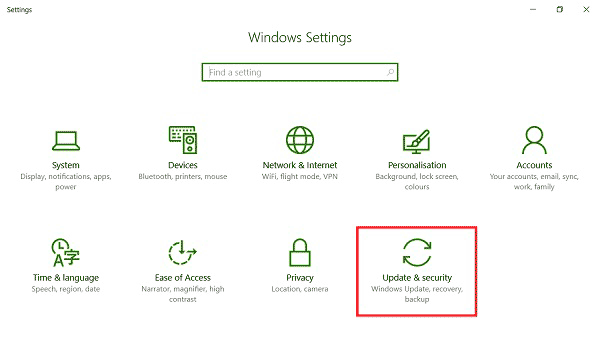
Step 3: Open the “Restore” tab and click Restart Now in the Advanced start-up section
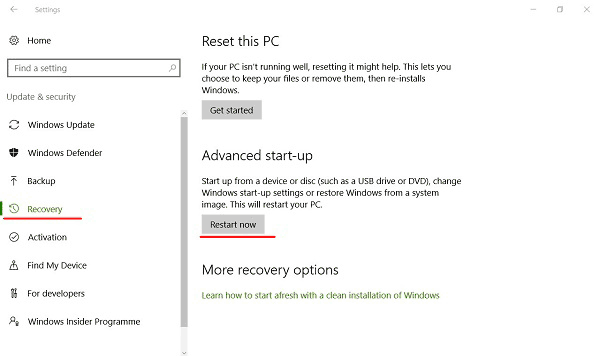
Step 4: When booting the OS, a window similar to that described in the first method will open
Safe Mode is a handy tool for removing viruses and unwanted program components that cannot be removed in normal Windows 10 mode.


