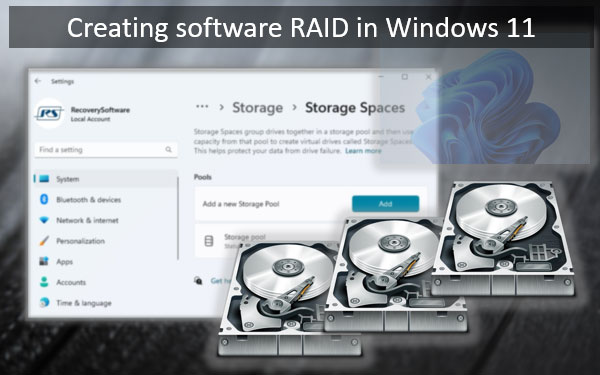
Windows 11 natively supports the creation of software RAID. And for these purposes, it has various tools in its arsenal. One of them is the Storage Spaces feature. In Windows 11, this feature, in addition to the existing classic implementation, has received a new implementation in the modern WinUI system interface. With better usability. And with some functional improvements. How to create software RAID in Windows 11 using Storage Spaces in the WinUI interface?
Contents
- Windows 11 Storage Spaces
- Where to find Storage Spaces in Windows 11
- How to create a storage space
- How to replace a drive in the pool
- How to delete a storage space and a pool of drives
- How to recover deleted data on a storage space
Windows 11 Storage Spaces
Windows 11 has the largest set of built-in tools for implementing software RAID among all versions of Windows.
The 11th version inherited the old dynamic disks feature from Windows 10. This feature has been available since Windows XP and is available in Windows editions starting from Pro. With the use of dynamic disks, software RAID can be applied to both the Windows disk and user data storage.
Windows 11 also inherited the classic implementation of the Storage Spaces feature. This feature was introduced starting from Windows 8 and is available in all editions of Windows, even in Home. Software RAID using this feature can only be applied to user data storage.
In addition to the classic implementation in the traditional functionality of the operating system, Storage Spaces in Windows 11 also has a new implementation in the modern WinUI system interface – in the “Settings” app.
Interestingly, the new implementation includes a small functional improvement in the form of additional RAID configuration.
So, the classic Storage Spaces feature offers us a choice of 4 configurations (types of resiliency) when creating software RAID: simple, two-way mirror, three-way mirror, and parity.
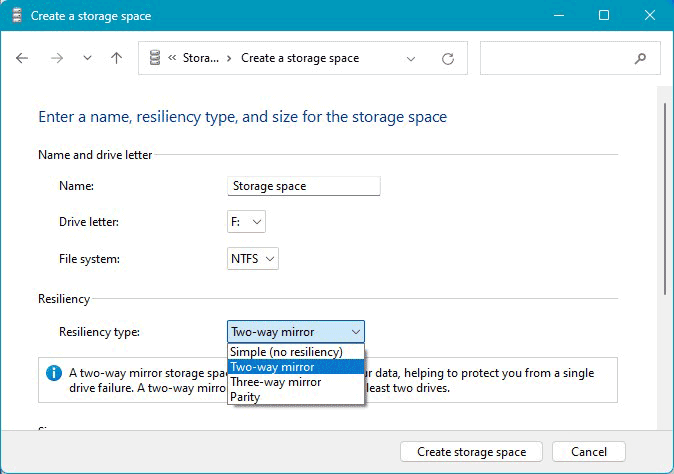
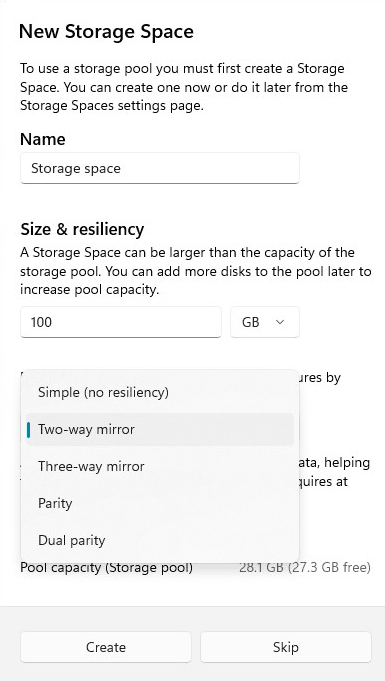
The Storage Spaces feature in the WinUI interface provides 5 RAID configurations: the 4 configurations offered by the classic format, and a new configuration – dual parity.
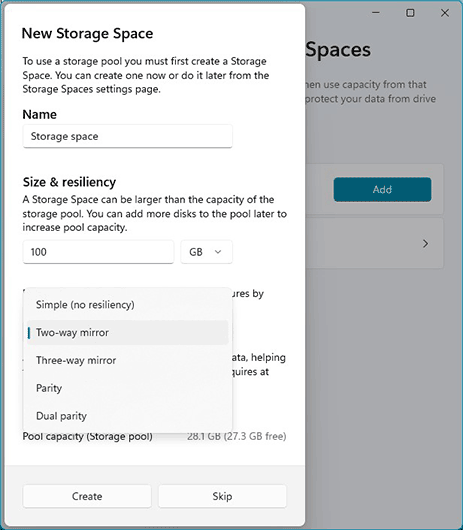
You can learn about the different RAID configurations in the article “What is RAID and how to use different RAID types”. And what RAID configurations are offered by Storage Spaces in the WinUI interface?
These are the types of resiliency:
- Simple – a RAID 0 (Stripping) array without fault tolerance. Requires at least 2 disks;
- Two-way mirror – a fault-tolerant RAID 1 (Mirroring) array. Requires at least 2 disks;
- Three-way mirror – a fault-tolerant RAID 1E (Enhanced) array. A hybrid array that combines RAID 0 and RAID 1 configurations. Requires at least 5 disks (data will be written to 3 disks for fault tolerance, while 2 disks will work for data processing performance);
- Parity – a fault-tolerant RAID 5 array. Requires at least 3 disks;
- Dual parity – a fault-tolerant RAID 6 array. Requires at least 5 disks.
Where to find Storage Spaces in Windows 11
The WinUI implementation of the Storage Spaces feature in Windows 11, as mentioned, is located in the “Settings” app. In this app, go to “System → Storage”. Expand the “Storage Spaces” section in the “Advanced storage settings” block.
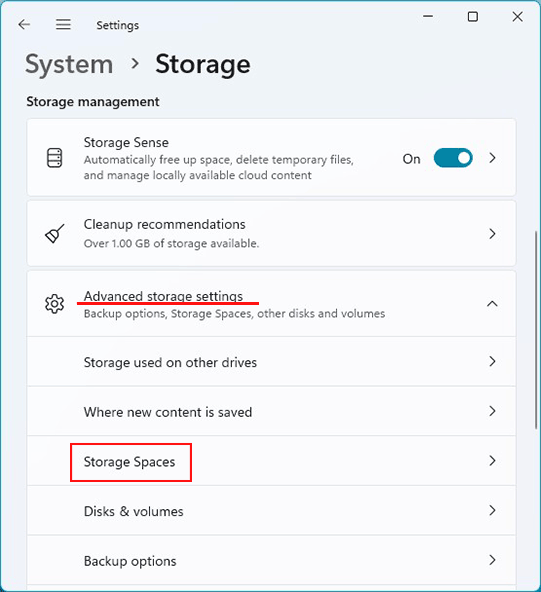
This is the Storage Spaces section. This is where they are created. And here you can manage them: replace or add disks, increase the size of storage spaces, rename them, disable, enable, delete.
How to create a storage space
The first step in the process of creating software RAID is organizing a pool of drives. A pool of hard drives, based on the physical volume of which we will create one or more RAID arrays, which are the storage spaces in the terminology of the feature itself.
An important nuance when creating any RAID array.
Before putting hard drives into RAID, if they contain important data, it is necessary to extract this data. During the creation of a RAID array, the disks will be cleared of partitioning and formatted. All their data will be deleted, and it can only be recovered using data recovery software.
How to create a pool of drives? This is the only option available in the Storage Spaces section in the “Properties” app, until the spaces themselves are created. Click on “Create a new pool and storage space”.
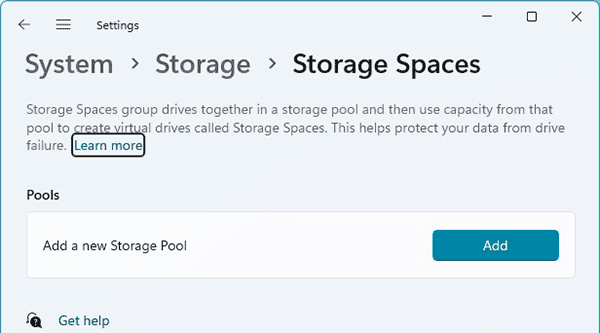
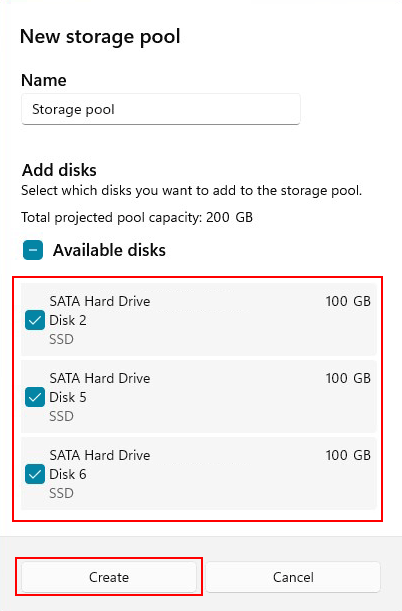
Select the hard drives that will be part of the pool. These drives will no longer be available for individual use. They will provide storage spaces based on the created pool. Click “Add”.
After creating the pool, the next step is to create a storage space. You can give it a custom name instead of the default one.
Specify the size of the storage space. If you only need one space, specify the size that is effectively provided by the volume of the disks (taking redundancy into account). If you later add more disks to the pool, you can increase the size of the storage space. If you need to create multiple storage spaces for storing different types of data, specify only a portion of the disk volume (taking redundancy into account).
Next, select the RAID configuration, i.e. the type of resiliency. In our example, it is parity, i.e. RAID 5. Click “Create”.
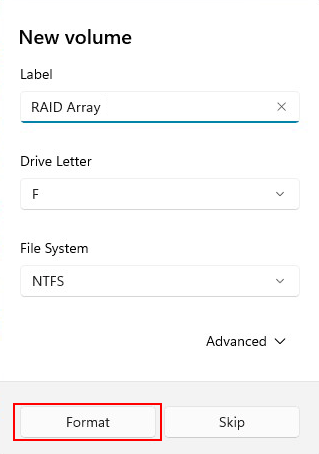
Specify the label for the storage space. If necessary, change the drive letter.
You can click “Advanced” and select the preferred cluster size. If the storage space will primarily store data with a large footprint (larger than 1 MB), it is better to choose a larger cluster size – 64 KB or larger. This will provide some performance improvement when reading and writing data.
Finally, click “Format”.
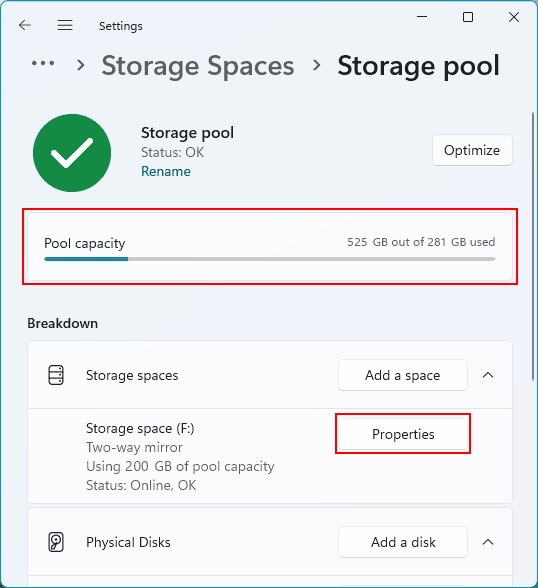
The storage space is created. Now it and the pool of drives will be displayed in the Storage Spaces section in the “Settings” app.
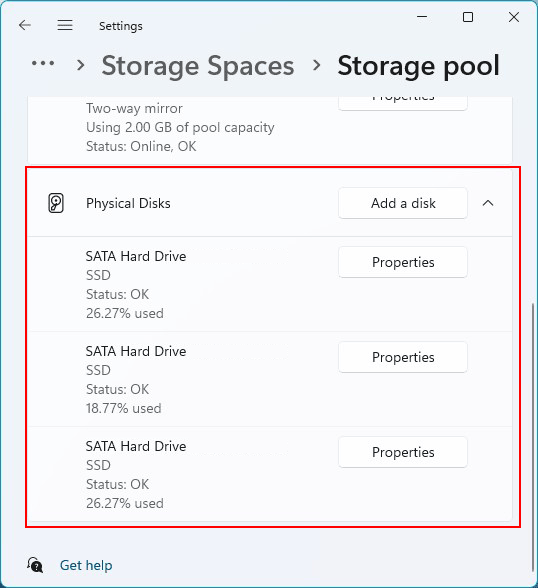
Below, the physical drives included in the pool are displayed.
On the computer, the storage space will be displayed as a regular internal drive.
How to replace a drive in the pool
When problems occur with the hard drives that provide the operation of the storage space, you will see a warning in its section in the “Settings” app. Notifications about decreased performance will also be displayed in the pool of drives and in the storage space block.
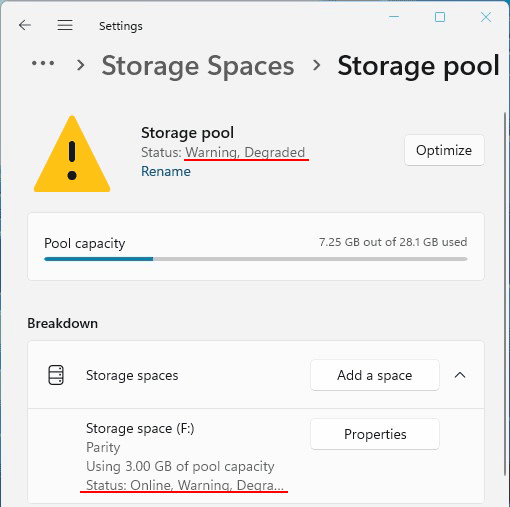
In the block of physical drives, you will see which specific drive(s) have problems. If these problems cannot be resolved, if it is a case of a failed drive, it needs to be replaced with another one.
If the minimum number of drives is used in the RAID configuration, you need to add a new drive to the pool first, and only then remove the failed drive from the pool.
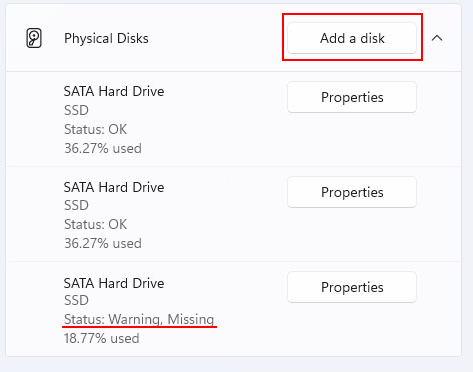
To add a drive to the pool, select “Add drives to storage pool” in the block of physical drives.
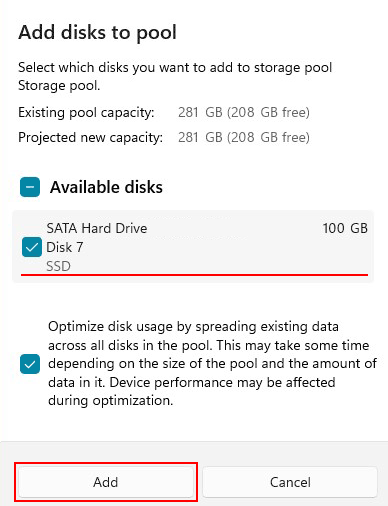
Check the box next to the drive you want to add. Click “Add”.
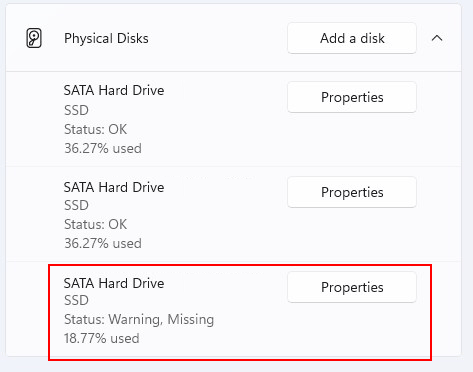
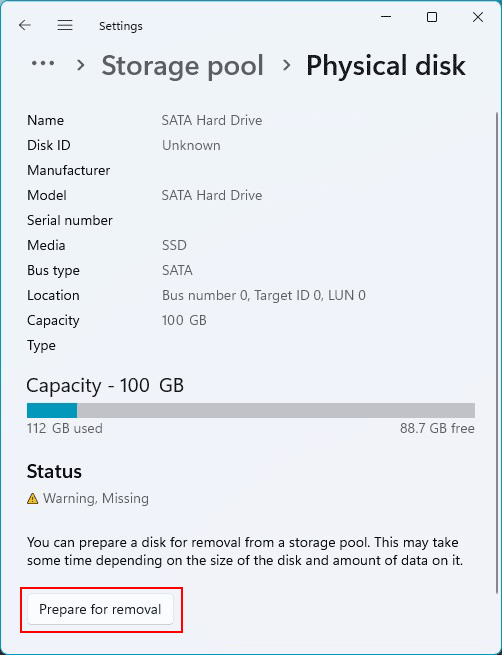
For the failed drive, click “Properties”.
Select “Prepare for removal”.
Then click “Remove”.
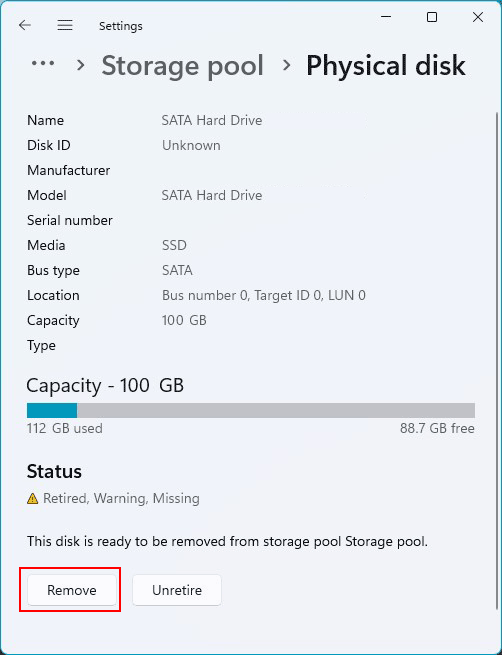
That’s it, after this, the failed drive can be physically removed from the computer.
How to delete a storage space and a pool of drives
How to delete a storage space so that the hard drives can be added to another pool or used individually?
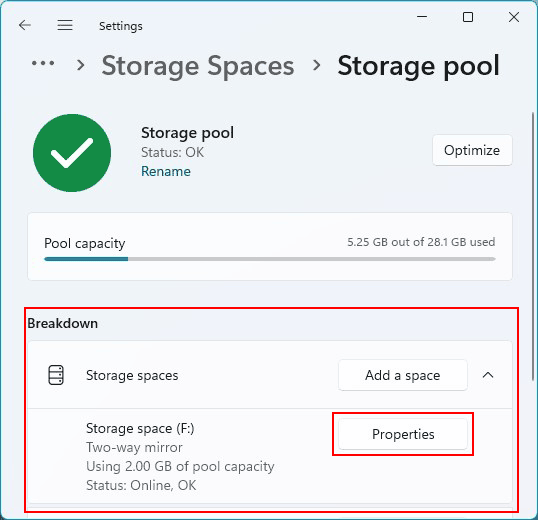
In the Storage Spaces section in the “Settings” app, select “Properties” of the space you want to delete.
Click “Delete”.
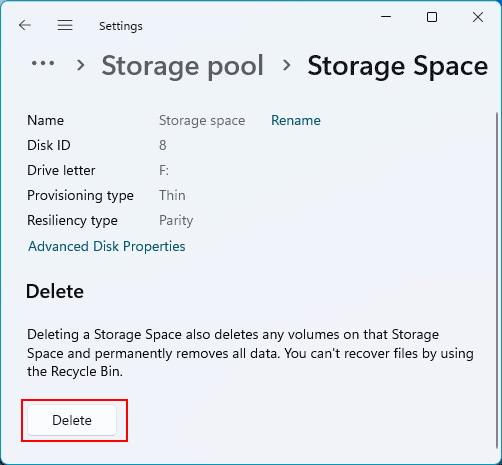
If there are multiple storage spaces, you need to delete all of them to delete the pool. The pool can only be deleted if it no longer provides any storage spaces.
To delete the pool, click “Properties” of each drive in the block of physical drives.

Click “Prepare for removal”.

Then click “Remove”.

After deleting all the drives in this way, the pool itself will be automatically deleted.
How to recover deleted data on a storage space
How to recover data if it is deleted from the storage space? Or if the storage space itself is not displayed in Windows? For these purposes, you can use the RS RAID Retrieve program.

Data recovery from damaged RAID arrays
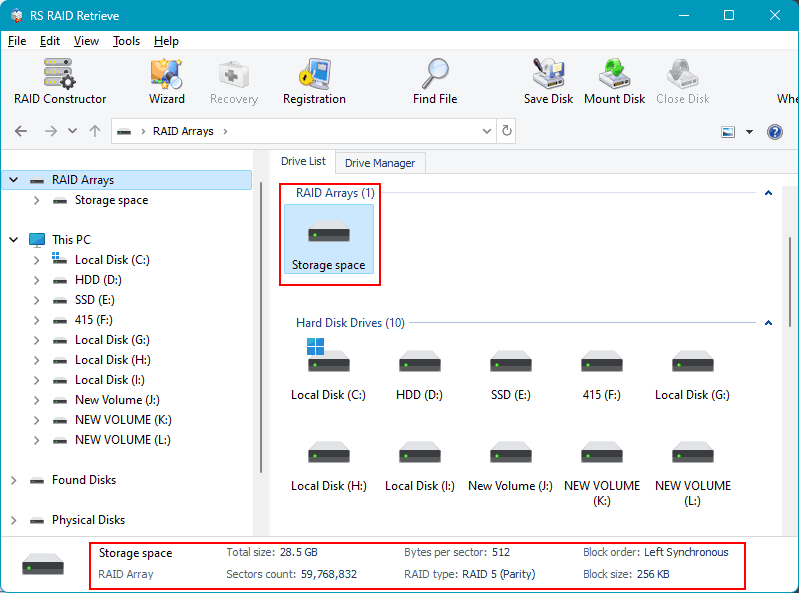
The program automatically detects Windows storage spaces, including damaged ones. Simply click on them in the RS RAID Retrieve window.
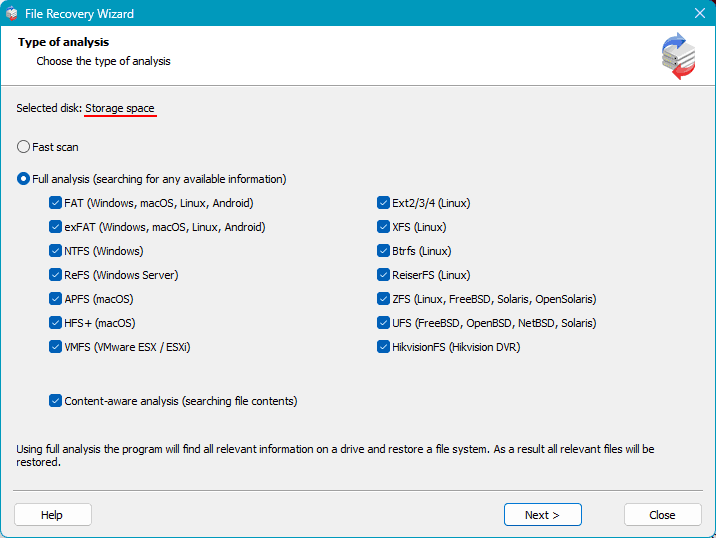
Select the type of data analysis. Quick scan is a fast analysis and is suitable for recently deleted data. You can start with this option.
If it doesn’t solve the problem, run data recovery from the storage space again and select full analysis instead. This analysis is effective in the most complex cases – long-deleted data, partition formatting, file system damage (RAW), disk repartitioning.
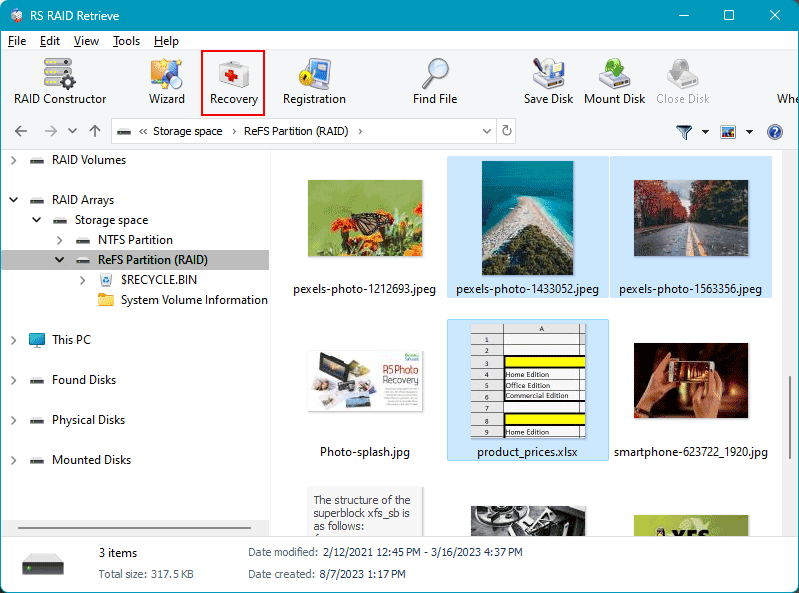
In the analysis results, select the deleted data, they will be marked with a red cross. And click the “Recover” button for them.
Select how you want to save the recovered data.
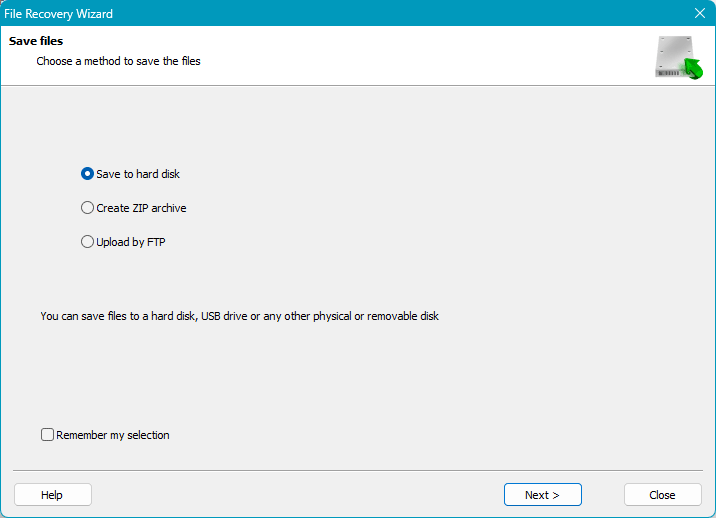
And start the recovery process. When selecting the hard drive, specify a different path from the original one. It should be a path on a different disk than the one where the data was originally stored.

